Comcast Email Not Working on iPhone [Resolved]
- 0
- 562
![Comcast Email Not Working on iPhone [Resolved]](https://helpemailtales.com/upload/blog/6847e92d89382_comcast-email-not-working-on-iphone-resolved-.webp)
It was just a regular day when I was skimming through my mail on Comcast. But what I noticed is that it was not working as it used to. My inbox went silent and stopped showing the usual flood of newsletters and meeting reminders. Also, I kept getting an error message stating it couldn’t connect to the server.
The first thing I did was restart my iPhone. I also tried refreshing the Mail application and switching between Wi-Fi and mobile data, but nothing worked. After spending some time on the browser, I finally found certain fixes for the error.
It took some effort, but I was determined to find the solutions. Let me share with you what I tried to fix the “Comcast email not working on iPhone” issue.
Potential Problems While Troubleshooting
While fixing the “Comcast email not working on iPhone” issue, I have also experienced several challenges. I want to highlight them as these greatly hindered the troubleshooting. These are:
-
Account lockout or suspension
-
SSL certificate issues
-
Background app refresh disabled
-
Mailbox full or quota exceeded
Comcast Email Not Working on iPhone: 2 Easy Solutions
Here are practical solutions to resolve the “Comcast email not working on iPhone” issue:
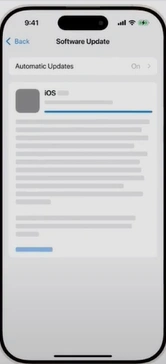
Solution 1: Update Your iOS Software
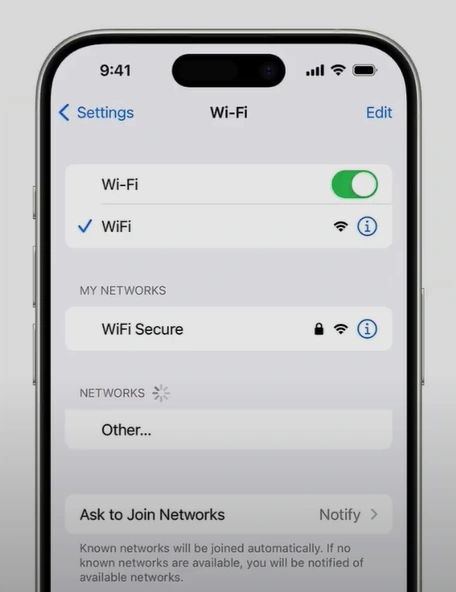
Step 1: Connect your device to an internet connection.
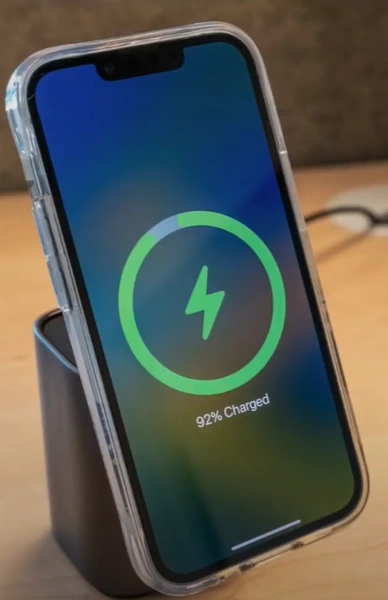
Step 2: Make sure the device has enough battery.
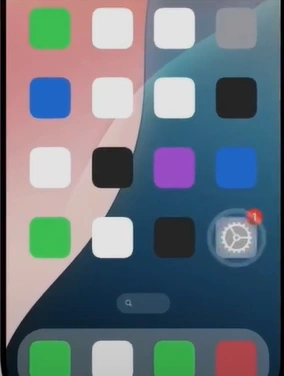
Step 3: Open Settings.
Step 4: Tap on General.
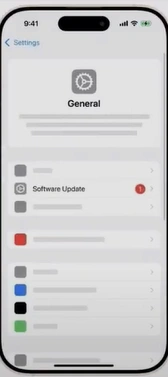
Step 5: Tap on Software Update.
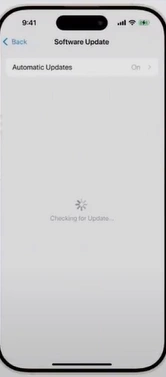
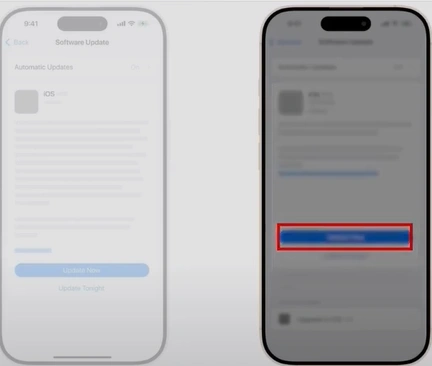
Step 6: If an update is available, tap on Update Now.
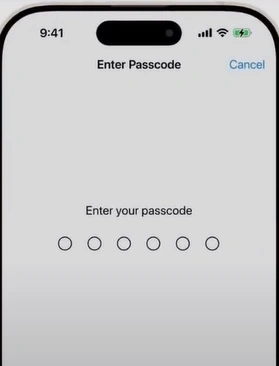
Step 7: Enter your passcode to start the update.
Step 8: After the update ends, wait for the iPhone to restart.
Solution 2: Set Up Comcast Email Settings
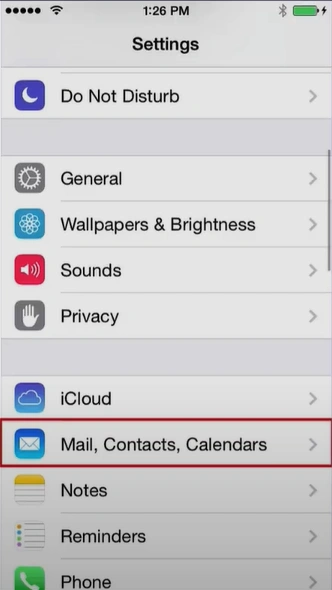
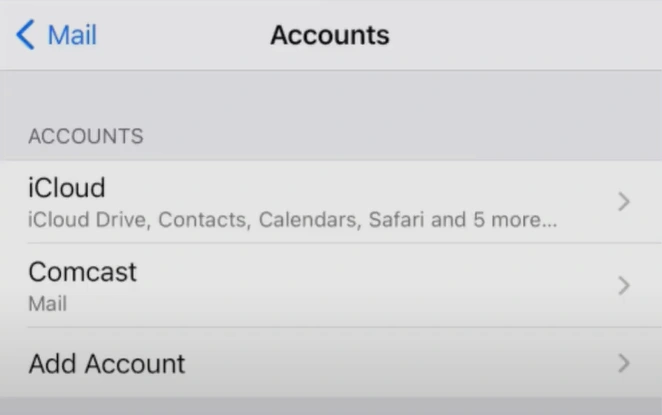
Step 1: Go to Settings, scroll, and select Mail.
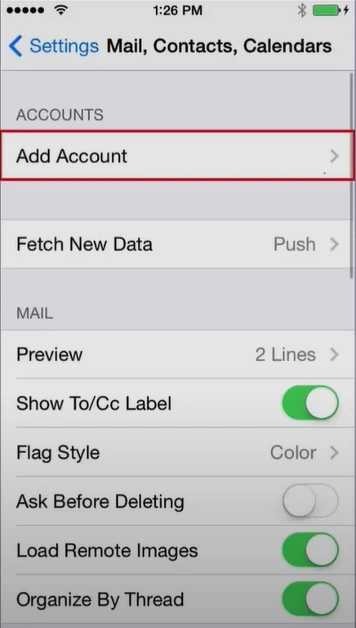
Step 2: Select Accounts, then tap on Add Account.
Step 3: Tap on the Other option.
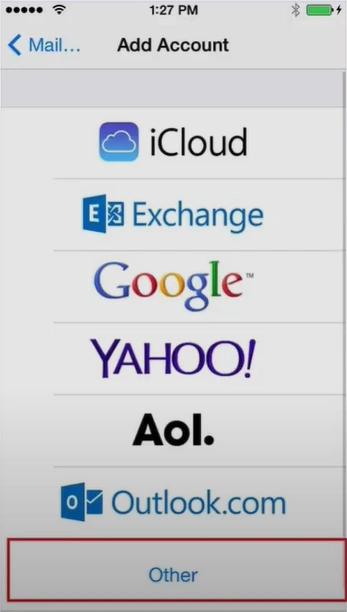
Step 4: Enter your Xfinity email details and tap on Next.

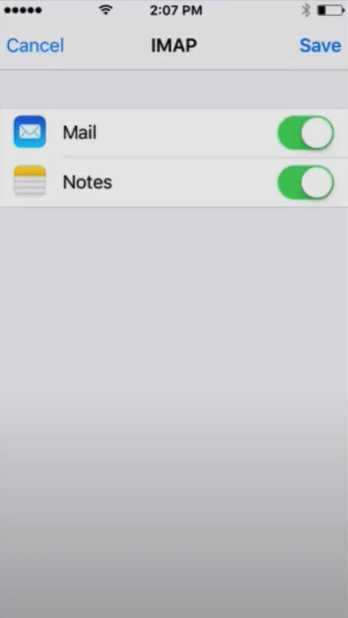
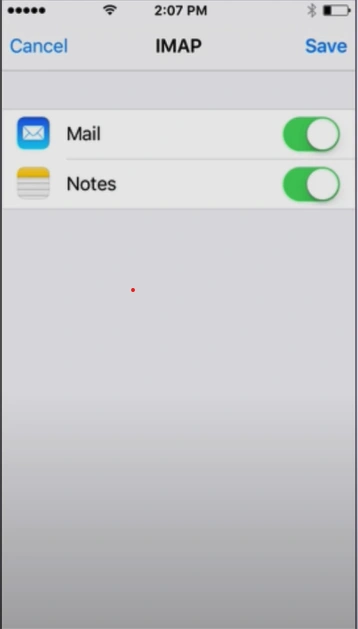
Step 5: If the Mail automatically finds settings, enable the Mail option and tap on Save.
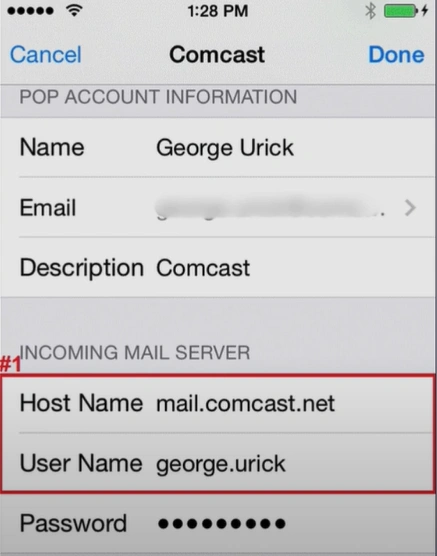
Step 6: In another case, you need to fill in the settings manually by going back to the Comcast email service in Mail settings.
Step 7: In the Incoming Mail Server section, set the Host Name to mail.comcast.net.
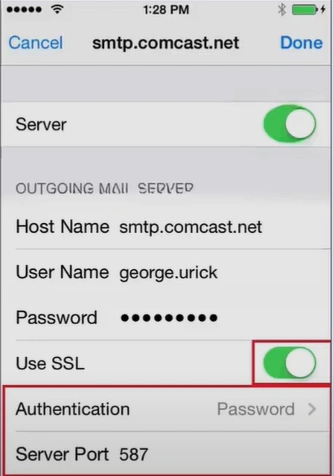
Step 8: Set the Host Name in the Outgoing Mail Server to smtp.comcast.net.

Step 9: Turn on the Use SSL option, enter 587 in Server Port, then tap on Done.
Step 10: Toggle on Mail in the Account Added screen and tap on Save.
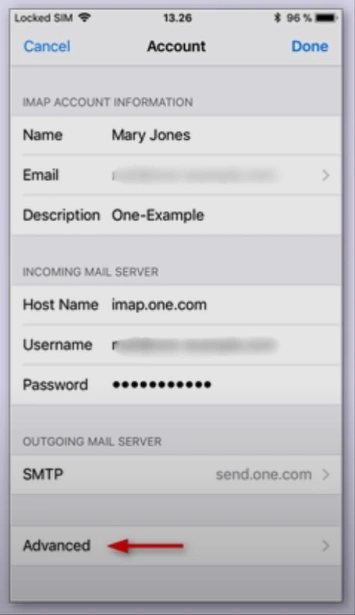
Step 11: Go back to account settings and tap on Advanced.
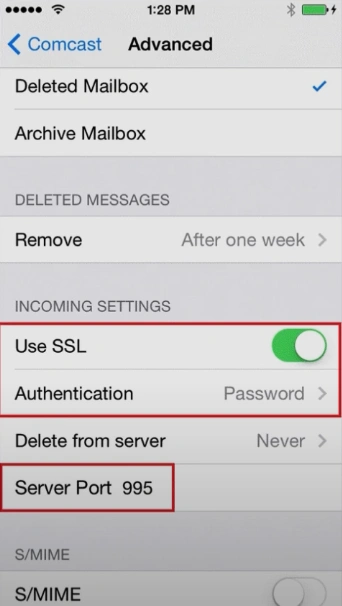
Step 12: Ensure that the “Use SSL” is enabled, the authentication type is set to “Password,” and the server port is set to 995.
Wrap Up
I experienced a lot of frustration when dealing with the “Comcast email not working on iPhone” issue. It disrupted my everyday communications. However, I was able to fix the problem using the best possible troubleshooting methods, such as updating the iOS and setting up Comcast email settings.
If you are also experiencing the “Comcast email not working on iPhone” issue, adhere to the recommended solutions. This will resolve the issue and restore your inbox to its usual smooth operation
 Verified Expert