How To Set Up Xfinity Email? Troubleshooting Methods
- 0
- 406
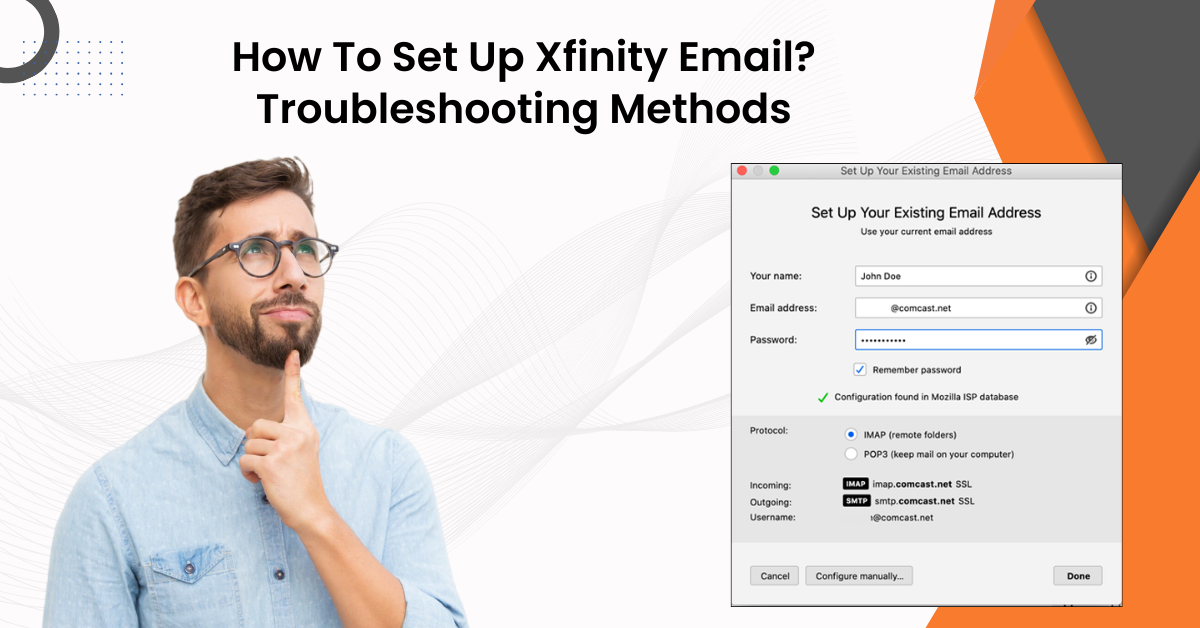
Xfinity Email, previously known as Comcast Mail, is a prominent email service by Comcast Corporation. It serves a vast range of users, from individuals to businesses. The subscribers of the Xfinity services have access to it. This email service assists users in organizing their email accounts using the domain "@comcast.net.” It also has incredible features, such as spam filtering and email forwarding.
The users can access their Xfinity Email account via any web browser. What’s more, they can also configure it with any email client like Outlook or Gmail on multiple devices.
Are you a user who wants to set up your Xfinity Email on different platforms? If so, we present you a step-by-step guide on the same. Let’s explore how you can set up your Xfinity Email.
Potential Problems While Setting Up Xfinity Email
Setting up Xfinity email might seem straightforward, but many potential problems may crop up. These include the following:
-
Device compatibility
-
Server connection problems
-
Incorrect settings
-
Account-specific issues
-
SSL/TLS configuration
Methods to Set Up Xfinity Email
Setting up Xfinity Email can enable users to easily access their emails anytime, anywhere. But how to do it? Adhere to the below-mentioned steps to set up Xfinity Email:
Step 1: First, you need to enable access to third-party email programs; to do this, log into your Xfinity account.
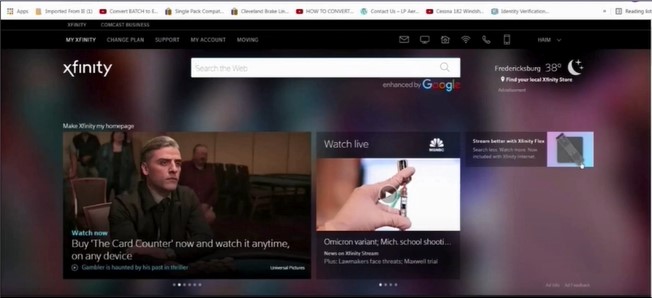
Step 2: Click on the email icon on the top right side of the screen.
![]()
Step 3: Click the gear icon on the top right side of the screen to open settings.
![]()
Step 4: Select Email Settings, then select Security from the left panel.
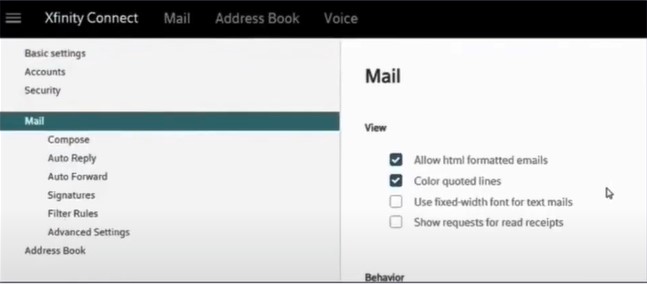
Step 5: Check the Third Party Access Security section and ensure that it’s selected.
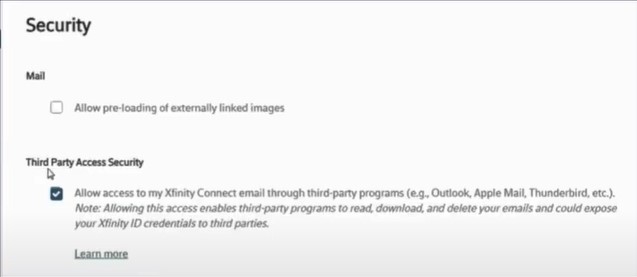
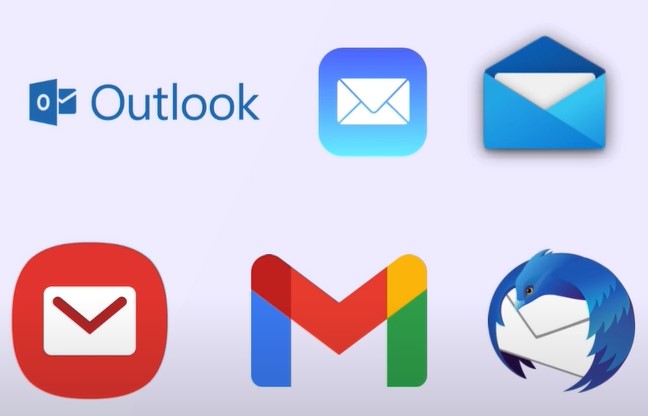
Step 6: Now, open the email program where you want to set up your Xfinity mail. (Outlook, Apple Mail, Gmail, Windows Mail, Samsung Email, Mozilla Thunderbird).
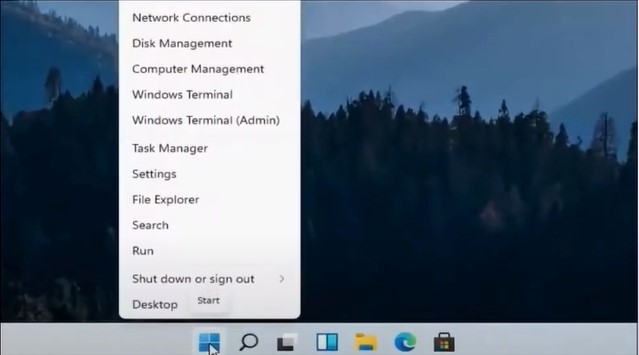
Step 7: If you’re setting up on Windows, right-click the Windows button and select Settings.
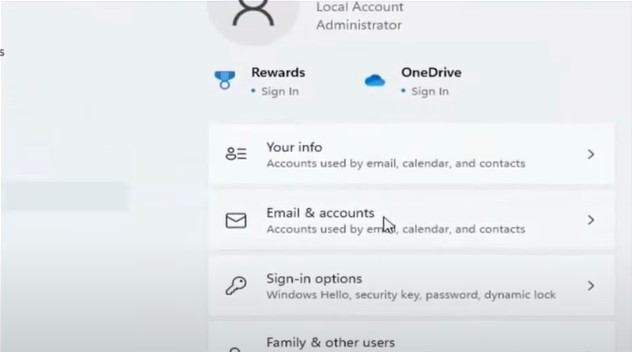
Step 8: Go to Accounts, then select Email & Accounts.
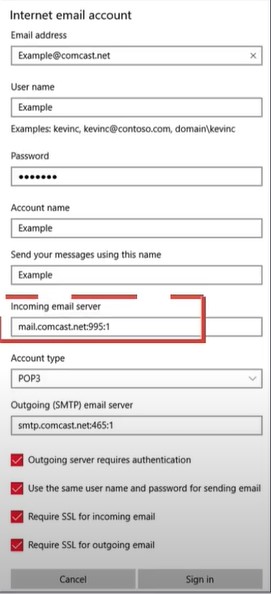
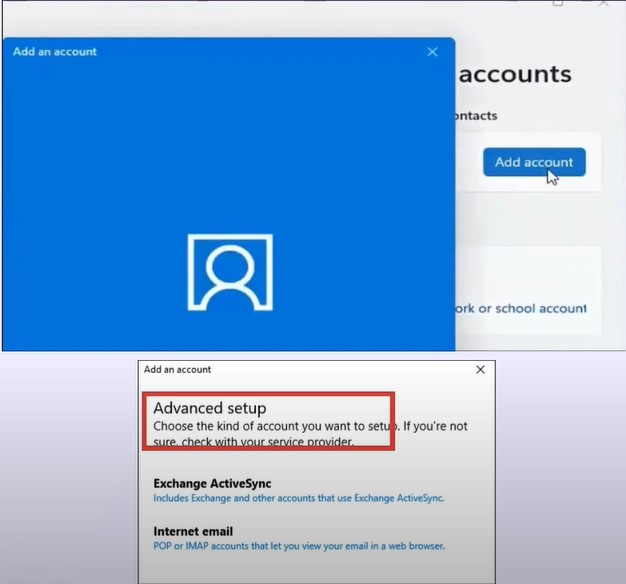
Step 9: Click Add Account and select Advanced Setup.
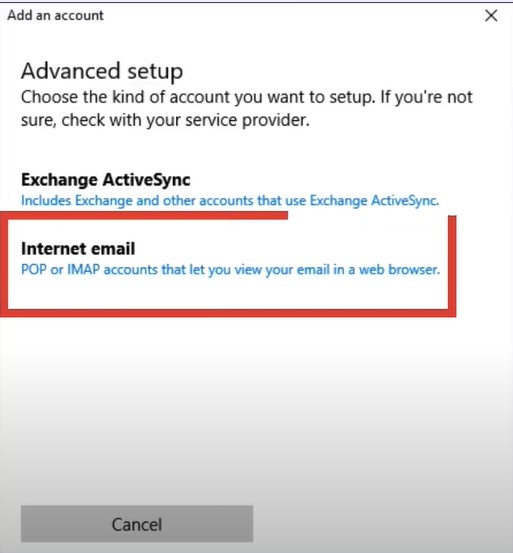
Step 10: Select Internet Email.
Step 11: Fill in your email address, username, password, and other details.
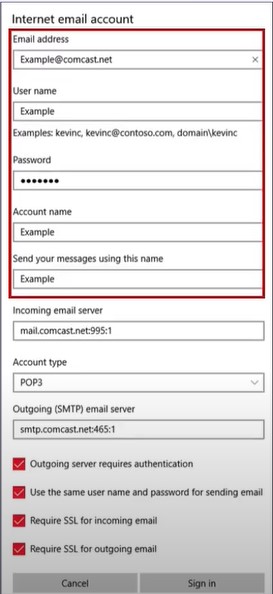
Step 12: In the Incoming Mail Server field, fill in mail.comcast.net:995:1.
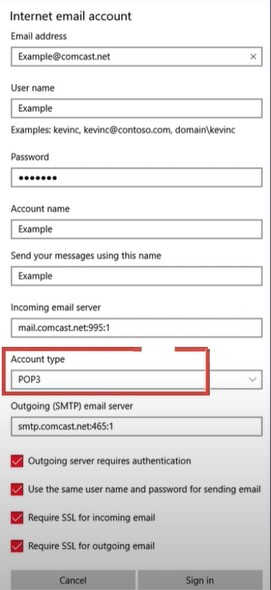
Step 13: Set the Account type to POP3 or IMAP.
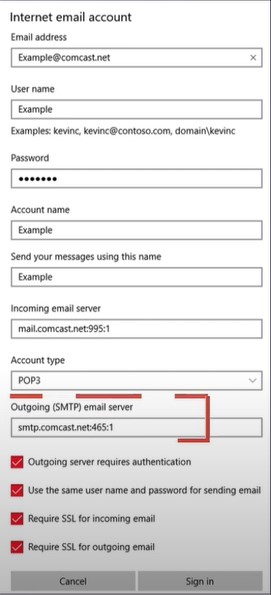
Step 14: Set the Outgoing Mail Server to smtp.comcast.net:465:1.
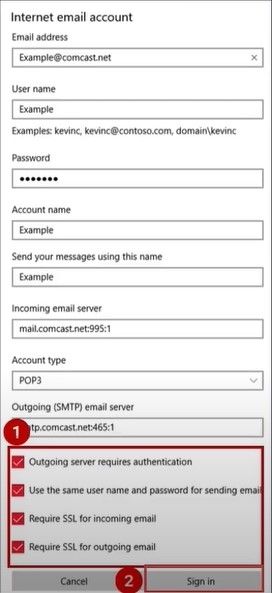
Step 15: Check all the four boxes and click Sign In.
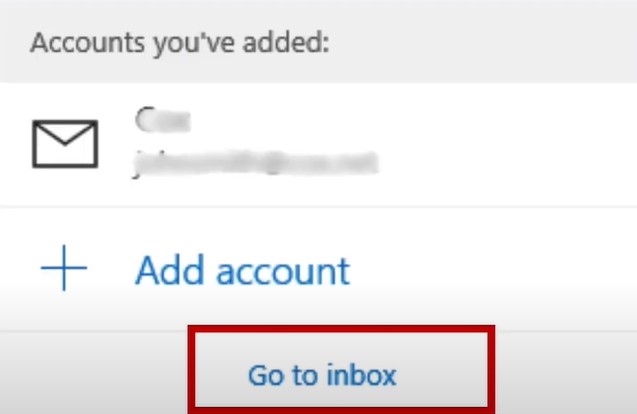
Step 16: If prompted, click Go to Inbox and sync the mail.
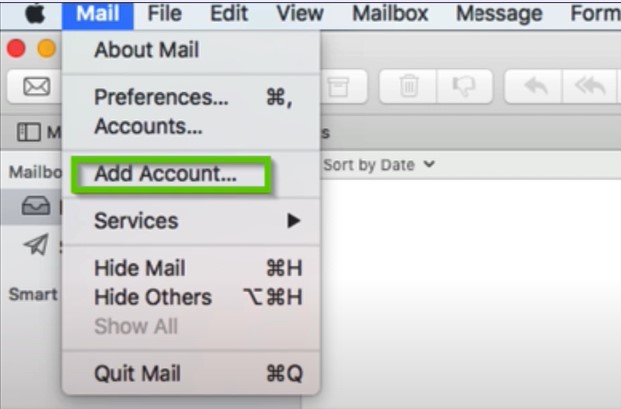
Step 17: If you’re setting up on Apple Mail, open the Mail app, click Mail on the top left side of the screen, and select Add Account.
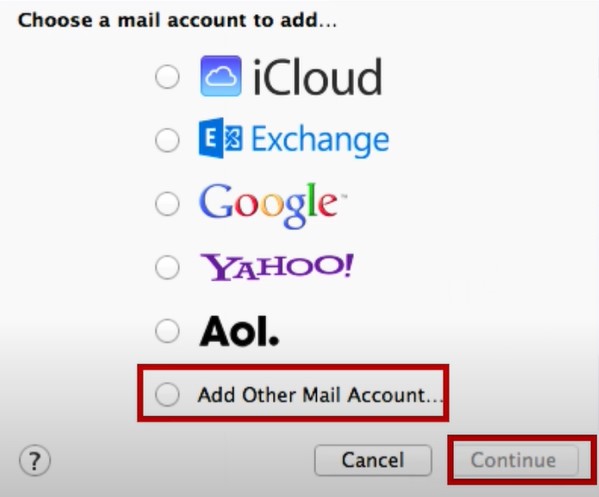
Step 18: Select Add Other Mail Account and click Continue.
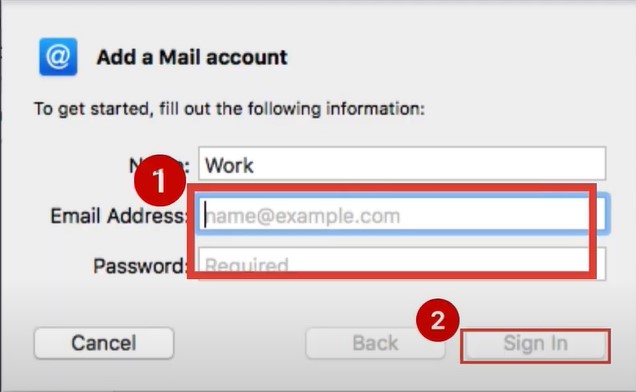
Step 19: Type in the account details and click Sign In.
Step 20: If it tells you that it’s unable to verify the account, you need to configure it manually.
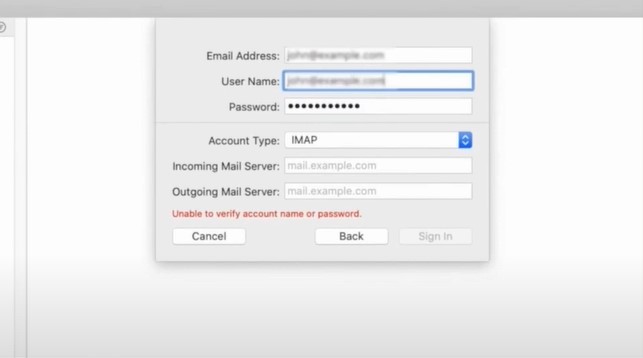
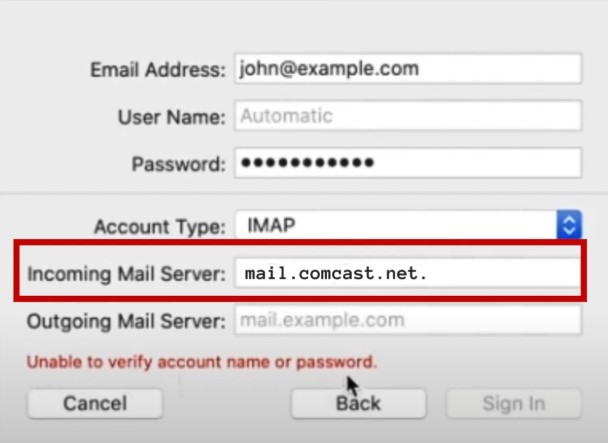
Step 21: In the Incoming Mail Server field, fill in mail.comcast.net.
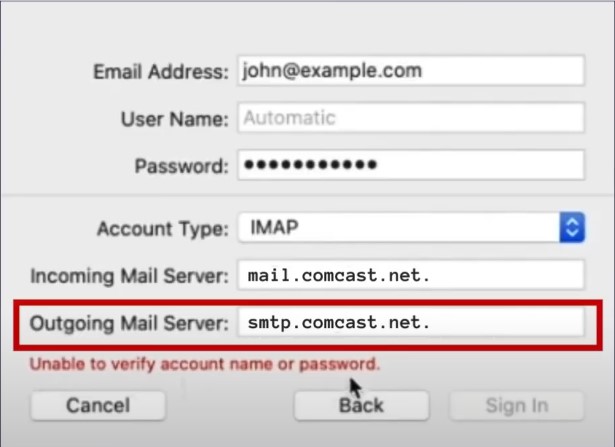
Step 22: In the Outgoing Mail Server field, type in smtp.comcast.net.
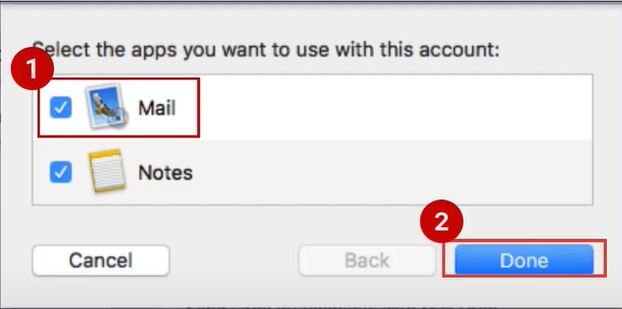
Step 23: Click Sign In, then select Mail, and click Done.
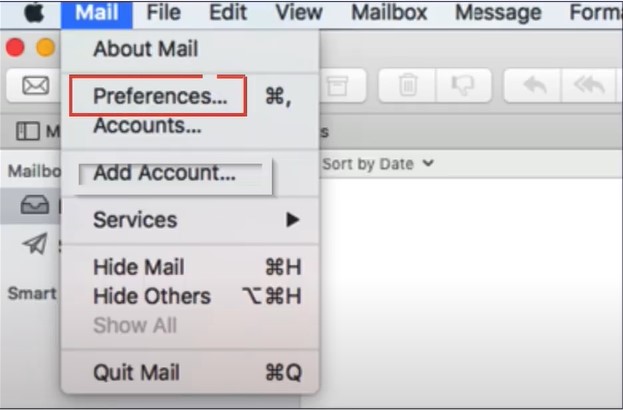
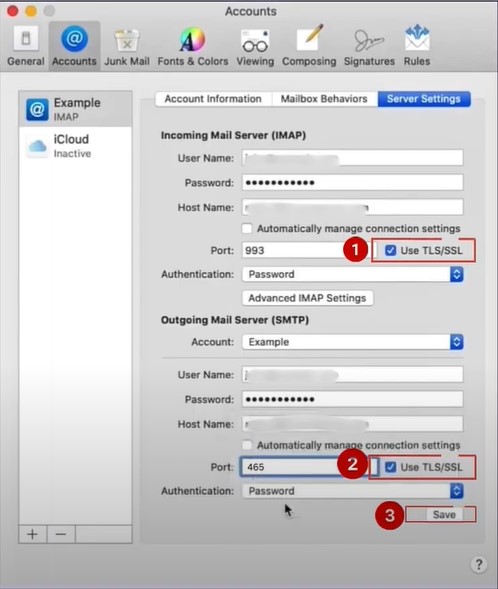
Step 24: Once signed in, go to the top left side of the screen and click Mail, then select Preferences.
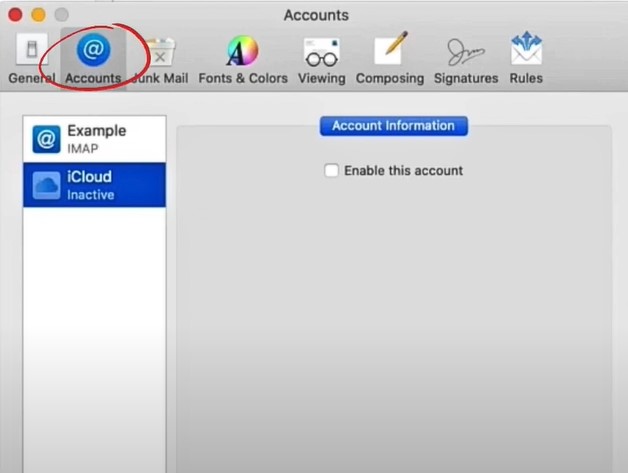
Step 25: Select the account you just added from the Accounts section.
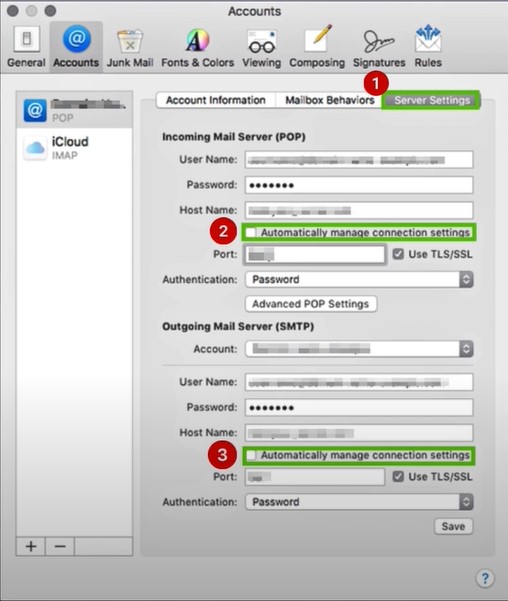
Step 26: Go to the Server Settings tab and uncheck automatically Manage Connection Settings options for both Incoming and Outgoing Mail Servers.
Step 27: Set the Incoming port to 993 and the Outgoing port to 465 respectively.
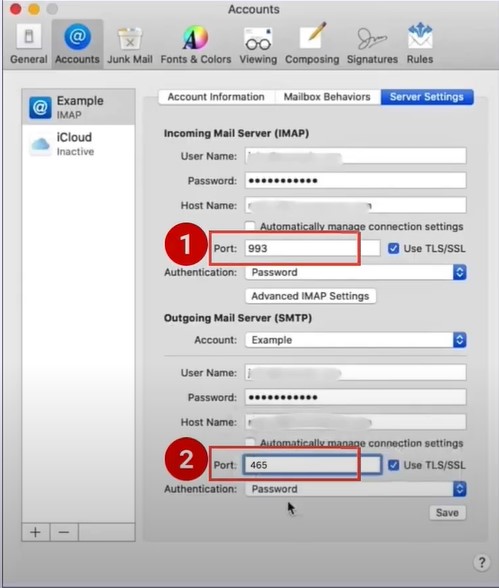
Step 28: Make sure that Use TLS/SSL options are selected and click Save.
Conclusion
So, here we conclude this write-up on how to set up your Xfinity Email. We believe we have provided you with the right solutions. Simply follow every instruction we have outlined and ensure a seamless process. If you are still having difficulty setting up Xfinity Email, reach out to an expert.
