How to Enable IMAP & POP in Gmail?
- 0
- 410
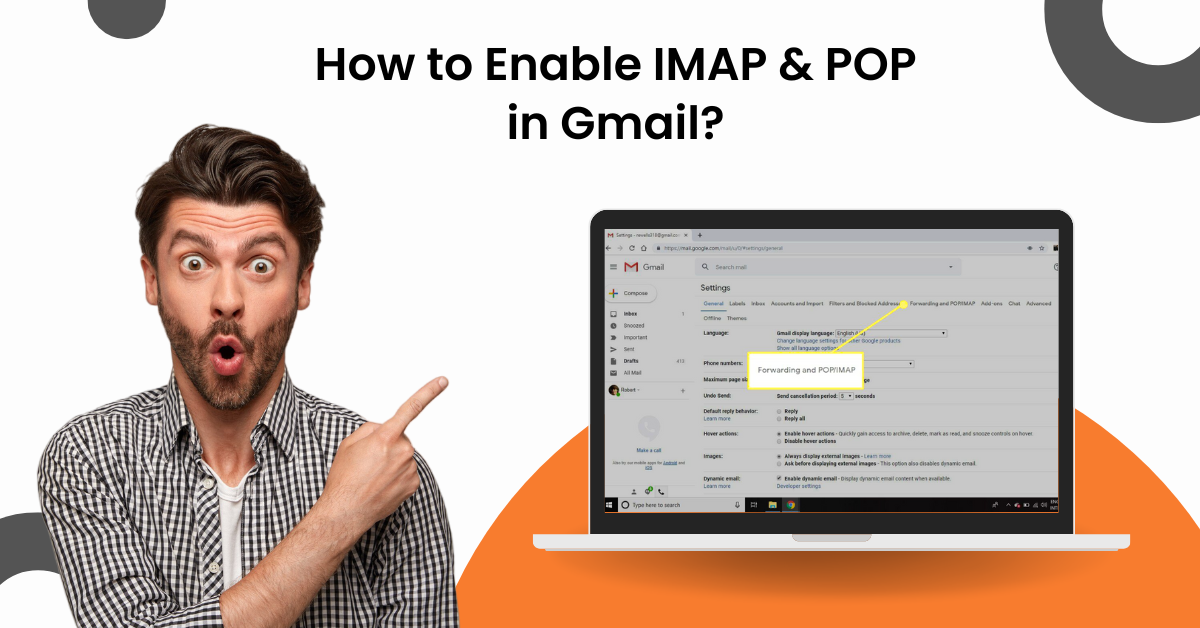
IMAP & POP are vital for experiencing seamless emailing on your product. Due to the wrong IMAP & POP settings, your Gmail can lead to numerous problems, like not sending emails, being unable to get emails from the server, missing emails, and more. The process to enable these settings is simple, but it is prudent to acquire the correct knowledge beforehand. In addition, learning the whole method also helps in preventing any errors.
So, in the following content, you will learn the entire proven and precise process for enable IMAP and POP in Gmail. Let’s get started without making any further ado!
Steps to Enable IMAP & POP in Gmail
-
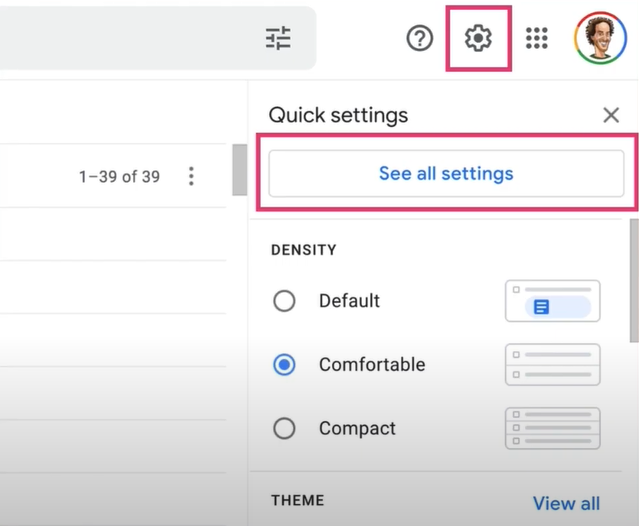
Initially, open your Gmail, click on the Settings (Gear) icon, and select the ‘See All Settings’ option.
-
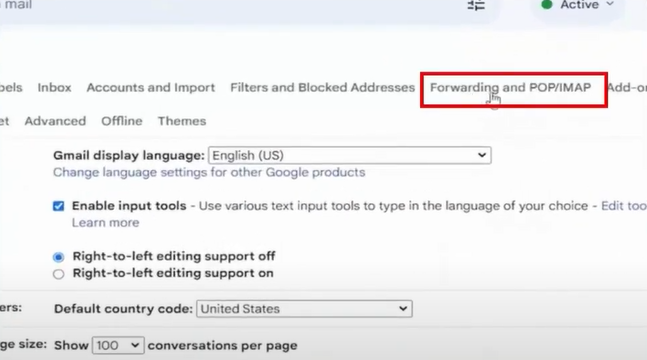
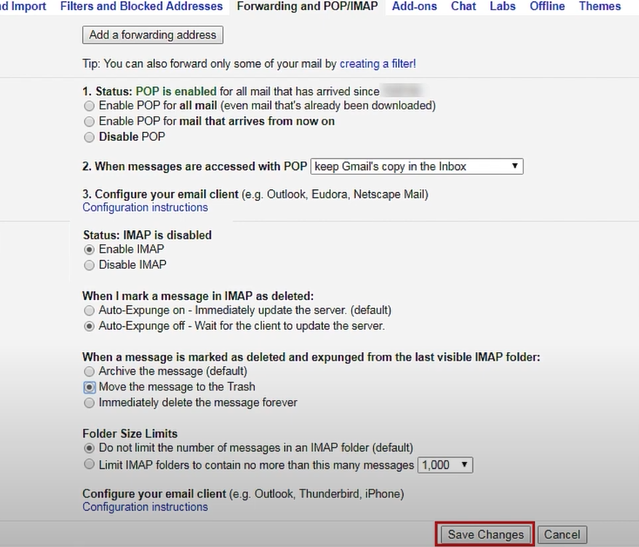
After that, head to the ‘Forwarding and POP/IMAP’ tab and click on it.
-
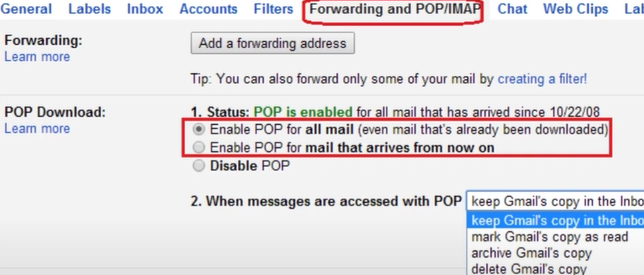
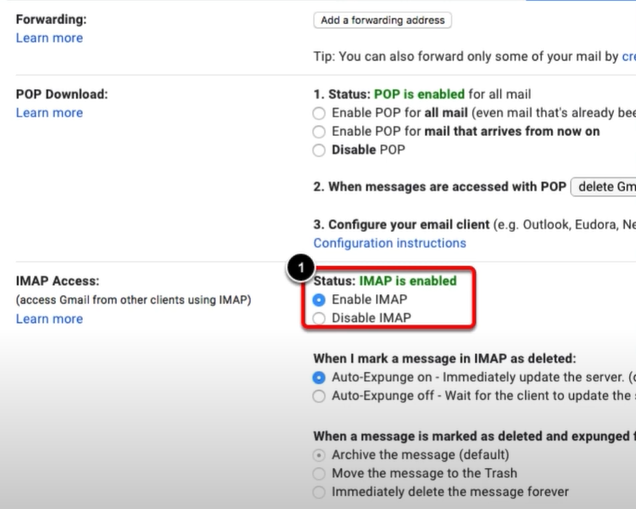
Now, in the POP Download section, select the radio button ‘Enable POP for all mail’ option.
-
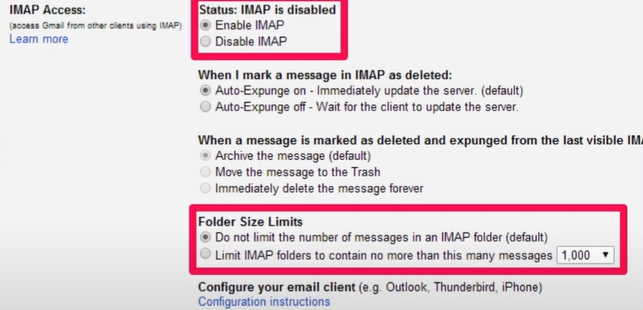
Furthermore, you can also limit the folder size for the IMAP folder and specify how many messages you want the folder to contain.
-
Once done, choose the Save Changes option.
-
Lastly, the process will be complete.
Conclusion
We have shared the step-by-step process to enable IMAP and POP in Gmail. In addition, we have attached relevant pictures to a better understanding of the process. If you follow our guide carefully, the process will seem like a cakewalk for you. However, if you are encountering any problems or want more info about IMAP and POP in Gmail, then it would be best to look for additional help.


