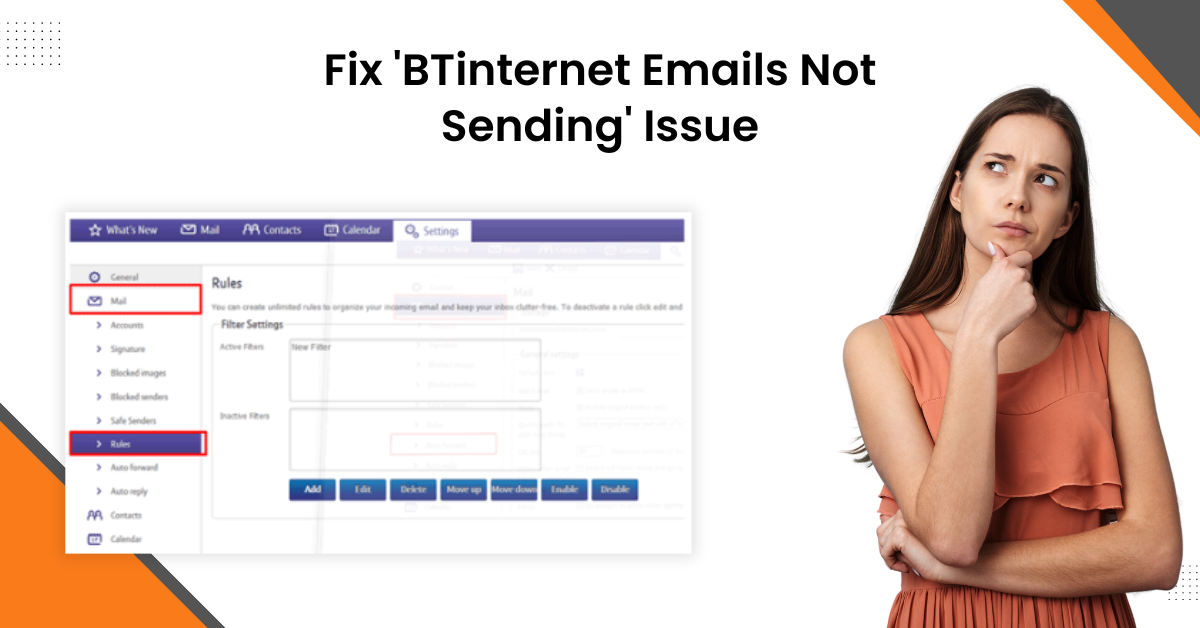
Fix 'BTinternet Emails Not Sending' Issue
- 1
- 553
Facing minor errors now and then is normal, no matter what mail program you use. If you are also getting the 'BTinternet emails not sending' error on your Windows or Mac device, then there is nothing to panic about. You can encounter this problem as a result of several issues with your mail product or computer system. But, no matter the situation, you can find some helpful solutions.
Also, learning about the reasons behind this issue could also be beneficial. Some possible prominent causes for this are unintentionally blocking the recipient, facing a network problem, incorrect BT mail configuration, an issue with the BT mail server, or any security product interruption. Here, acquire a deep understanding of two effective methods to resolve the problem on a Windows or Mac device.
Solution 1: Log Out your BT Email and Log Back In
The first method you can try is to fix your 'BTinternet emails not sending' errors to remove and re-add your account. Here is how you can do it properly.
-
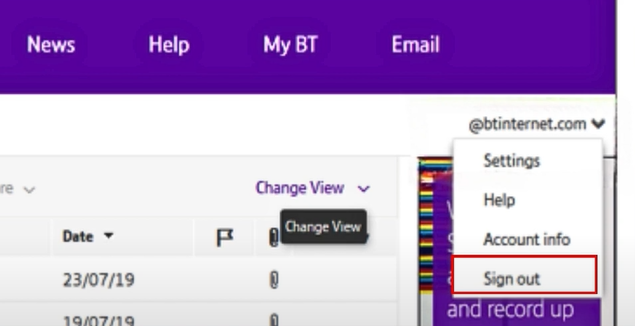
If you are using the webmail, click on the drop-down menu from the top right corner of the screen and then select Sign Out.
-
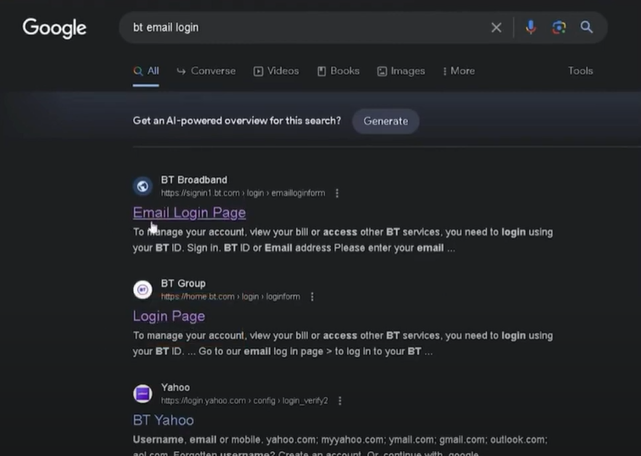
Once you have signed out, navigate to the BTinternet login page.
-
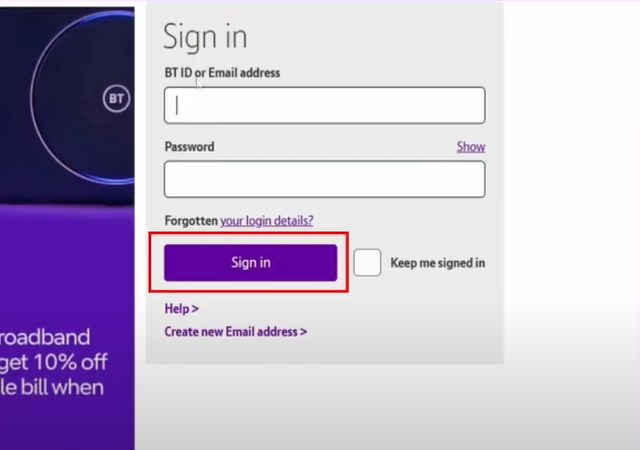
On their specified section, enter the account ID and password and click on the Sign-in button.
-
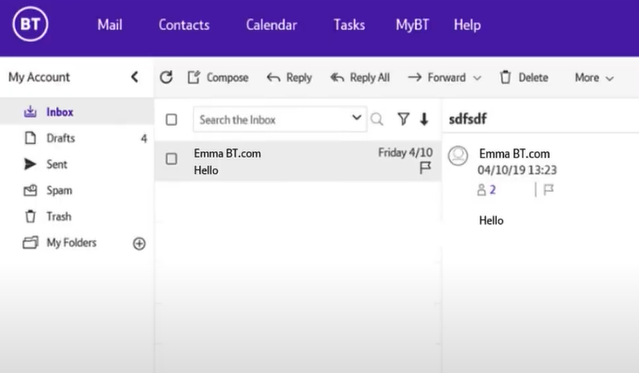
Now, send yourself a test email and see if the issue is resolved.
-
If the 'BTinternet emails not sending' issue still shows, then move to the next step.
Also Read: Fix IMAP & POP Related Issues in BT Email
Solution 2: Check the Server Settings
Problems with the server settings of your BTinternet mail can also lead to an issue in mail sending. Hence, use the following guide to quickly resolve the BT Emails not sending errors from your Mac/Windows OS device.
-
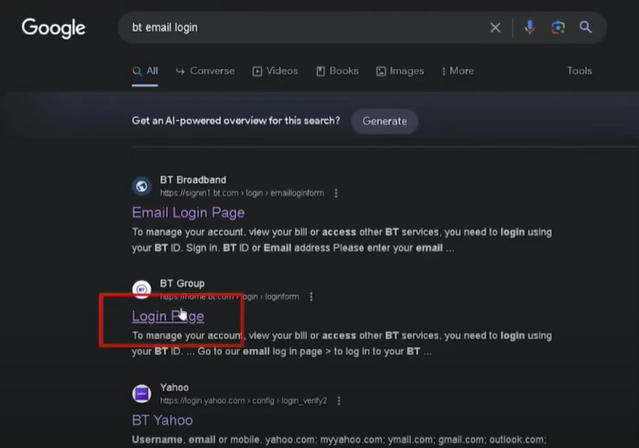
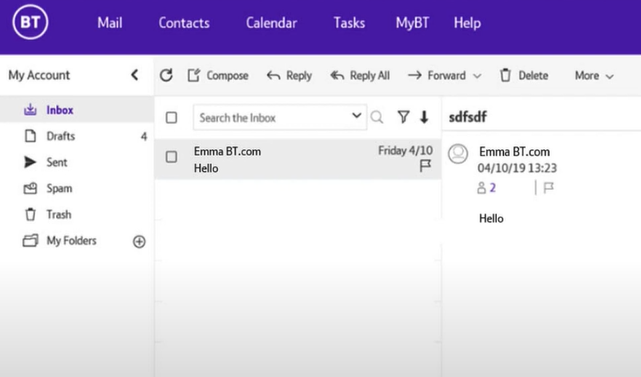
If you are using an email program, sign into your BT mail account using webmail.
-
Now, send yourself an email to check if it goes through.
-
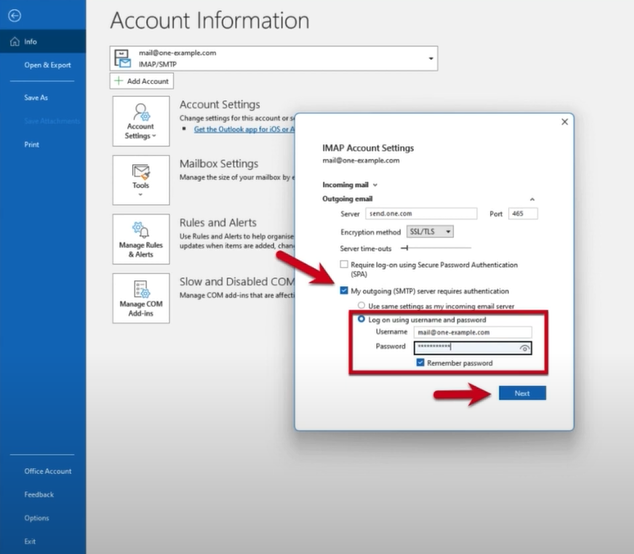
If you are able to send emails from webmail, you need to check the server settings of the email program you are using.
-
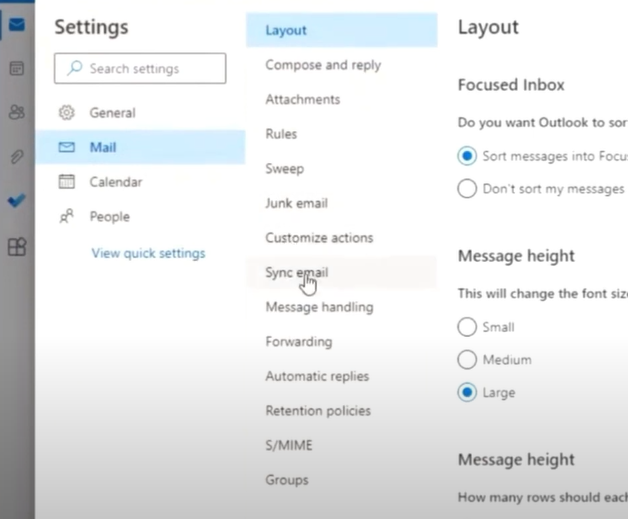
If you are using Outlook, sign into your account and click on the Settings icon on the top right corner of the screen.
![]()
-
After that, click View All Outlook Settings. Select Mail, and then click on Sync Email.
-
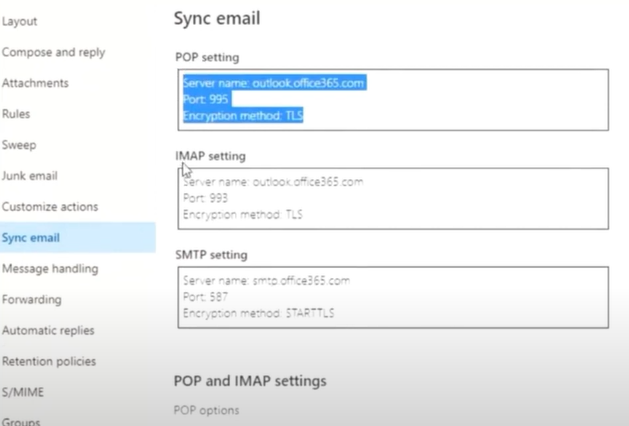
On the next page, check the configuration for POP, IMAP, and SMTP settings.
-
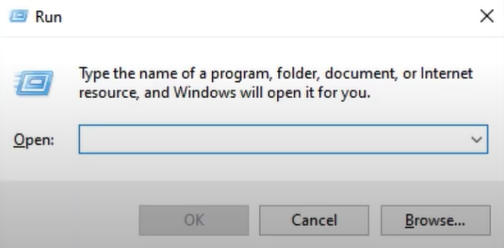
Furthermore, to confirm and check the server settings, press the Windows + R keys together to open the Run dialog box.
-
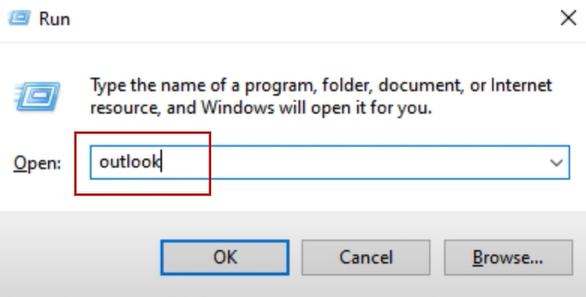
Next, type in Outlook in the open field and click on the OK button.
-
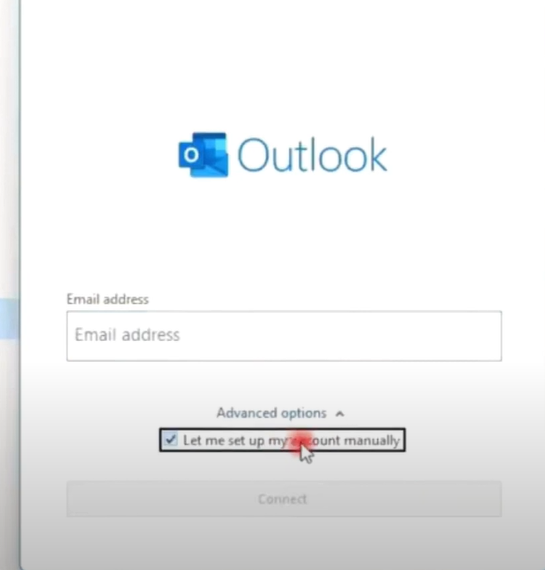
Then, enter your BT mail address, click Advanced options, and check the 'let me set up my account manually' option.
-
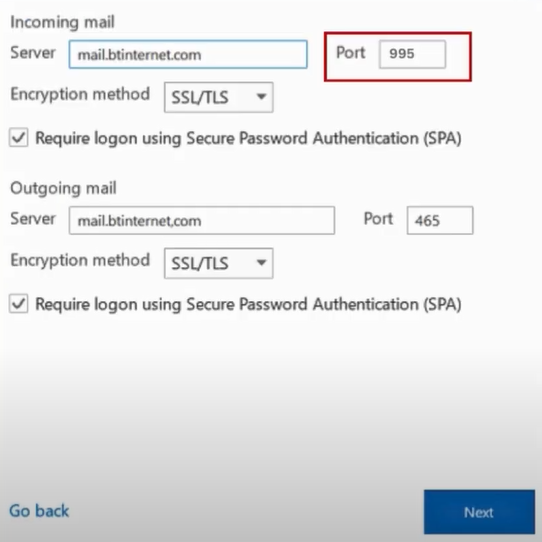
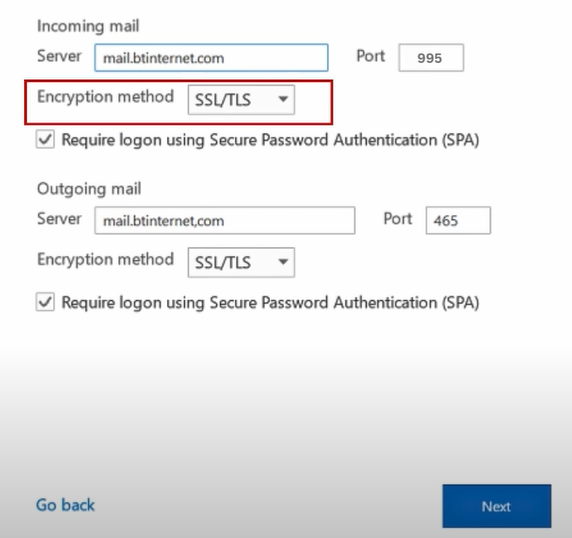
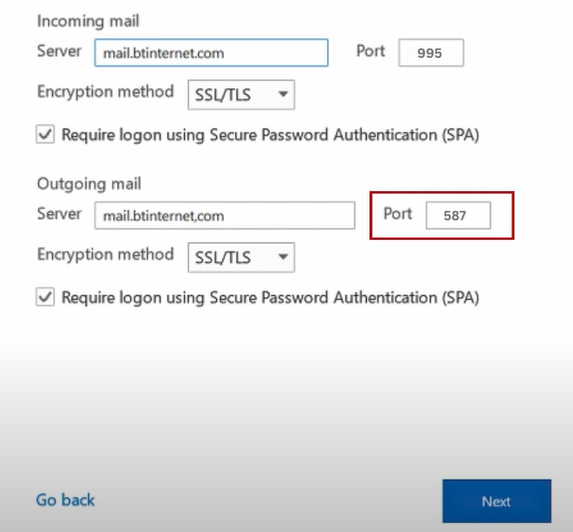
Moreover, select POP, and check that the incoming server name is mail.btinternet.com, and ensure that the Port is set to 995.
-
After that, make sure to select the checkbox 'This server requires an encrypted connection (SSL/TLS).'
-
Henceforth, you are required to check and ensure that the Outgoing mail server name is set to mail.btinternet.com, and the Port is 587.
-
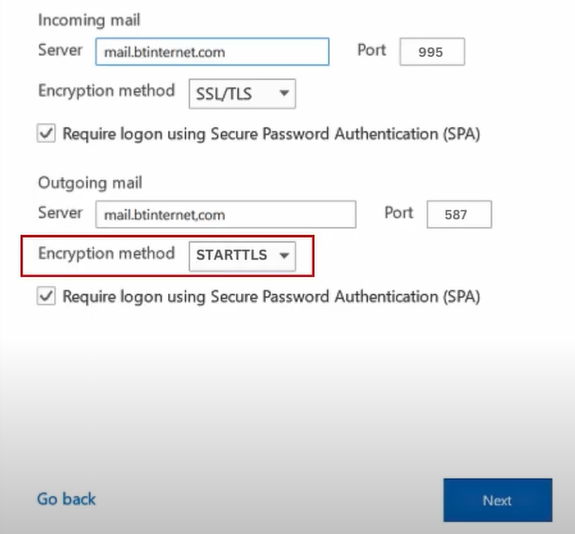
In addition, you need to select the STARTTLS option for the Encryption method.
-
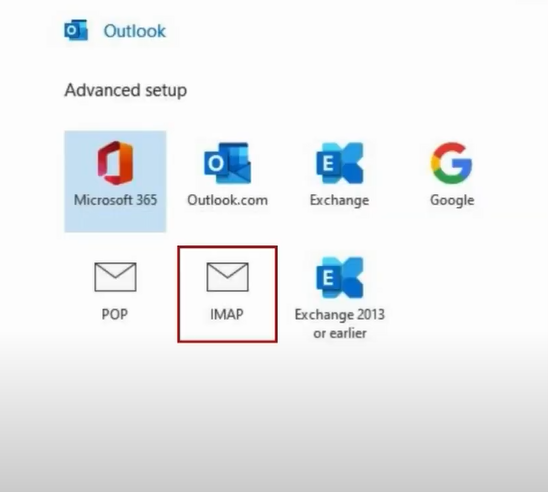
Once the above process is done, click Go back and choose IMAP.
-
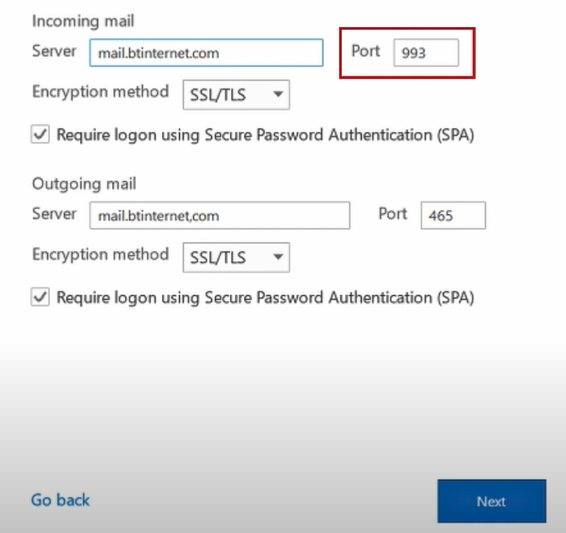
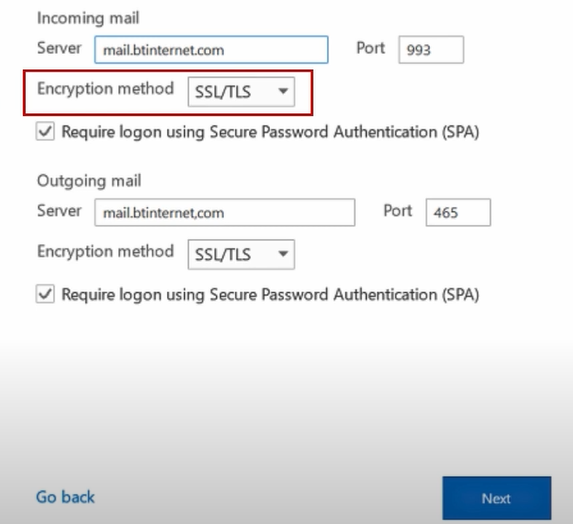
Afterward, check and confirm that the incoming mail server name is mail.btinternet.com and ensure that the Port is set to 993.
-
For the Encryption method option, choose SSL/TLS.
-
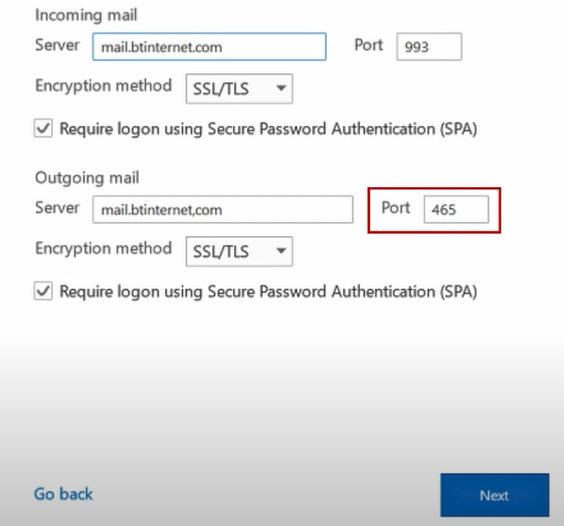
Moreover, ensure that the Outgoing mail server name is set to mail.Btinterent.com and that the Port is 465.
-
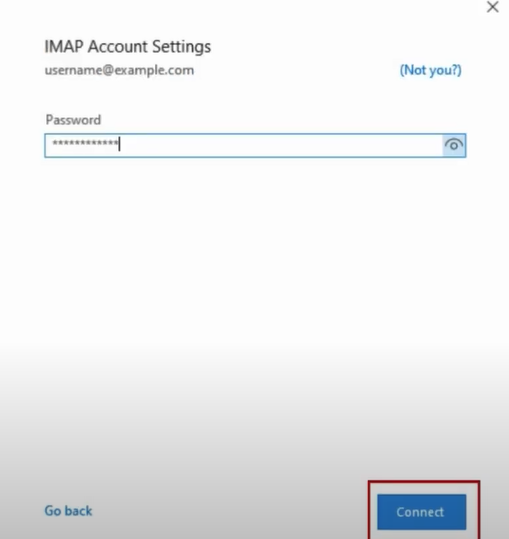
Once that's done, click on Next, type your password, and then click Connect.
-
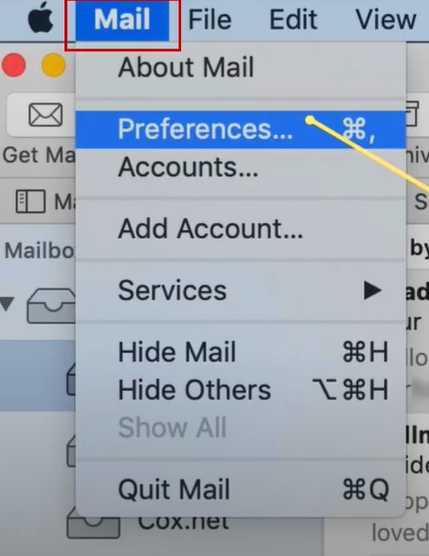
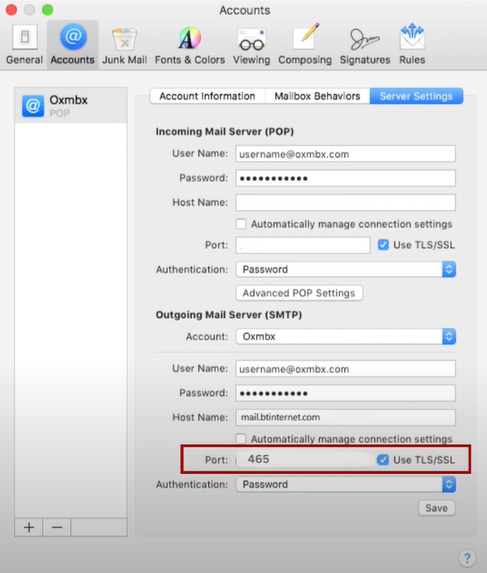
If you are using Apple Mail, open Mail, click "Mail" from the upper left corner, and select the Preferences option.
-
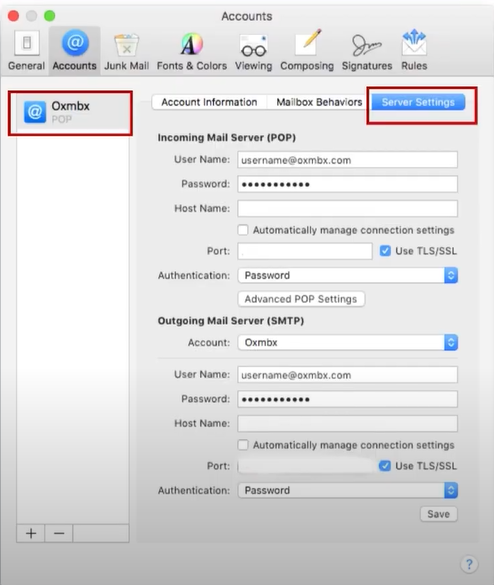
Now, select your BT mail account from the left panel and go to Server Settings.
-
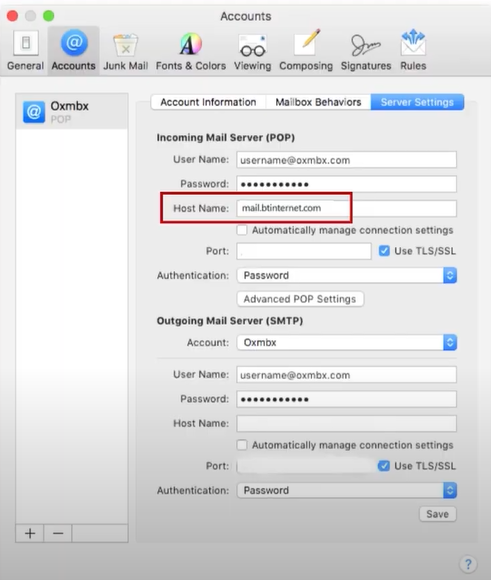
In the incoming mail server (IMAP), check and confirm that the Hostname is set to mail.btinternet.com.
-
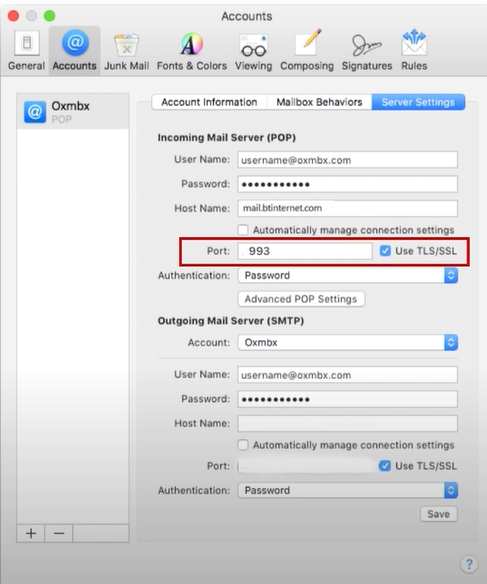
After that, make sure that the port is set to 993 and the Use SSL/TLS checkbox is checked.
-
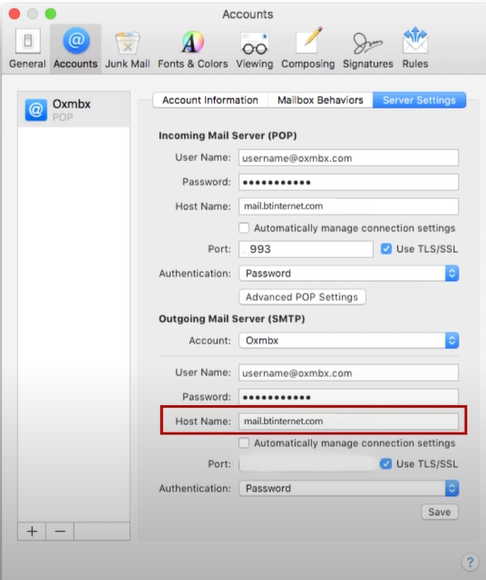
Next, on the outgoing mail server (SMTP), check and confirm that the Hostname is set to mail.btinternet.com.
-
In addition, set the port to 465 and click on the Use SSL/TLS checkbox.
-
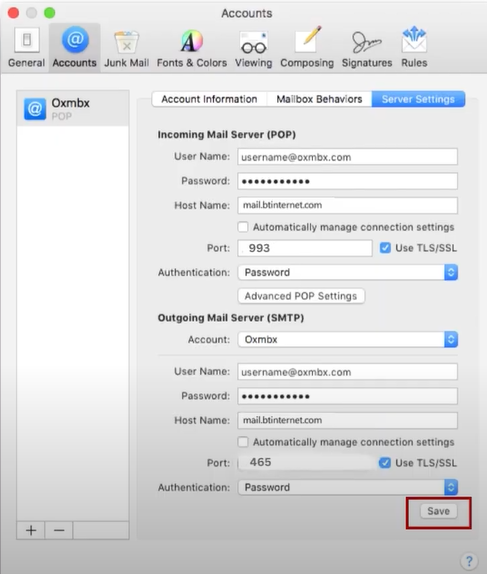
Finally, click on the "Save" button for applying all the changes.
Conclusion
We hope our methods will help you get out of the 'BTinternet emails not sending' on your device. Carefully use these two methods one by one according to the OS device you are using. If any mistake happens in the first attempt, then we would recommend trying these methods one more time. But, if the problem still appears on your BT Mail, then it is best to reach out for additional resources and help to get rid of the problem more efficiently.
