How to do Comcast Xfinity Email Server Settings?
- 0
- 395
Xfinity offers a fantastic emailing service for both personal and professional use. You can easily complete the Comcast Xfinity email server settings on a variety of email products if you already know the whole process. However, for someone doing it for the first time, it could be a little challenging. Moreover, there is a chance of getting several problems, such as incorrect server settings, certificate errors, authentication failures, and firewall or antivirus interference.
To streamline the process for you, we will explain the easy-to-follow guide to perform Xfinity email server settings on Thunderbird, Outlook, Gmail, and Apple Mail. So, keep reading the write-up till the end.
On Apple Mail
If you want to complete the Xfinity mail connection on Apple mail, then these are the steps that will allow you to do that easily.
1. For the first step, navigate to Mail on your Apple device.
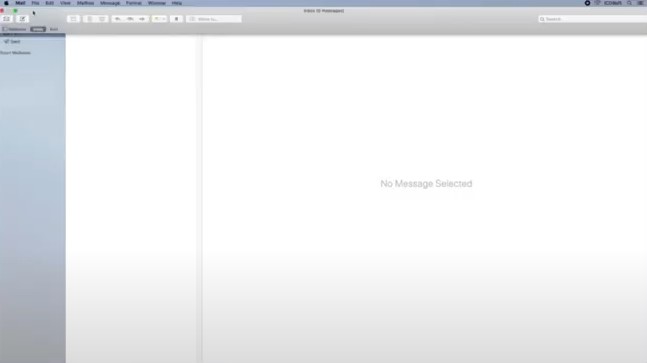
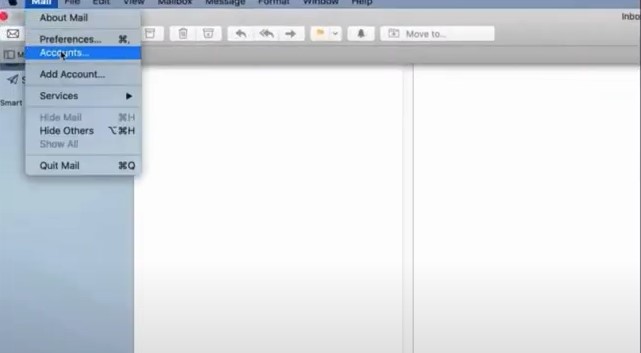
2. Choose the Mail option from the top left side of the home screen and then click on Add Account.
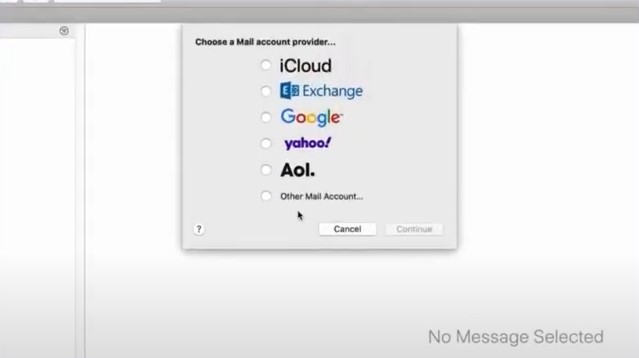
3. After that, choose the option Other Mail Account and click on the Continue button.
4. Next, in the name field, enter the name you like to appear.
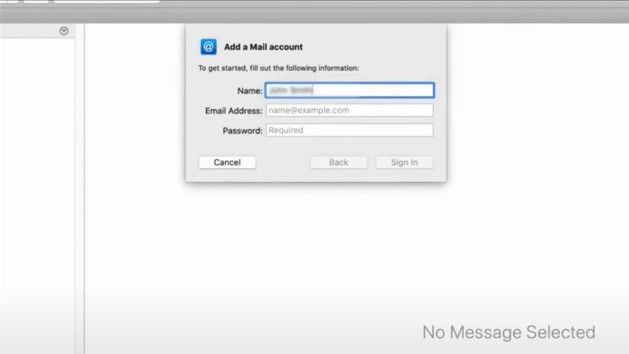
5. Now, fill in the correct Xfinity Mail email address and password and select the Sign-in option.
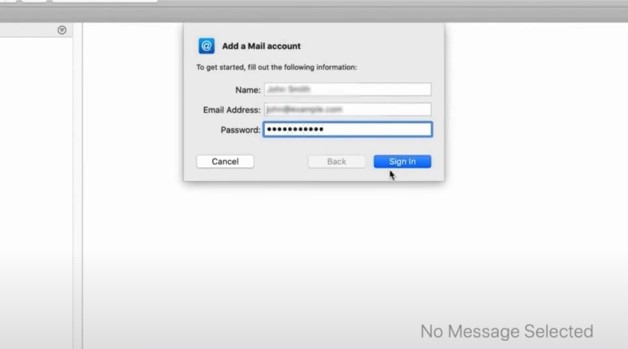
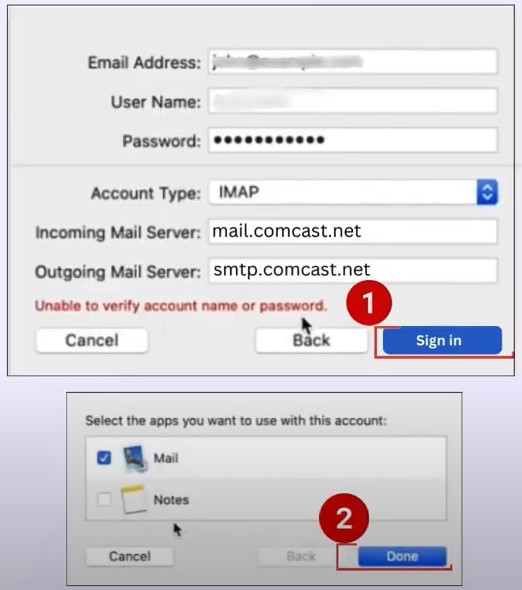
6. In case the Apple Mail informs you that it is unable to verify the account name and password, you need to fill out the form to configure it manually.
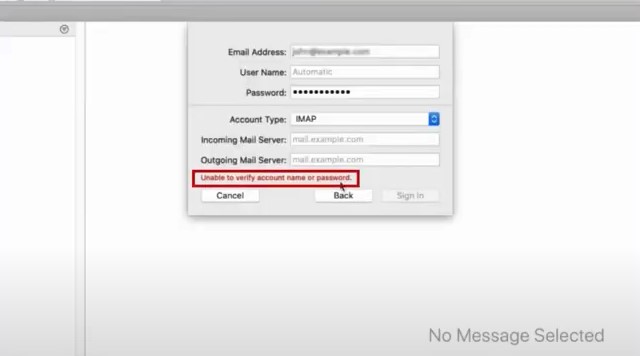
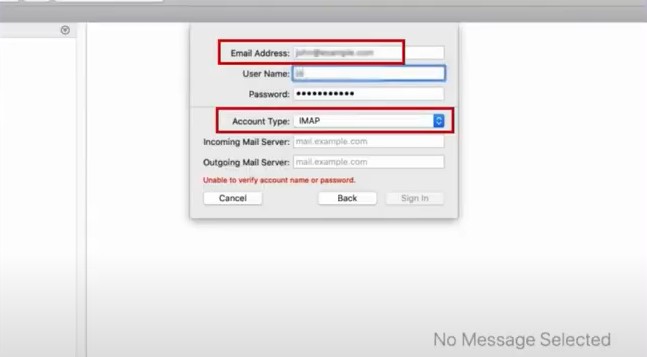
7. On the next screen, the email address and password should be populated. Enter a username and set the Account Type to IMAP.
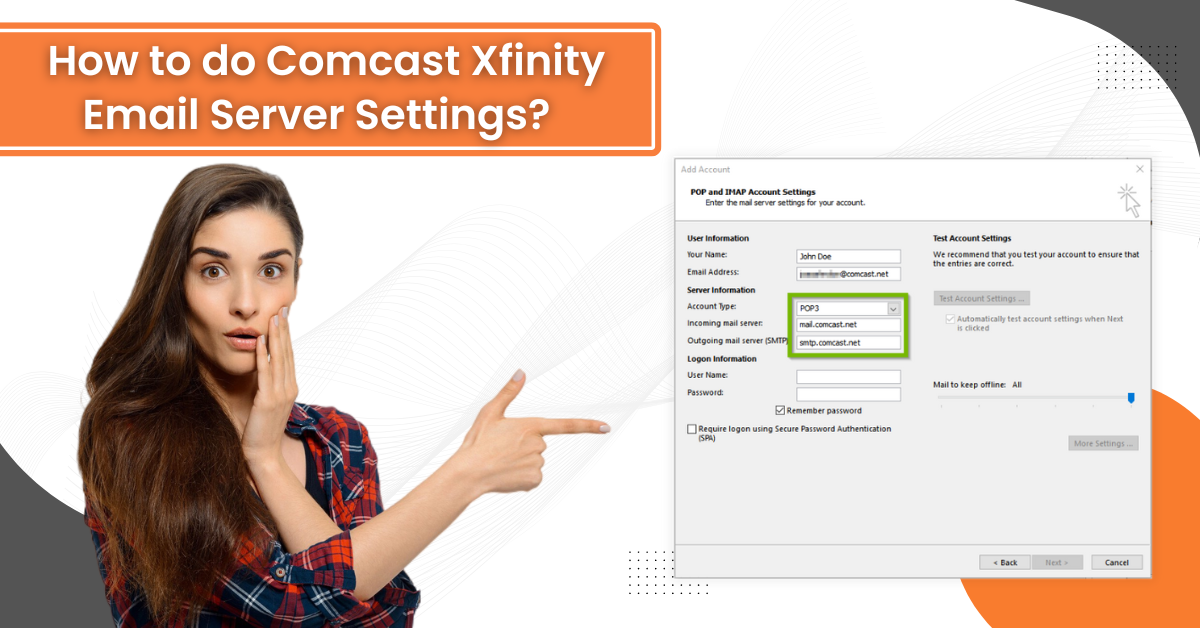
8. Now, in the Incoming and Outgoing Mail Server fields, fill in mail.comcast.net and smtp.comcast.net, respectively.
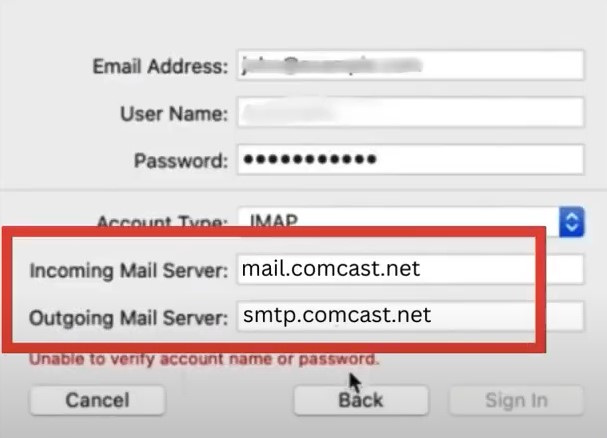
9. After that, click Sign-in, then select Mail and click Done.
10. Once you have signed in, go to the top left side of the screen and click Mail.
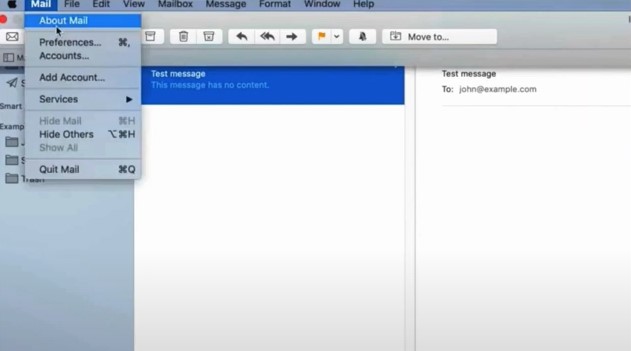
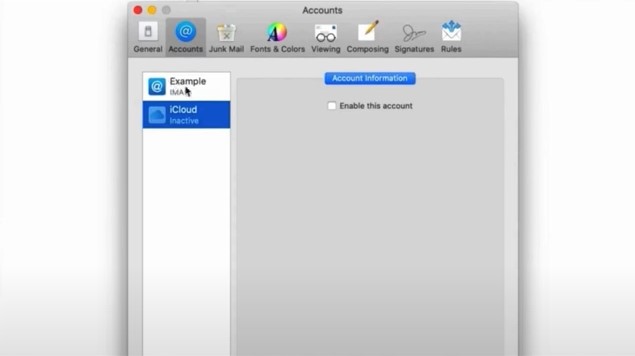
11. From the open options, click Preferences, then select your Xfinity mail from the Accounts section.
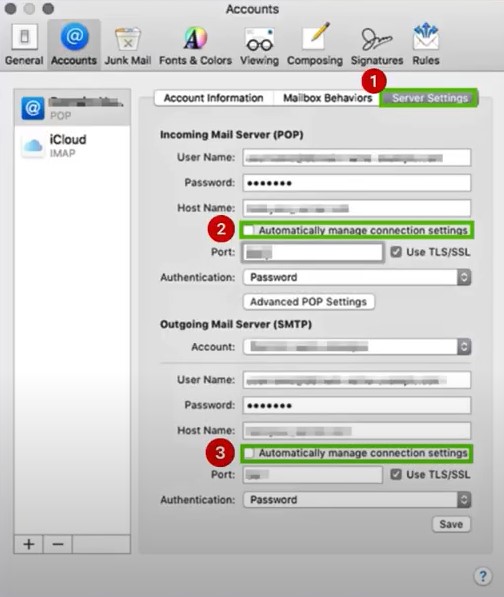
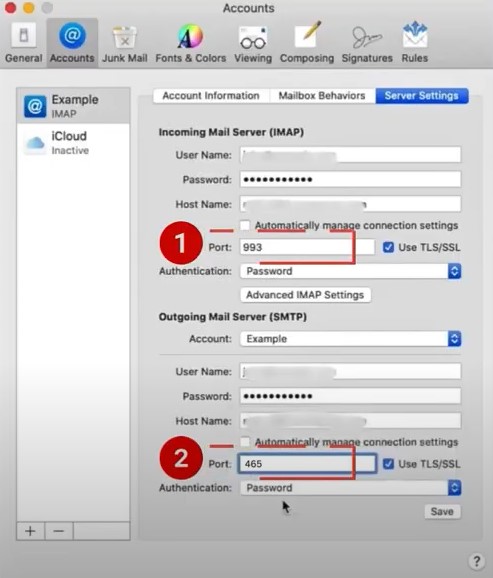
12. Moreover, you are required to go to the Server Settings tab and uncheck the ‘Automatically Manage Connection Settings’ options for both Incoming and Outgoing Mail Servers.
Also Read:- Fix 'Xfinity (Comcast) Email Not Working' Issue
13. In the next step, set the Incoming Port option to 993 and the Outgoing Port to 465, respectively.
14. Plus, ensure that the Use SSL/TLS checkboxes are selected, and then click on the Save button.
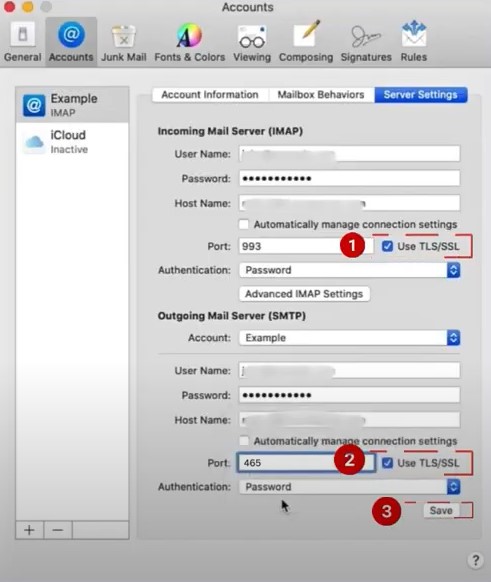
15. Now, the Comcast mail server settings on your Apple Mail will be complete.
On Outlook
The process to do the Comcast Xfinity email settings on your Outlook product is as follows.
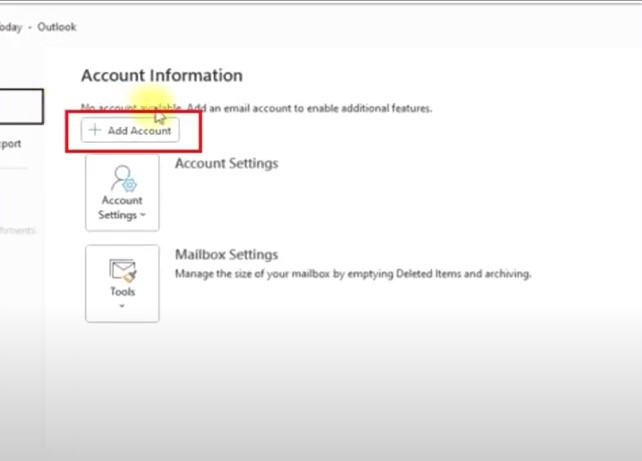
1. At the start, open Outlook, navigate to the Outlook Account Information page, and click on Add Account.
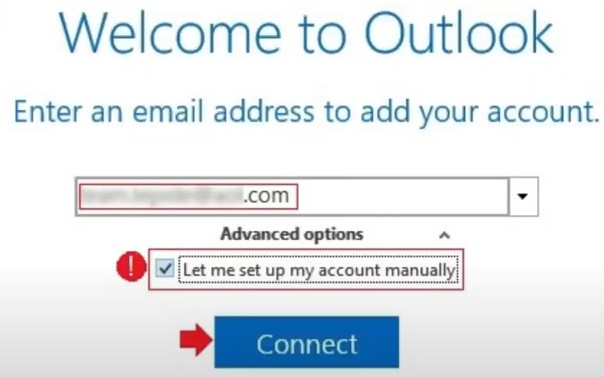
2. Next, you have to enter your Xfinity email address and click on the Connect button.
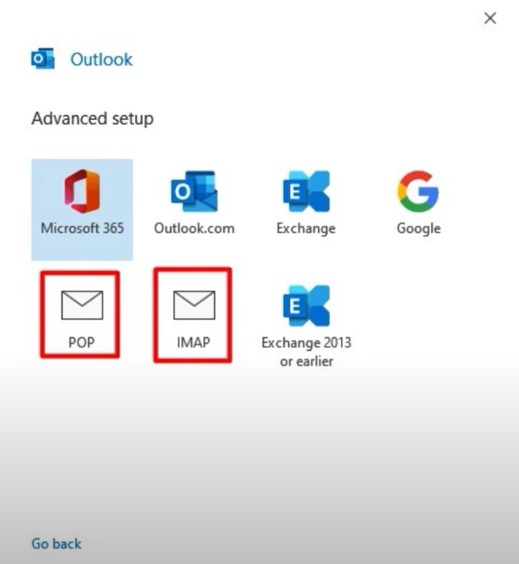
3. Now, in the Outlook window, select the IMAP or POP option.
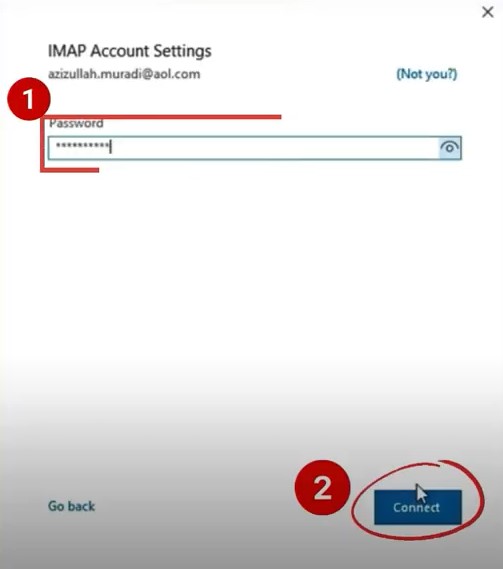
4. After that, type the Xfinity email account password associated with your mail and then choose the Connect button.
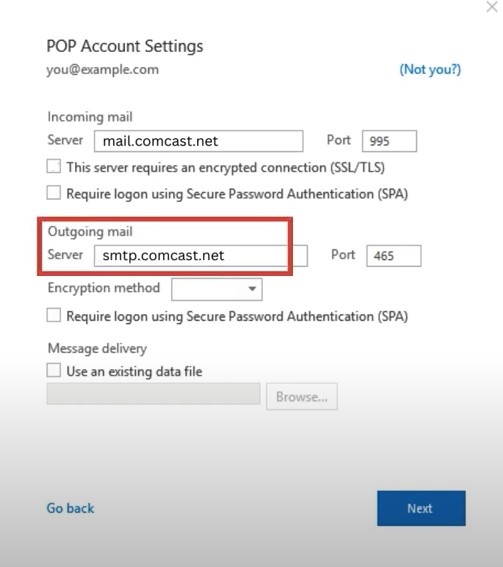
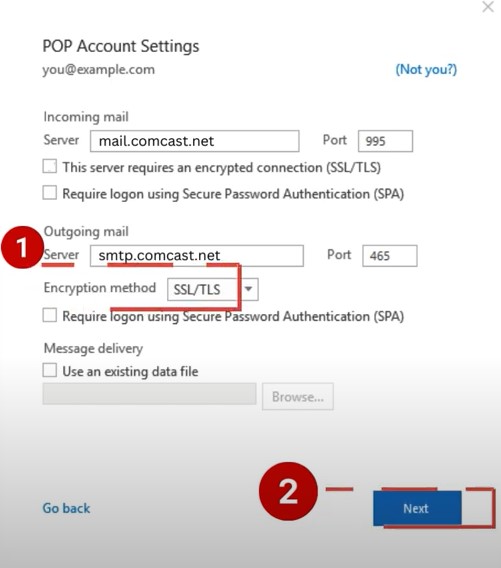
5. On the open page, make sure that the Incoming Mail Server field says mail.comcast.net.
6. In addition, the box in front of the Outgoing Mail Server says smtp.comcast.net.
7. Then make sure that the Incoming Mail Port is set to 993 and the Outgoing Mail Port is 465.
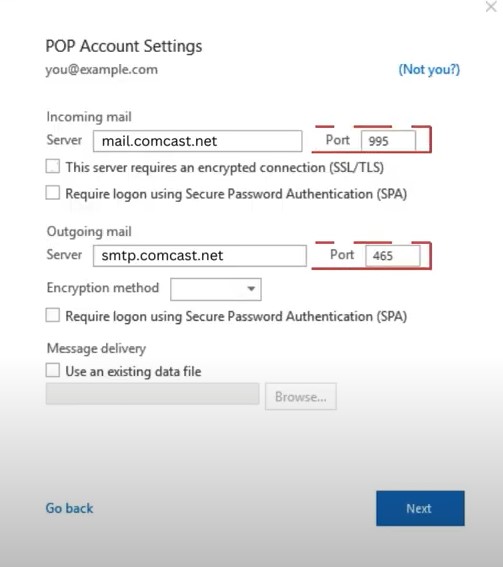
8. In the next step, set the Encryption Method to SSL/TLS and click on Next.
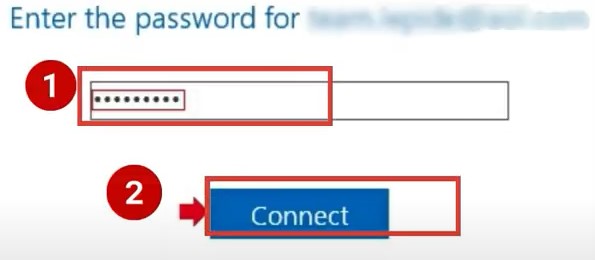
9. Now, enter the password and select the Connect button.
On Gmail
Below are the simple and proven steps that will help you complete the Xfinity server settings on your Gmail account.
1. First, you need to open your Gmail account and click the gear icon on the top right side of the display.
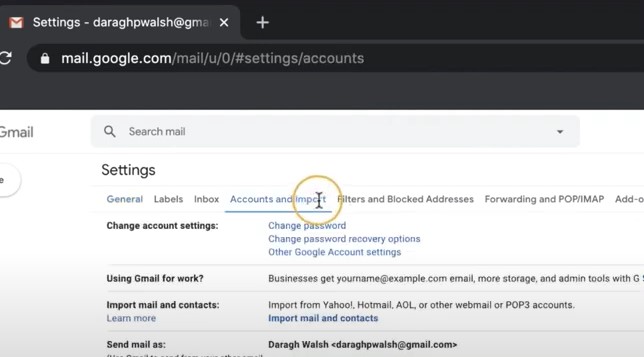
2. Then, choose the Settings option and then go to the ‘Account and Import’ tab.
3. On the next step, scroll down, then select the option Add a Mail Account next to the ‘Check Mail from other accounts’ section.
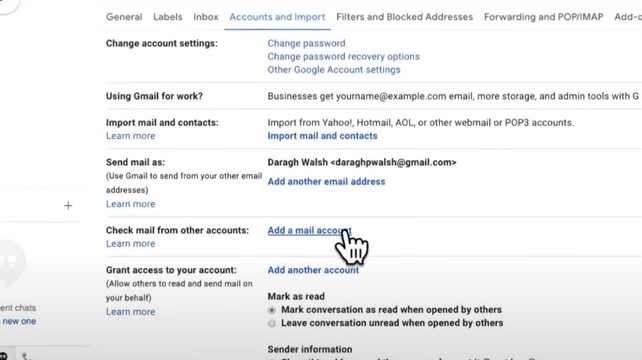
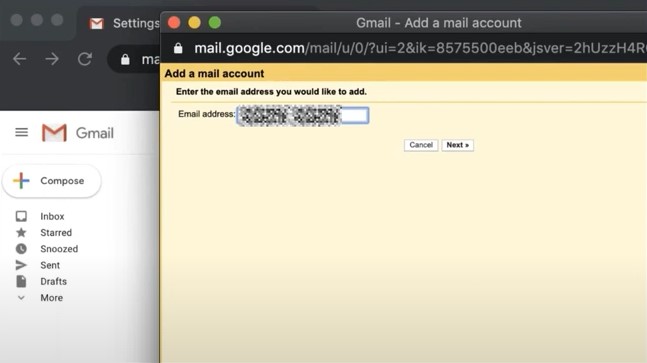
4. Now, in the new open window, type in your Xfinity email address and click Next.
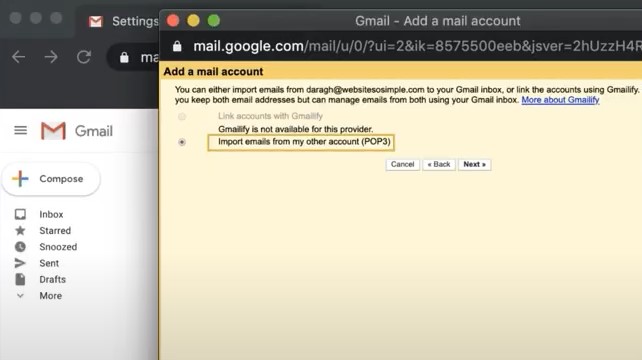
5. After that, select Import Email from the Other Account option and click on the Next option.
6. On the open page, type your Xfinity email address and password correctly.
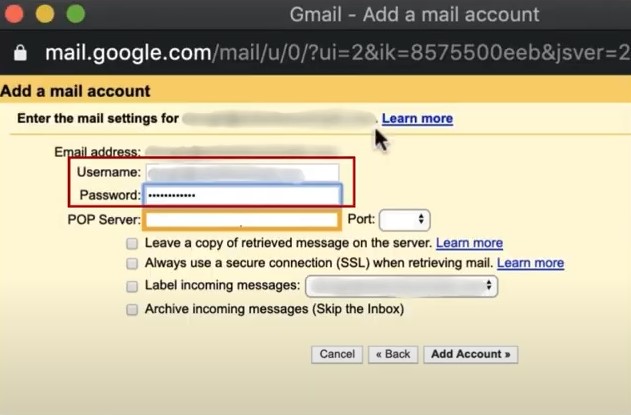
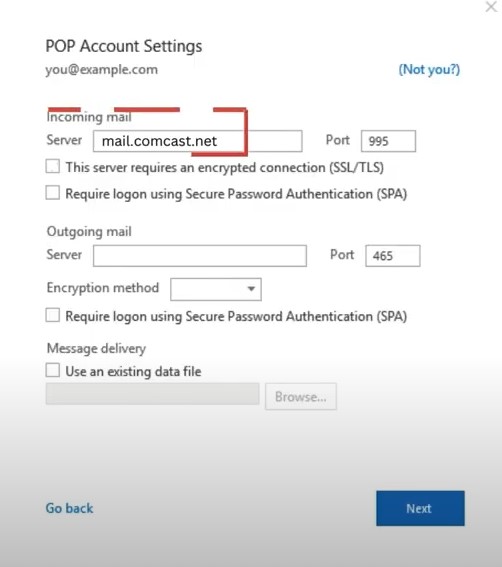
7. In the POP server field, type in mail.comcast.net and set the Port to 995.
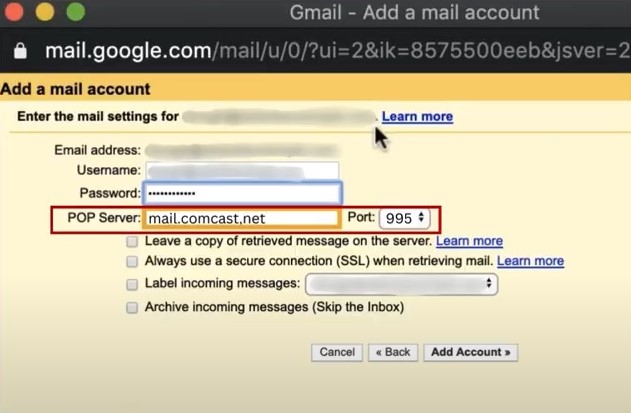
8. In the open window, click on the second and third checkboxes and choose Add Account to proceed.
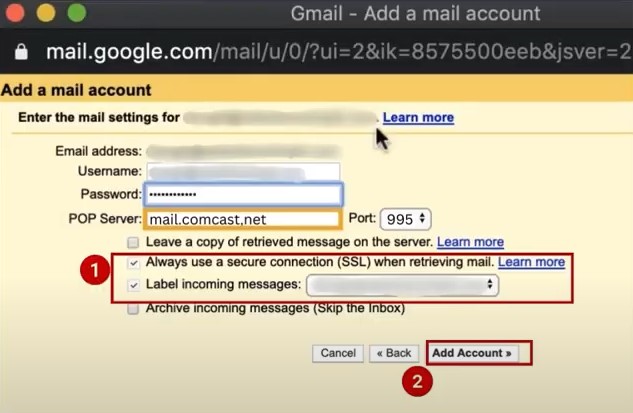
9. Once the ‘You mail has been added’ screen shows up, select Next.
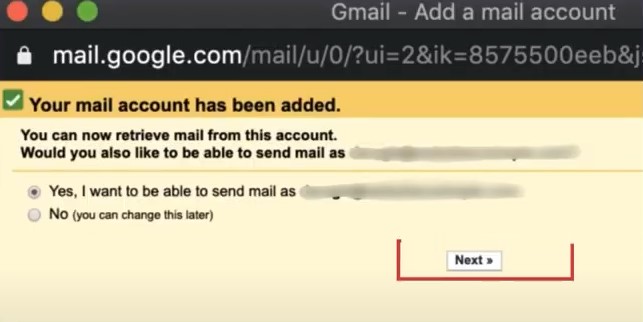
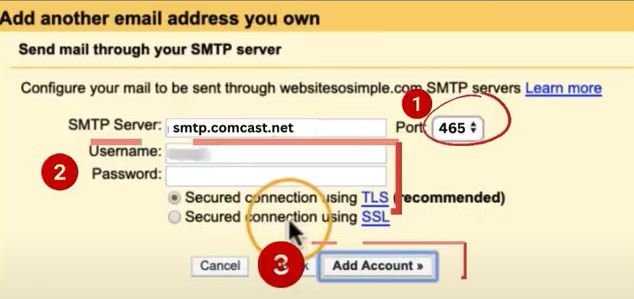
10. After that, click on Next Step and type smtp.comcast.net into the SMTP Server field.
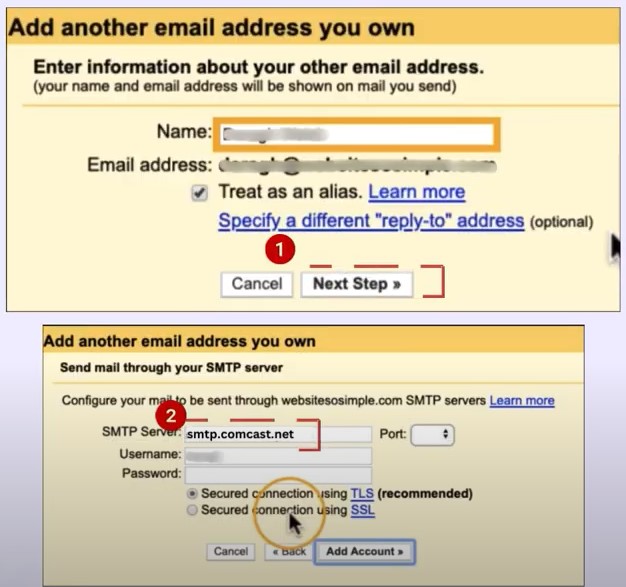
11. In addition, set the Port to 465, enter your username and password, and click Add Account.
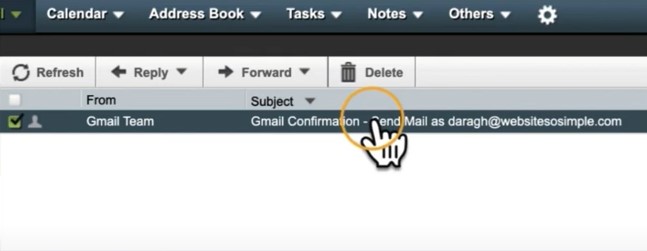
12. Next, Gmail will send you a confirmation code to your Xfinity email; copy the confirmation code received.
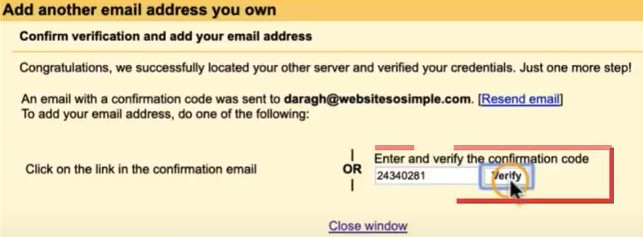
13. Henceforth, paste the confirmation code and choose the Verify button.
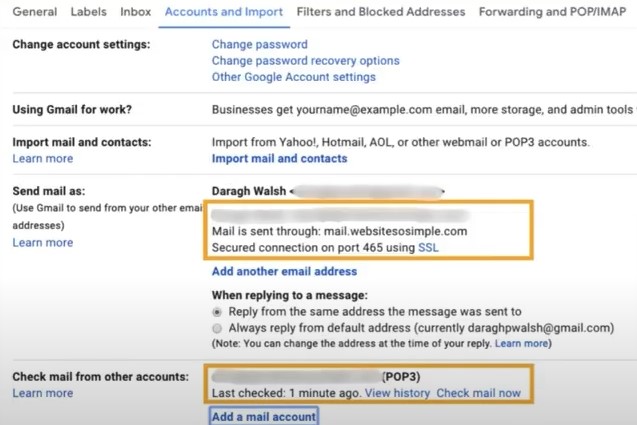
14. Finally, your Xfinity (Comcast) email will be added to your Gmail account.
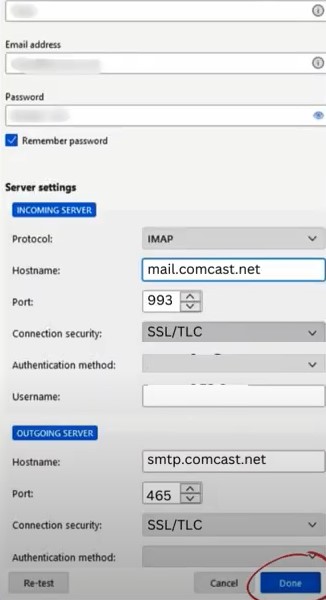
On Thunderbird
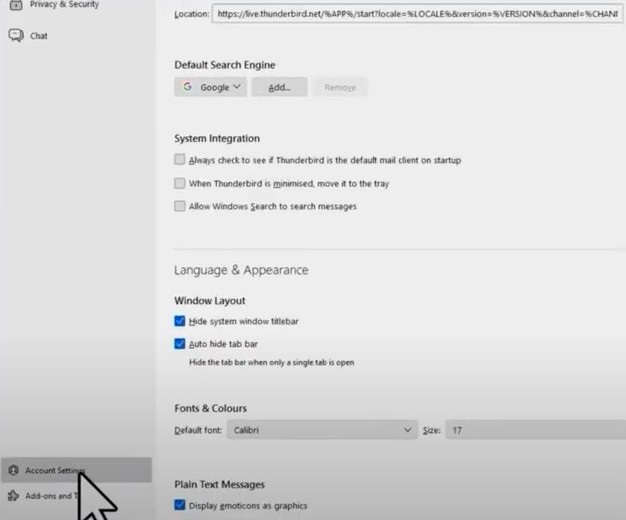
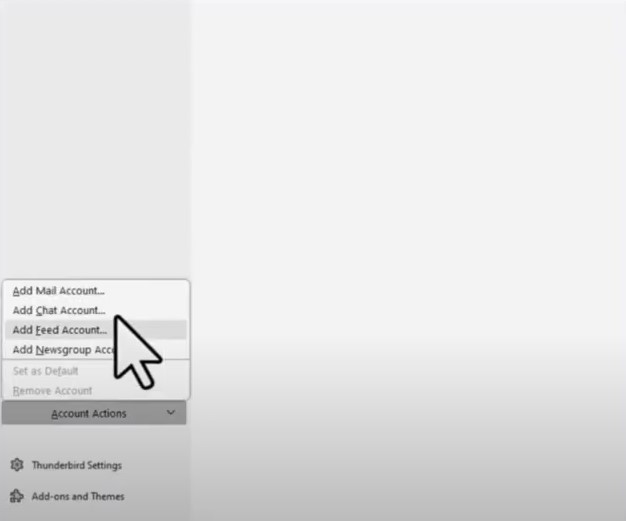
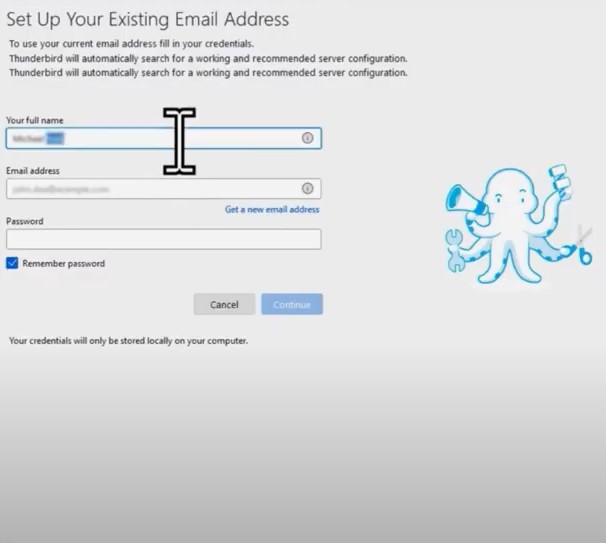
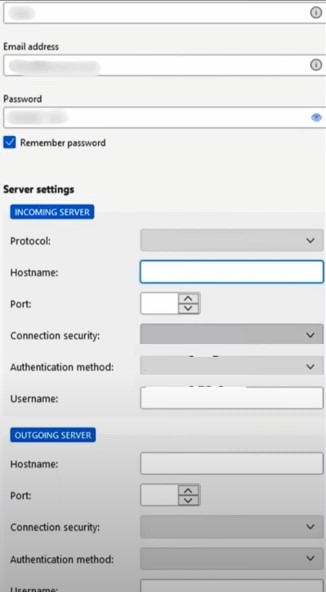
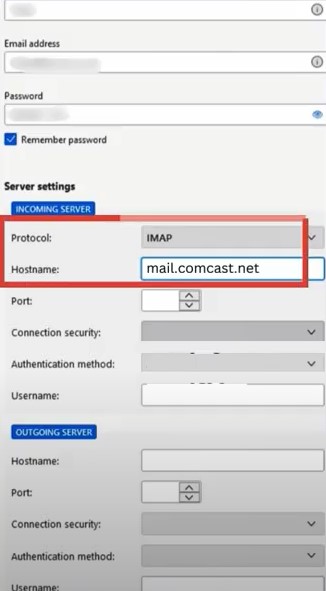
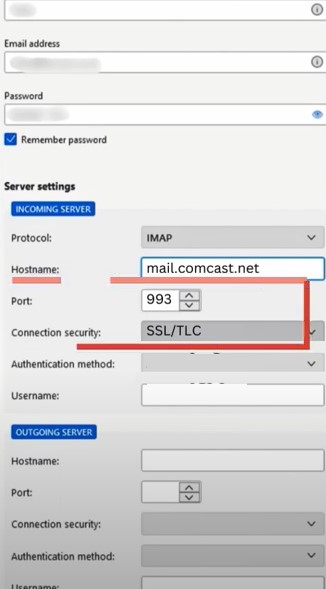
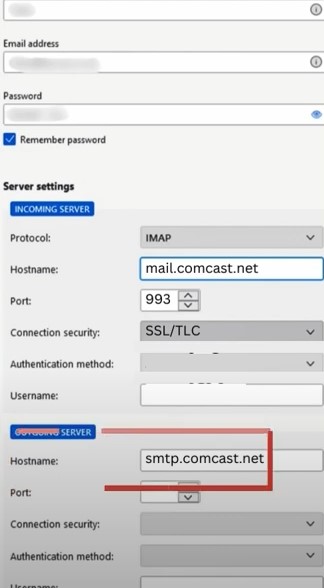
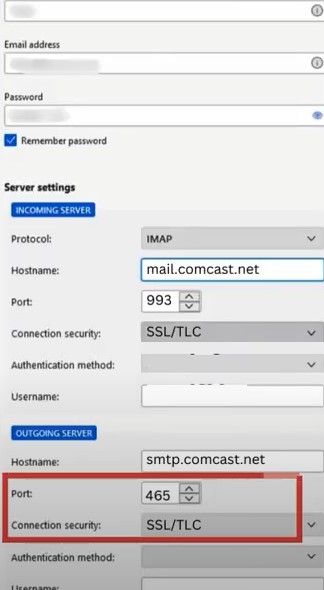
With the help of the follow-up steps, you can easily complete the Xfinity (Comcast) server settings in your Thunderbird mail.
Conclusion
We have shared a comprehensive guide that will help you easily complete Xfinity email server settings on various Mail products. With our effective and easy-to-understand guide, you can complete the process on Gmail, Outlook, Thunderbird, and Apple Mail without any hassle. If you follow all the steps carefully, depending on your mail product, then you can avoid any errors from happening. Apart from that, ask for additional help if necessary.
