How to Fix Comcast (Xfinity) Email Not Sending Issue?
- 0
- 345
Comcast (Xfinity) emails are a popular choice for many users, providing a vital means of communication. However, encountering issues when sending emails can be a frustrating situation, particularly when you have urgent messages to send.
There are a few reasons why your Comcast email might not be sending. These include incorrect recipient addresses, server issues, port settings, and more! This comprehensive guide walks you through the step-by-step instructions to fix them. With the help of these methods, you should be back to sending emails in no time. Let’s take a dive into the process.
Top Two Methods to Fix Xfinity Email Not Sending Issue
Here are two effective methods to fix the Xfinity email not sending issue. After going through the fixing process, you will be ready to send emails again.
Method 1: Check Your Email Address
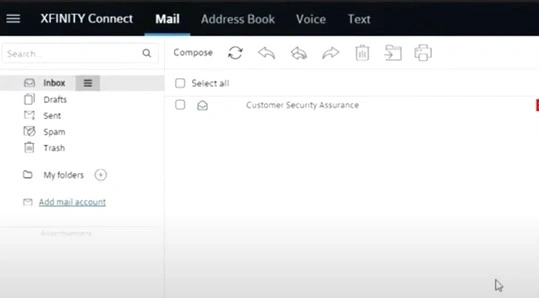
Step 1: Open the web browser and navigate to the official Xfinity page.
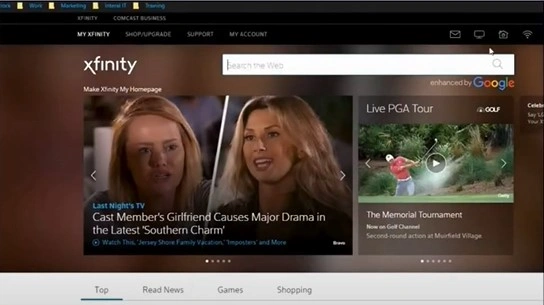
Step 2: Click on the email icon on the upper right panel. It will take you to the login page.
![]()
Step 3: Type in your email address and password and click on Sign In.
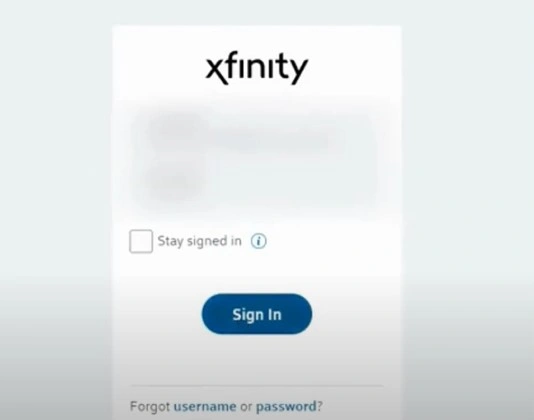
Step 4: If you are able to sign in, follow the next method.
Method 2: Check Your Email Protocol Settings in Outlook
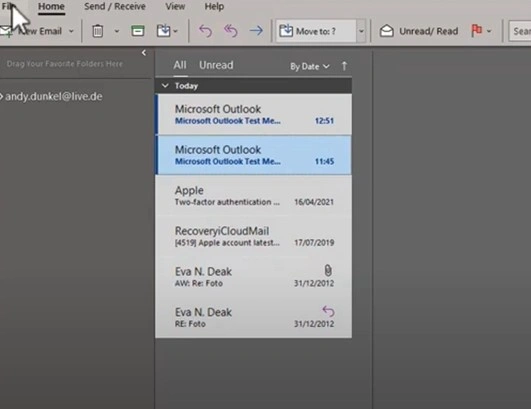
Step 1: In Outlook, go to File and click Account Settings.
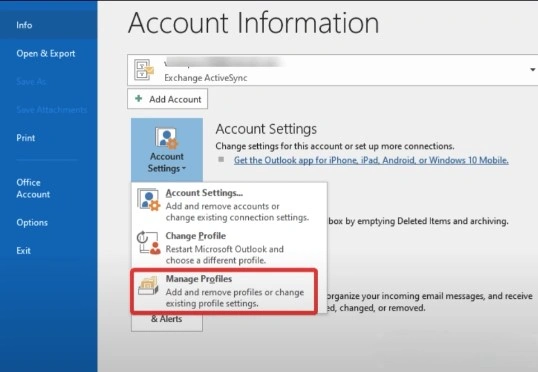
Step 2: Select Manage Profiles from the drop-down.
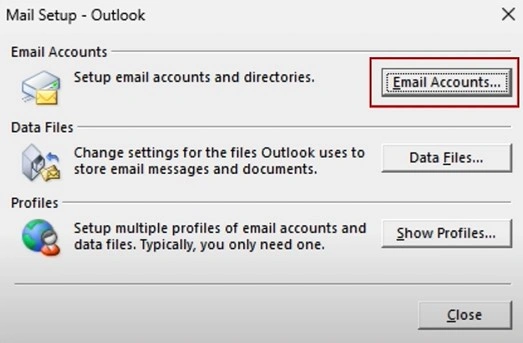
Step 3: Click on the Email Accounts in the pop-up window.
Step 4: In the Email Accounts window, you should be able to see your email address and the Type.
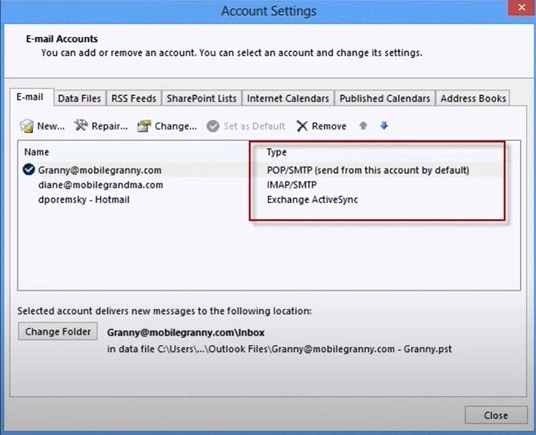
Step 5: If your email setting is set to POP, you need to change it to IMAP.
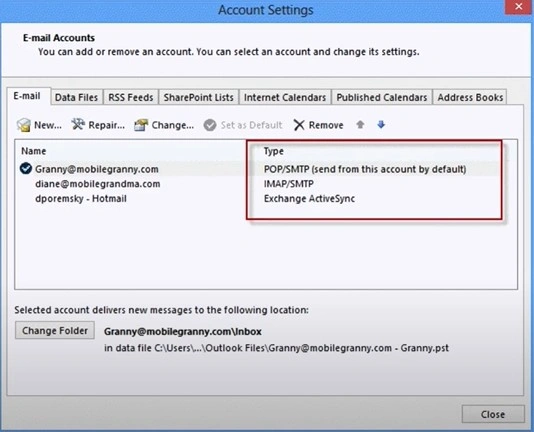
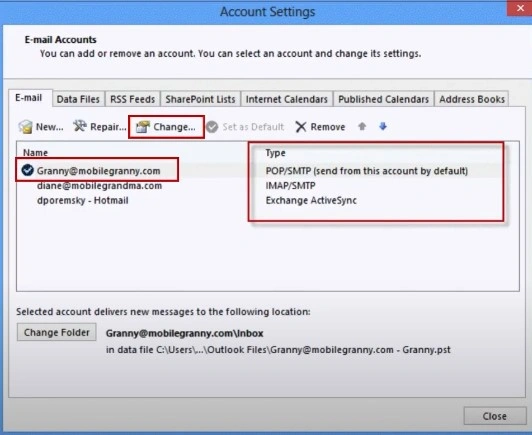
Step 6: To change the protocol settings, select your Xfinity email address and click Change.
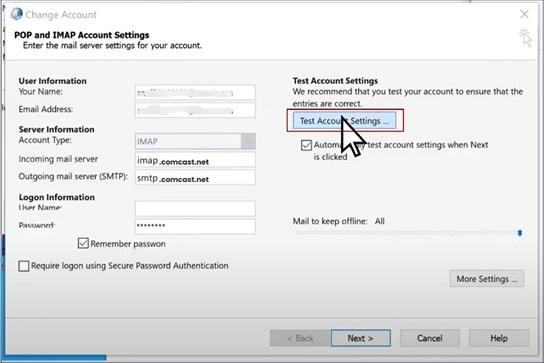
Step 7: In the Change Account Menu, you need to update the server settings of incoming and Outgoing mail servers.
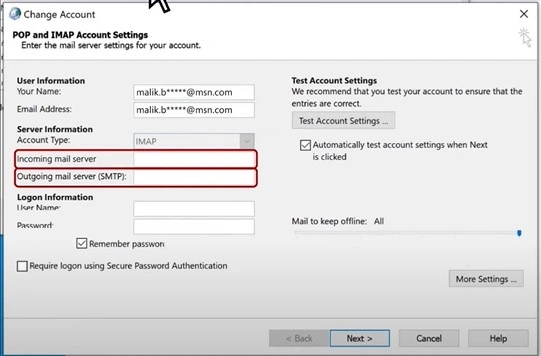
Step 8: In the Incoming Mail Server field, type in imap.comcast.net.

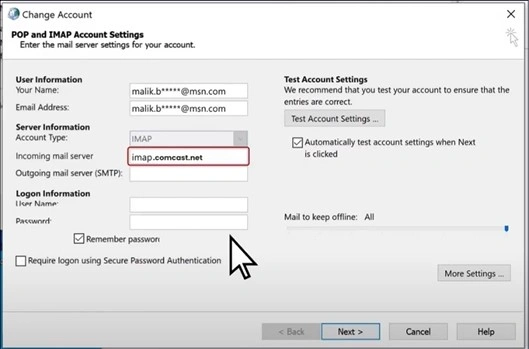
Step 9: In the Outgoing Mail Server field, type in smtp.comcast.net.
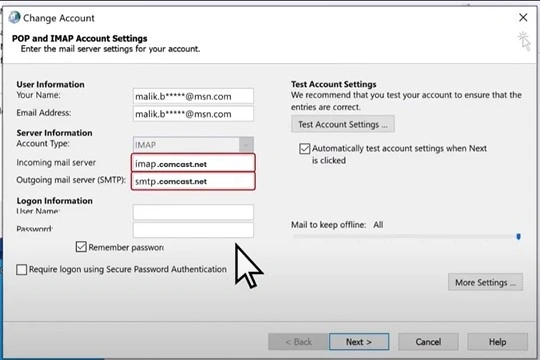
Step 10: To sync your email accounts, enter your Email Password.
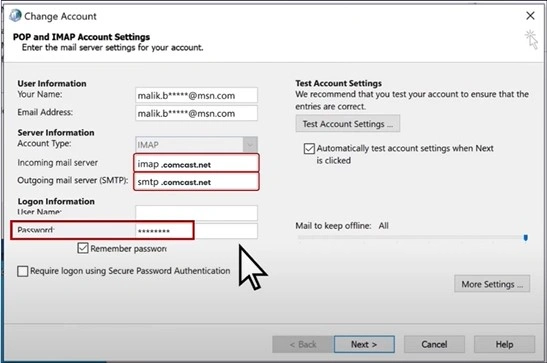
Note: If your email provider requires two-factor authentication, you will need to enter a temporary passcode when prompted.
Step 11: Click More Settings.
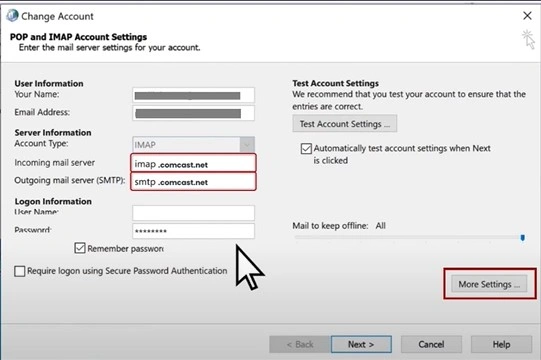
Step 12: In the Internet Email Settings window, select the Advanced tab.
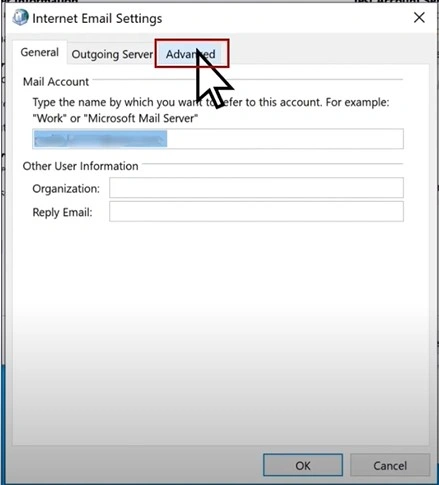
Step 13: Make sure that the incoming and outgoing port numbers are set to 993 and 587, respectively.
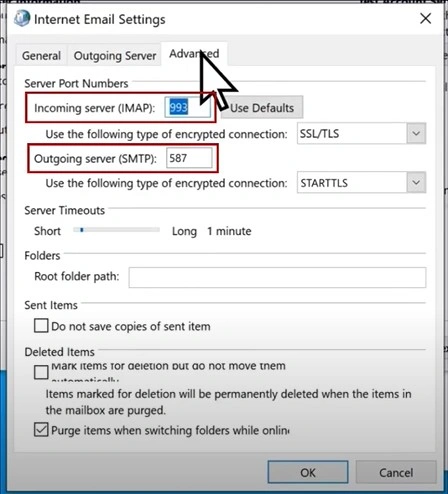
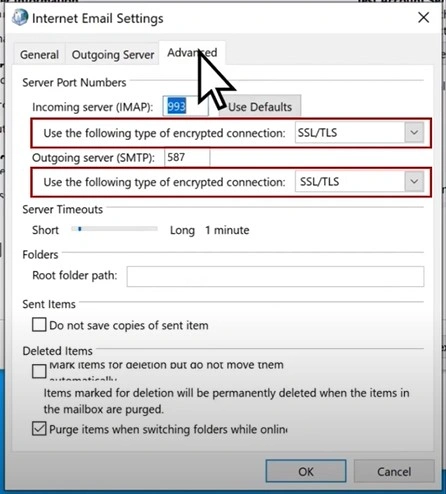
Step 14: Set the incoming and outgoing encryption types to SSL/TLS.
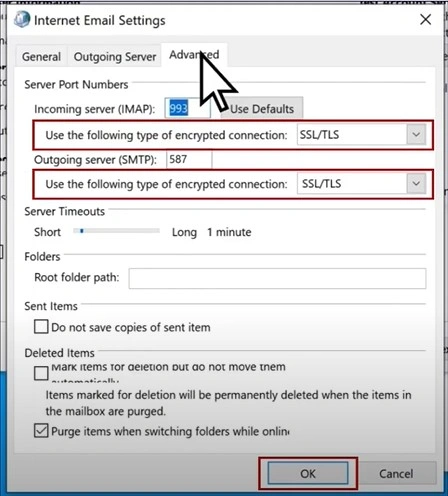
Step 15: Click OK to save the changes.
Step 16: To check the settings, click Test Account Settings.
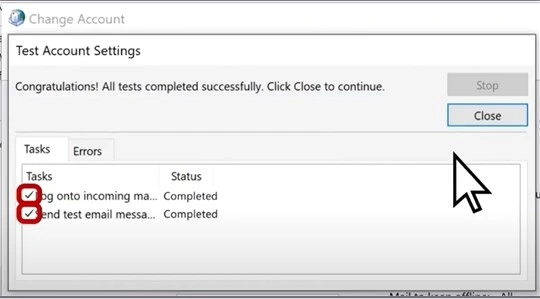
Step 17: If the new settings are correct, you will see green check marks in the dialog box.
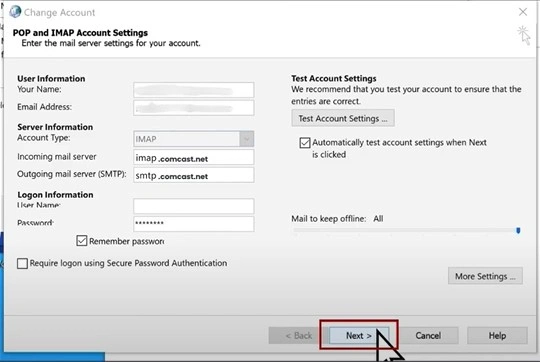
Step 18: Click Next in the POP and IMAP Account Settings window.
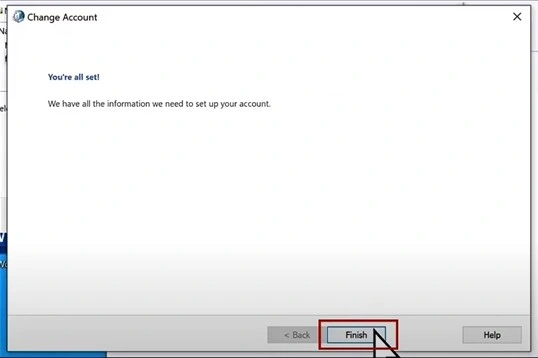
Step 19: Click Finish.
Conclusion
There is no need to panic in such situations as Comcast is unable to send emails. Try to find out the solution for it like the above methods which definitely help you fix the issue. However, if you still experience issues in fixing the Xfinity unable to send mail, get assistance from a professional.

