How to Fix The 'Samsung Email Not Syncing' Issue?
- 0
- 419
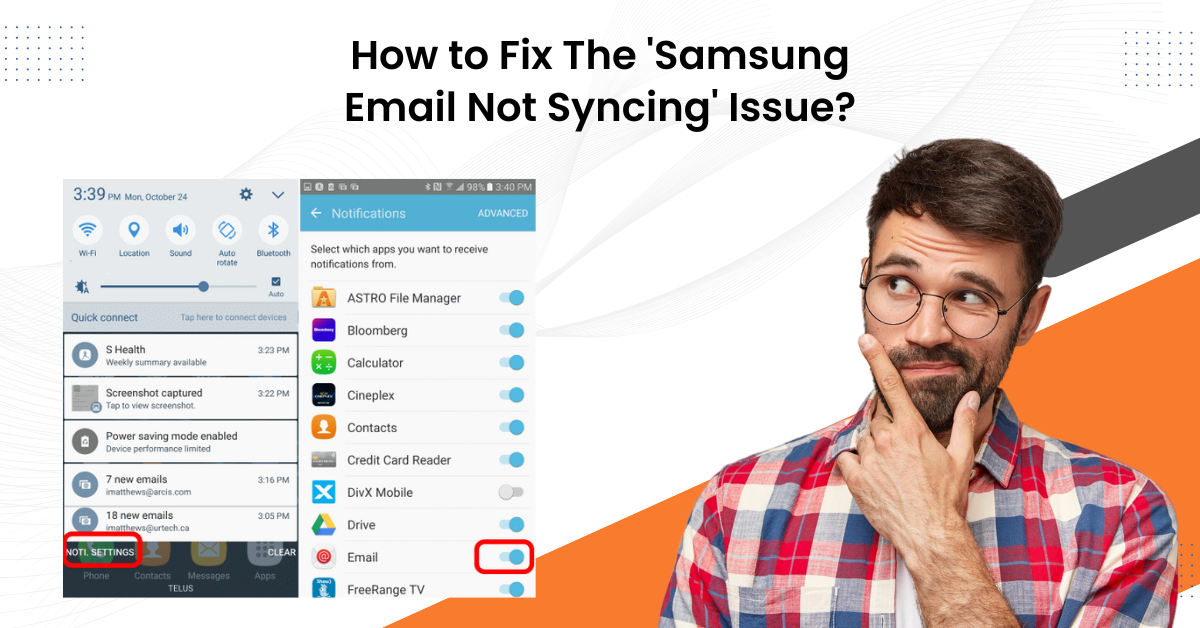
The Samsung email app is a versatile tool developed by Samsung for its Android devices. It helps users to manage multiple email accounts, including those from Outlook, Gmail, and Yahoo. Additionally, it showcases various features, such as sending, receiving, composing, and organizing emails, along with the feature to sync contacts and calendar events.
However, it is common for Samsung email users to encounter the annoying issue of emails not syncing. This may hinder their daily operations. If you are facing the same issue, rest assured that you're not alone. This guide is here to provide you with the troubleshooting solutions you need.
When addressing the Samsung email not syncing issue, problems like app-specific Bugs, app data loss, or network problems can also occur. So, be cautious during the process. Read further to learn more.
Samsung Email Not Syncing Issue Troubleshooting Solutions
Is Samsung Email not syncing correctly? Want to try fixing it by yourself? Here are the three troubleshooting solutions to fix the 'Samsung email not syncing' issue:
Solution 1: Turn Sync Off & On
Step 1: Swipe up from the home screen to go into the app's screen.
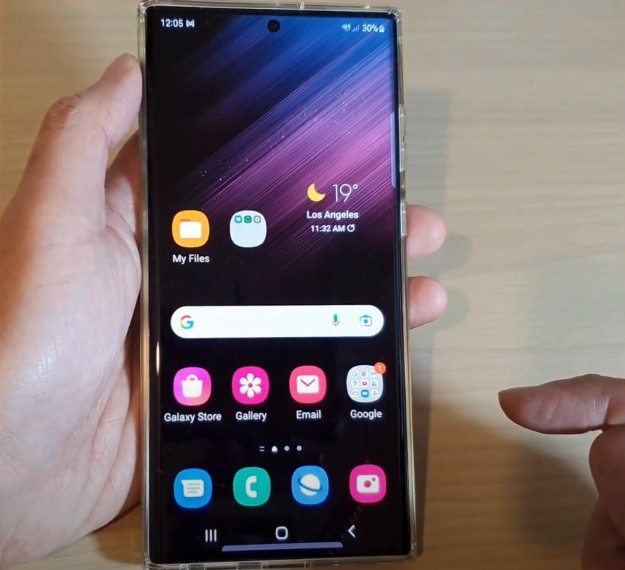
Step 2: Open the 'Samsung Email app and ensure you’re on the inbox page.
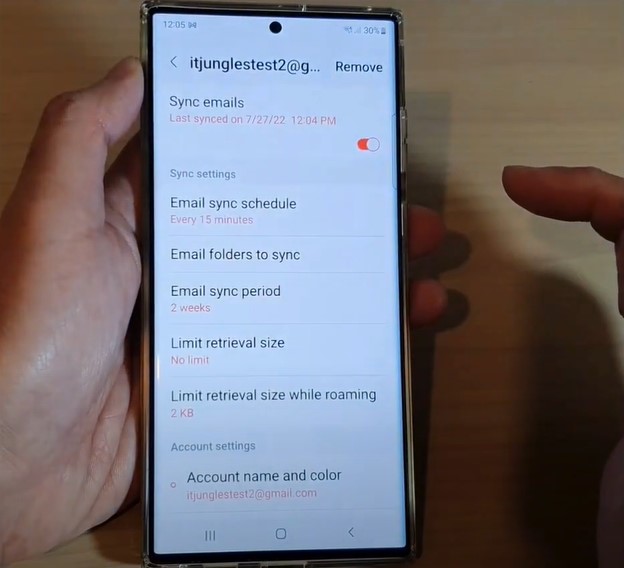
Step 3: Tap the menu key on the top left side of the screen.
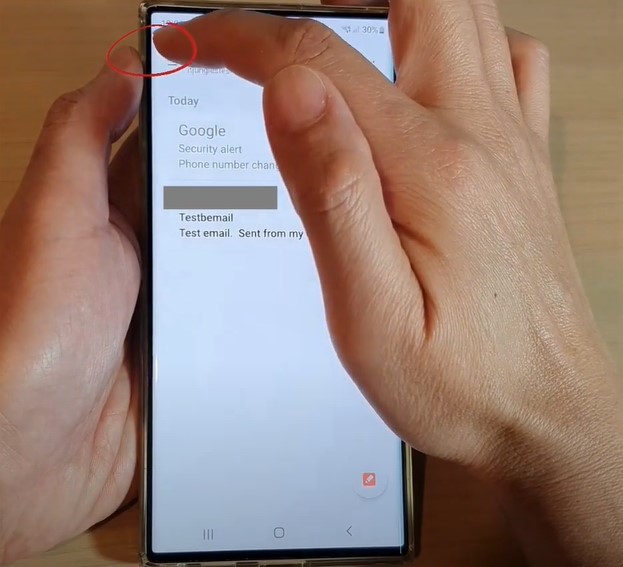
Step 4: Tap on the settings icon and select your email account.
![]()
Step 5: Toggle off Sync Emails and wait for a few seconds.
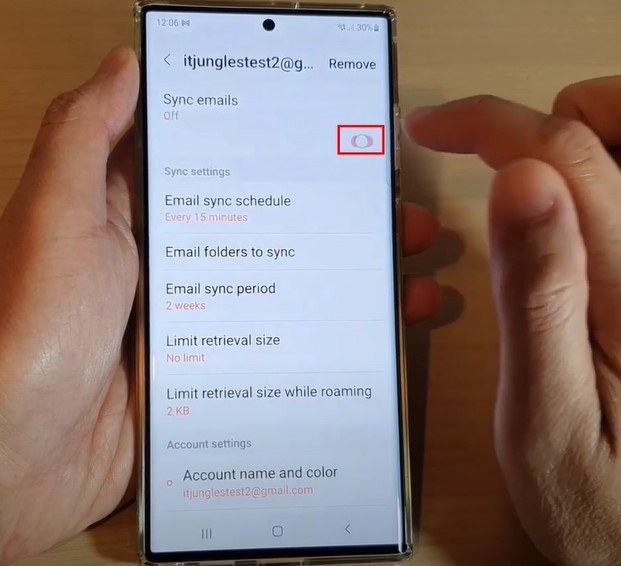
Step 6: Turn on Sync Emails again and return to the home screen.
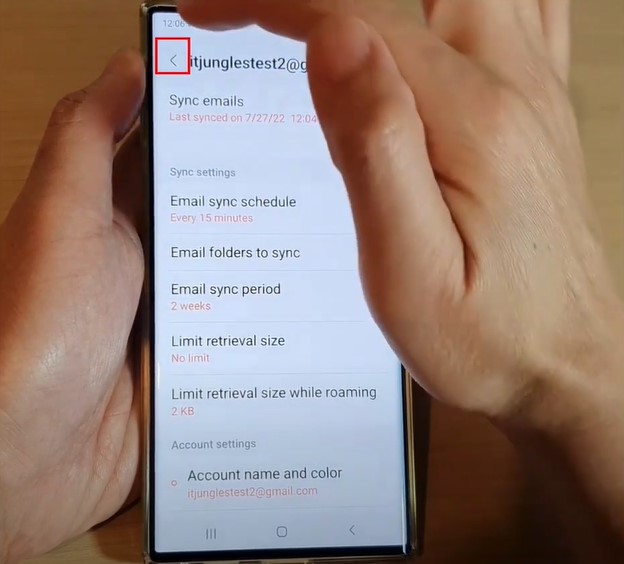
Step 7: Now, wait and see if it syncs.
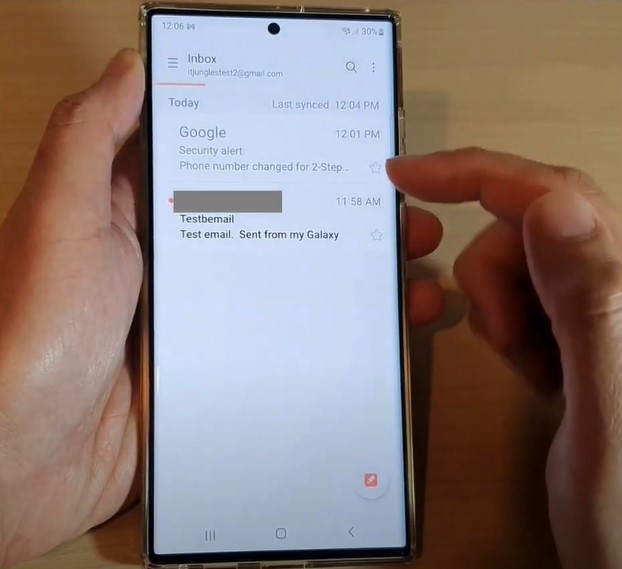
Solution 2: Clear Data & Force Stop
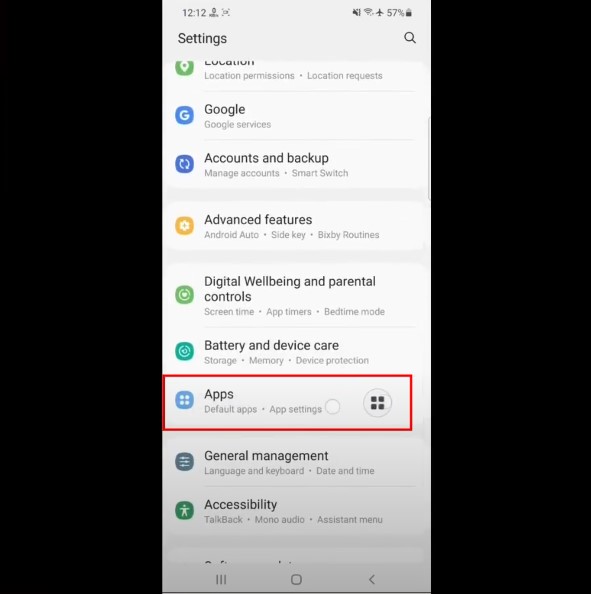
Step 1: Navigate to Settings, scroll down, and select Apps.
Step 2: Scroll down to Email, select it, then go to Storage.
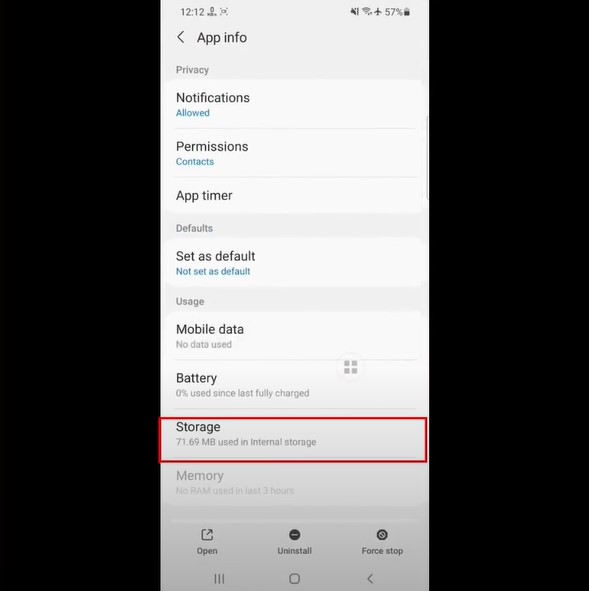
Step 3: Click Clear Data on the bottom left side of the screen and click OK when prompted.
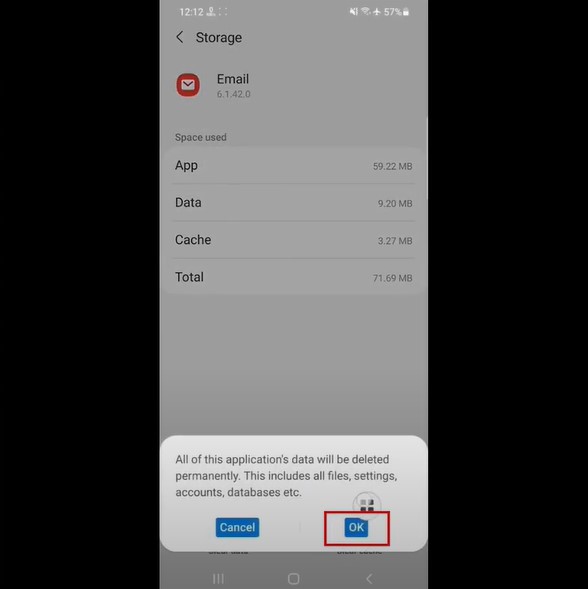
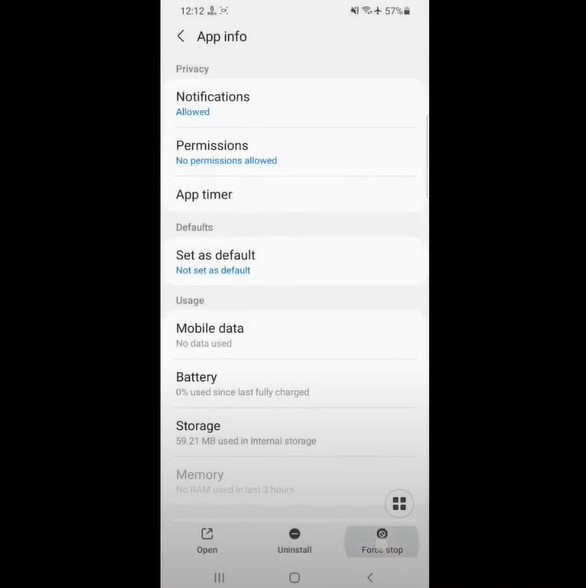
Step 4: Go back to App info and click Force Stop.
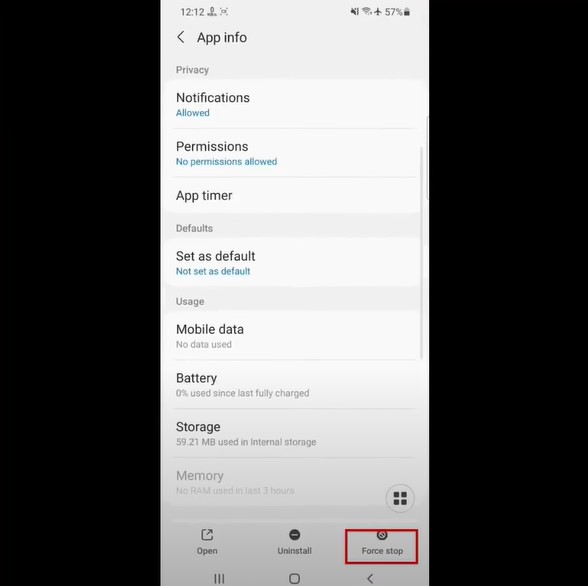
Step 5: Click OK on the pop-up prompt to proceed.

Solution 3: Check Settings
Step 1: Navigate the Settings, scroll down, and select Apps.
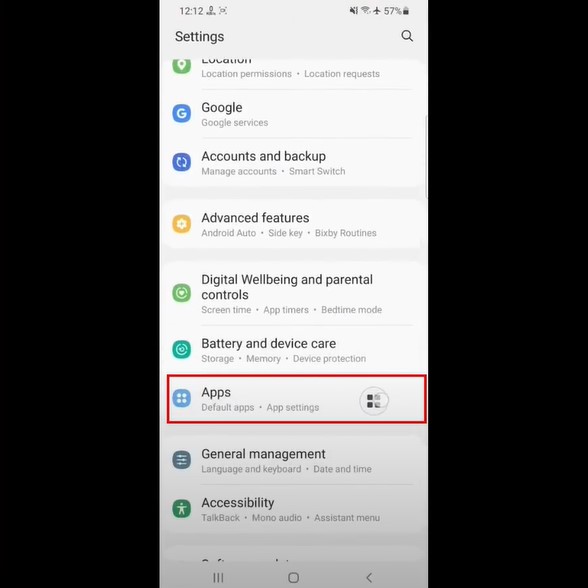
Step 2: Scroll down to Email and select it.
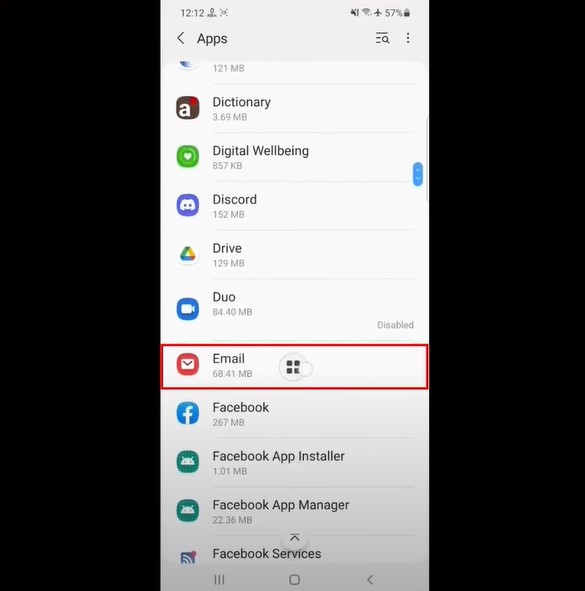
Step 3: Go to Permissions and tap Calendar.
Step 4: Select Allow and tap the back on the bottom right side of the screen.
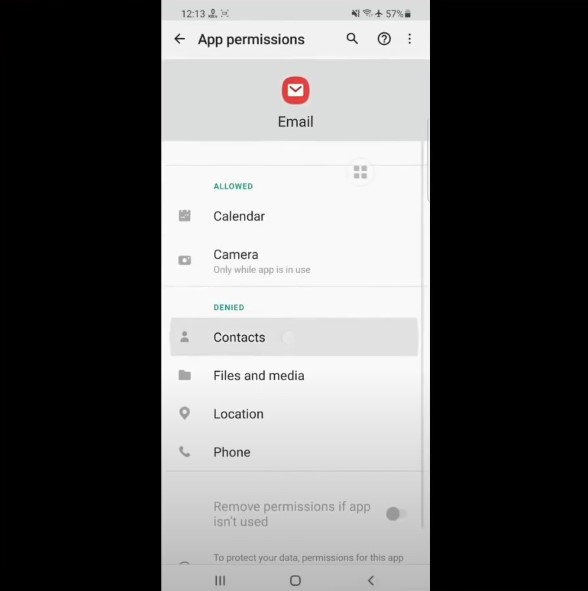
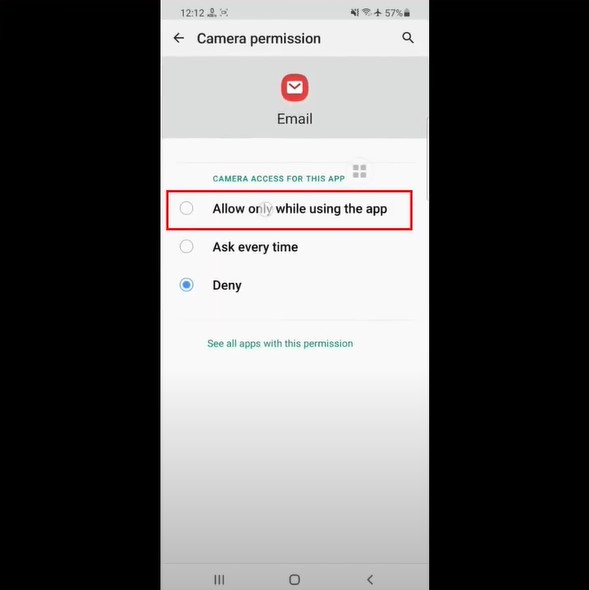
Step 5: Tap Camera, then select the option Allow Only While Using the App and tap the back icon.
Step 6: Tap Contacts, select Allow, and return to the App Permission screen.
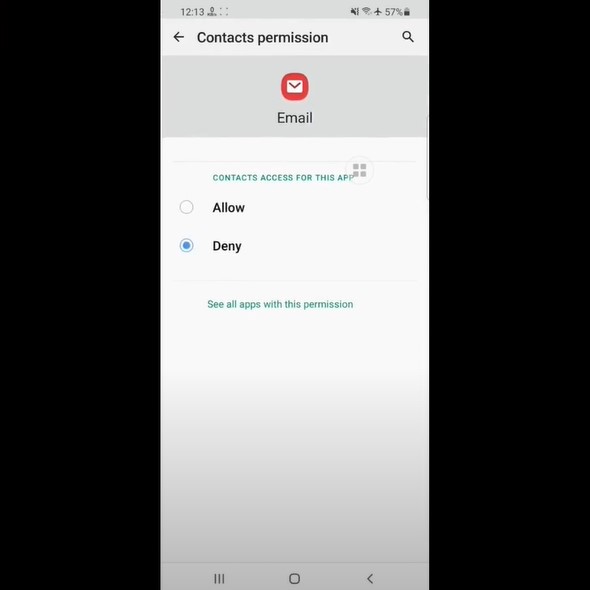
Step 7: Select Files and Media, select Allow Management of all Files, and tap the back icon.
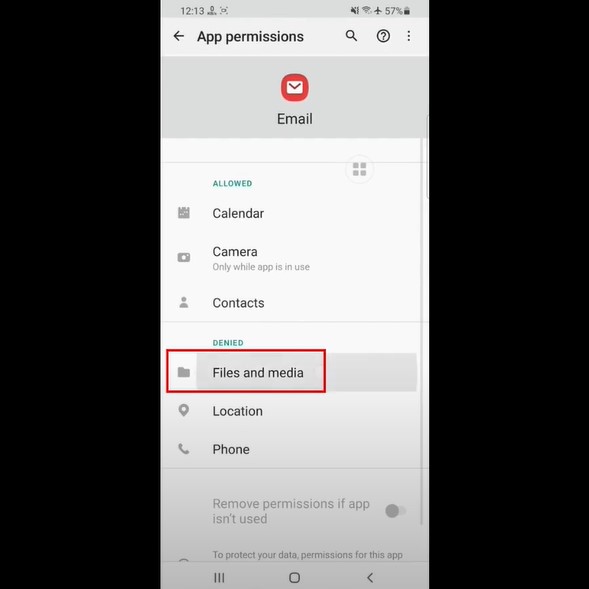
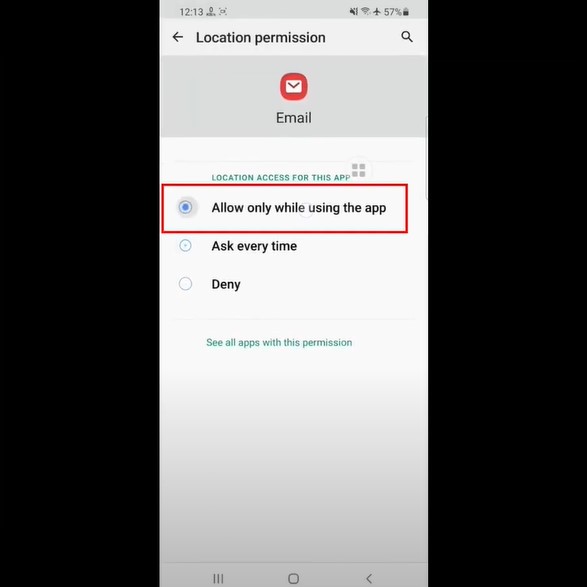
Step 8: Tap Location, select Allow Only While Using the App, and tap the back icon.
Step 9: Next, tap Phone, select Allow, and return to the App Permission screen.
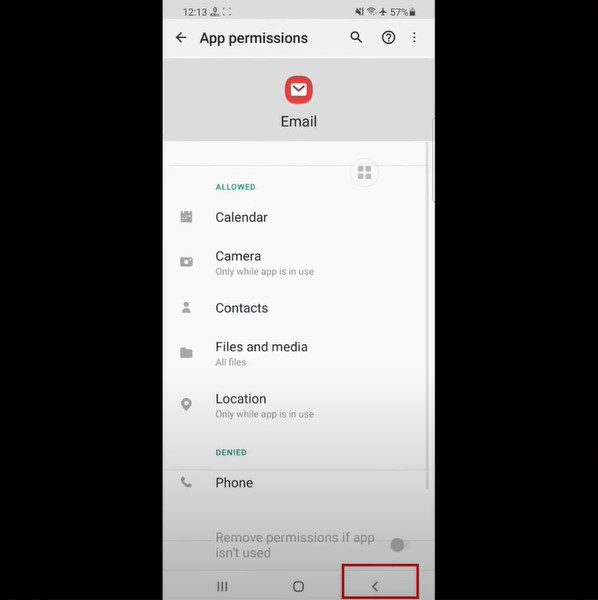
Step 10: Return to the home screen, open the email, and see if it’s syncing.
Conclusion
By following these systematic troubleshooting solutions, you can regain seamless operations of your daily communications. And if, despite your best efforts, the issue continues, remember that a professional is always available for assistance.

