How to Set Up Professional Email GoDaddy?
- 1
- 523

Your business website looks great, your products are ready, and your first few customers are starting to place orders. But then, one of them pauses before confirming an order. “Is this really your business email?” they ask, staring at your email address.
That’s why you should realize that no matter how polished your brand looks, an unprofessional-looking email can lessen trust. That may seem like a minor detail, but it plays a crucial role in shaping the perception of how people view your business.
A professional email address with GoDaddy can give your business a more trustworthy and polished image. Whatever mail you send to your respective recipients will sound credible, every invoice feels official, and every customer interaction builds confidence. So, let’s discuss how to set up a professional email with GoDaddy. But first, we want to share a few important tips that you must know before you start.
Things to Consider Before Setting Up Professional Email
You need to keep in check a few important things before you start setting up a professional Email with GoDaddy:
Check the Internet Connection and Device Readiness
Ensure that you have a stable internet connection and that all your devices, such as a computer, laptop, or phone, are ready for configuration.
Gather Login Details
Keep the credentials of your GoDaddy account and any relevant user information, like username, password, etc., on hand.
Update DNS records
Ensure you have access to your domain’s DNS settings so you can update CNAME, MX, and TXT records if required.
Choose an Email Plan
Check if you are using Microsoft 365 Email or GoDaddy Workspace Email, as the setup steps vary.
Turn on Security Settings
Set up two-factor authentication (2FA) and verify the SPF/DKIM records for enhanced email security.
Problems When Setting Up Professional Email GoDaddy
Setting up a professional email with GoDaddy seems like an easy process. However, certain problems may occasionally arise and cause an obstruction. Here is a list of the most common issues that may occur:
-
Wrong email client configuration
-
Email not syncing on devices
-
SPF / DKIM / DMARC issues
-
Login or password errors
Essential Steps to Set Up Professional Email GoDaddy
These are all the steps to know for setting up your own professional email with GoDaddy:
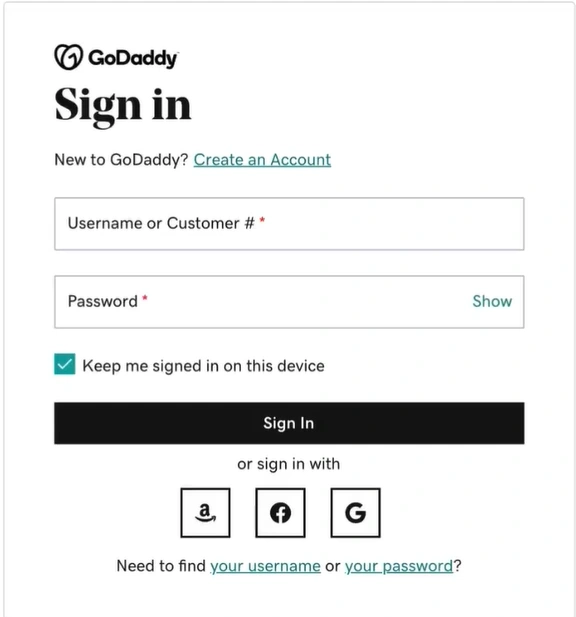
Step 1: Go to GoDaddy’s official website and sign in to your account.
Step 2: Hover over the Profile name, click the dropdown icon, and select “
![]()
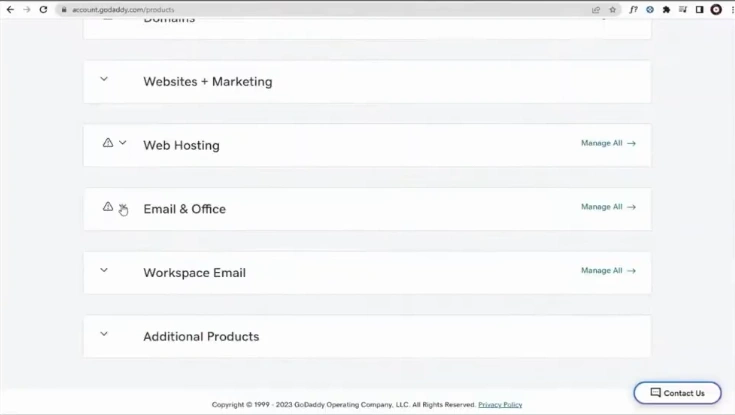
My Products.”
Step 3: Scroll down and open the Email & Office.
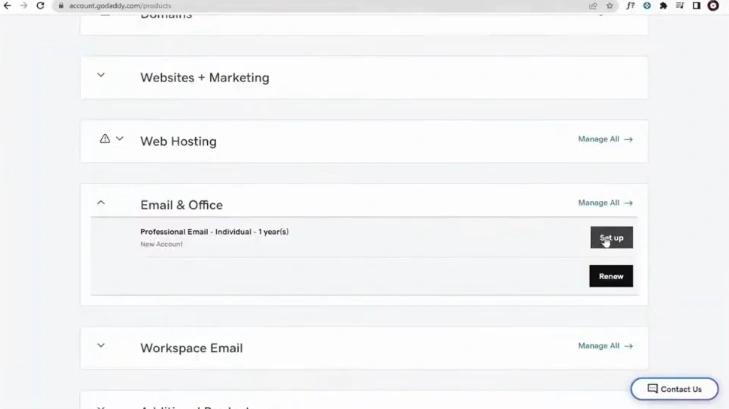
Step 4: Click on Set up next to Professional Email.
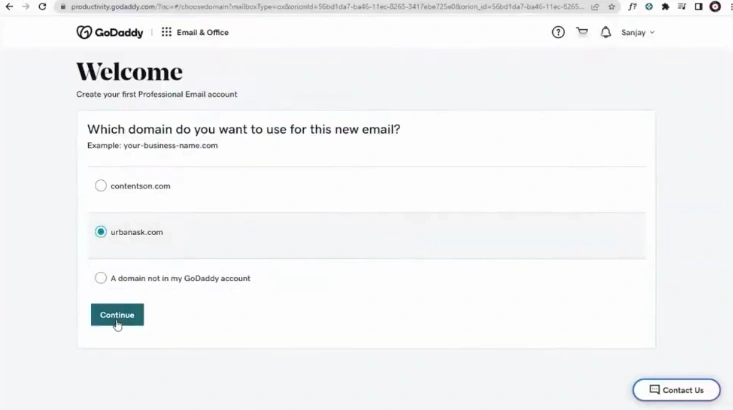
Step 5: Select a domain and click “Continue.”
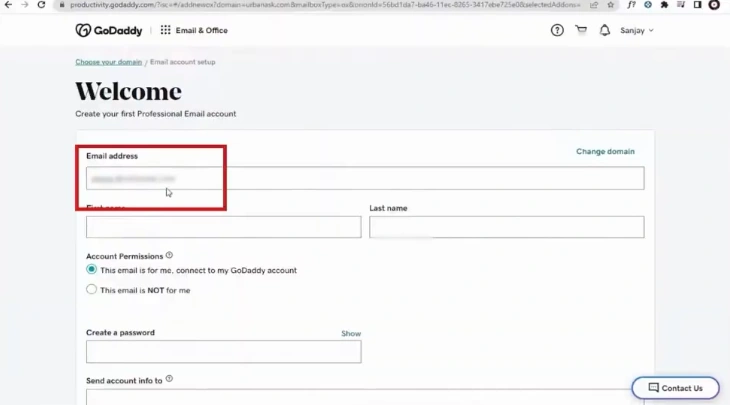
Step 6: On the Welcome page, enter the email address, first name, and last name.
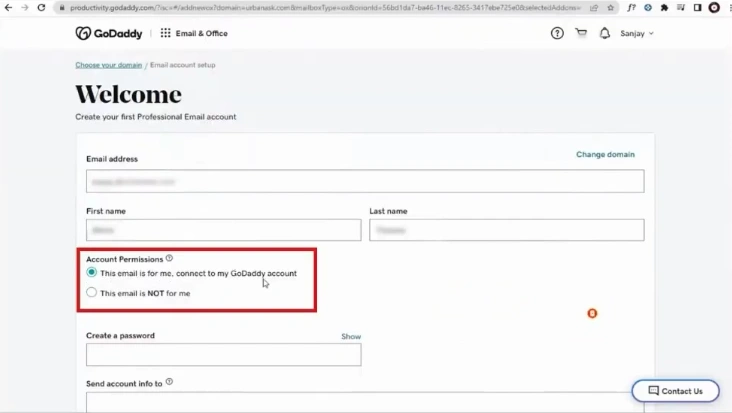
Step 7: Select your desired option in Account Permissions.
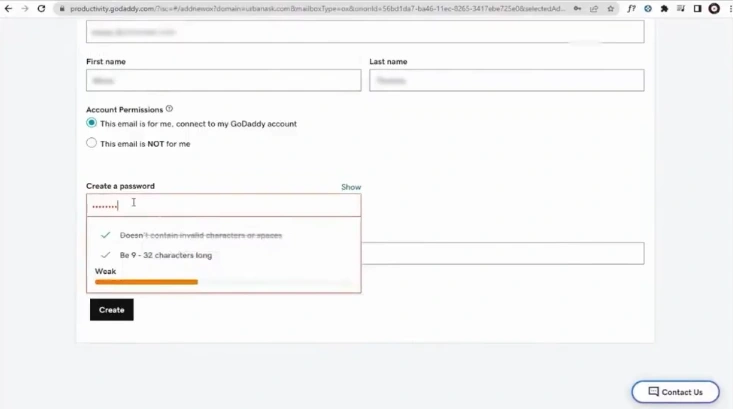
Step 8: Create a password.
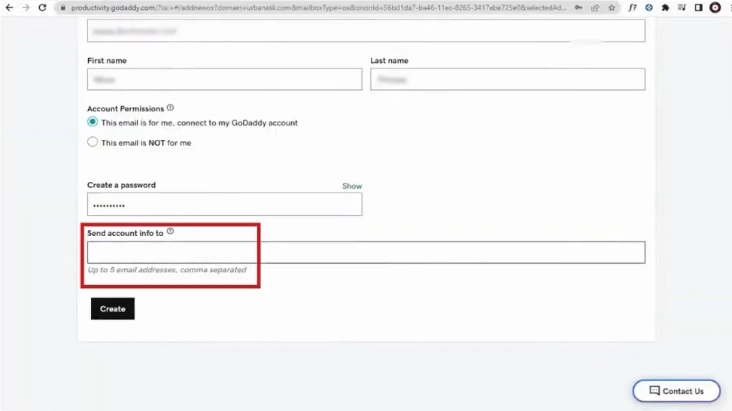
Step 9: In the “Send account info to” field box, add existing email addresses.
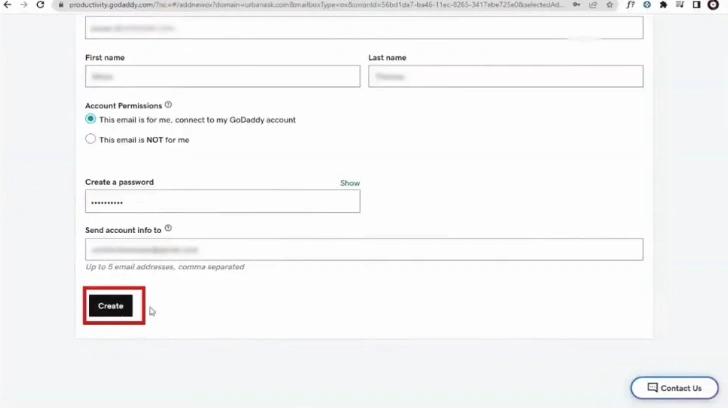
Step 10: Click on Create.
Summing Up
That’s how you create a professional email GoDaddy. Now you’re ready to send professional-looking emails to your customers, letting them know the level of credibility your brand has.
Follow the above method correctly, without skipping any instructions. Be cautious of potential issues, such as incorrect email client configuration, email not syncing across devices, and other similar problems.
 Verified Expert