How to Add a Disclaimer in Outlook?
- 0
- 644

Whenever you hit the Send button in Outlook Mail, you always think that your message is clear and professional. But in reality, this is not always the case. There may be something very important that is missing in your message.
Maybe it is a confidentiality statement, or a company policy reminder that must show up at the bottom of every email you send. It can be time-consuming to type a disclaimer each time, and forgetting it even once can lead to serious confusion or compliance issues.
So, how do you add a disclaimer in Outlook Mail? Let’s go through the steps. We have discussed the entire method for adding a disclaimer to both Windows and macOS systems. Before starting, it’s helpful to know the issues that can occur during the process.
Problems That Can Arise When Adding a Disclaimer in Outlook
Adding a disclaimer in Outlook is simple, but several challenges come along the way and create obstacles. The most common ones are:
-
Duplicate disclaimers
-
Permission limitations
-
Compatibility problems
-
Reply and forward limitations
Things to Check Before Adding a Disclaimer
It’s good to keep everything in check before adding a disclaimer in Outlook. Here’s what you need to know:
Admin Access
Check that you have the necessary administrator permissions. This is mainly required when you are adding a company-wide disclaimer in Outlook.
Email Format Settings
See if emails are sent in HTML, Rich Text, or Plain Text, as disclaimers may not show up correctly in every format.
Formatting and Brand Style
The logos, fonts, links, and spacing in the disclaimer should be consistent across different devices and email clients. So, make sure to check this first.
Rule Configuration
It is up to you to decide whether to apply the disclaimer using Outlook rules or server-side mail flow rules.
Disclaimer Content
Review the text to avoid any mistakes. Everything should be accurate and follow legal requirements. Always mention the correct contact details.
Steps to Add a Disclaimer in Outlook (Windows/Mac)
We have provided the steps to insert a disclaimer in Outlook for both Windows and Mac. Let’s start with Windows first:
For Windows
Step 1: Open Outlook on your PC.
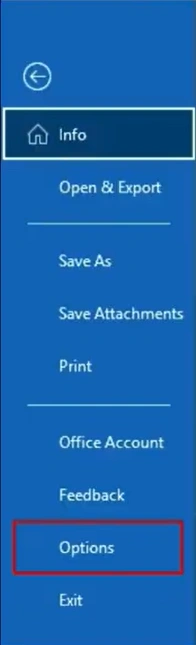
Step 2: Go to File at the top left corner.
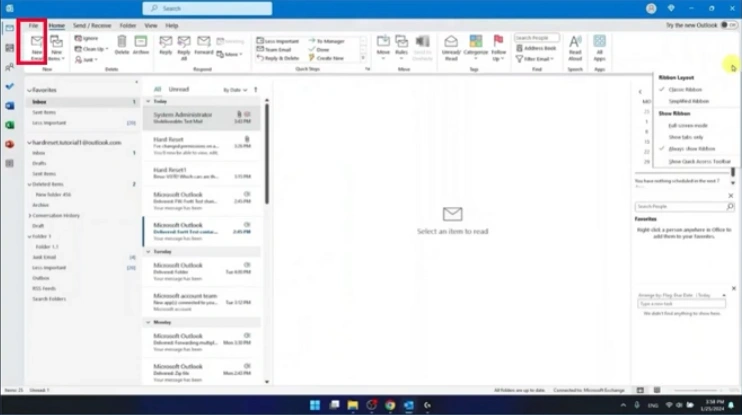
Step 3: Click “Options.”
Step 4: Click on the Mail tab.
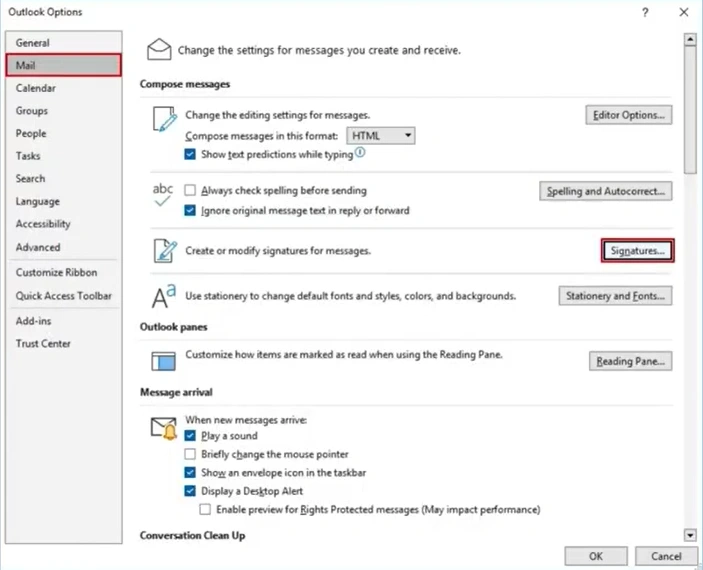
Step 5: Click on Signatures (under “Compose messages”)
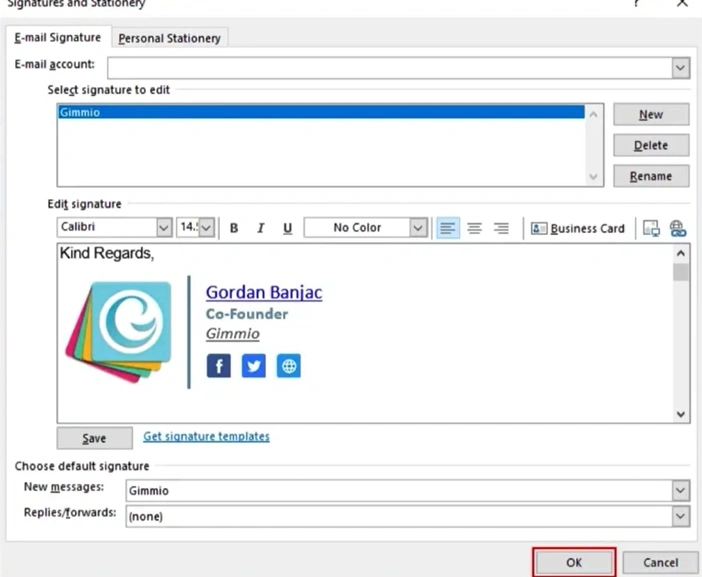
Step 6: You will see the Signatures and Stationery window.
Step 7: Go to the Edit Signature field and paste the Disclaimer content.
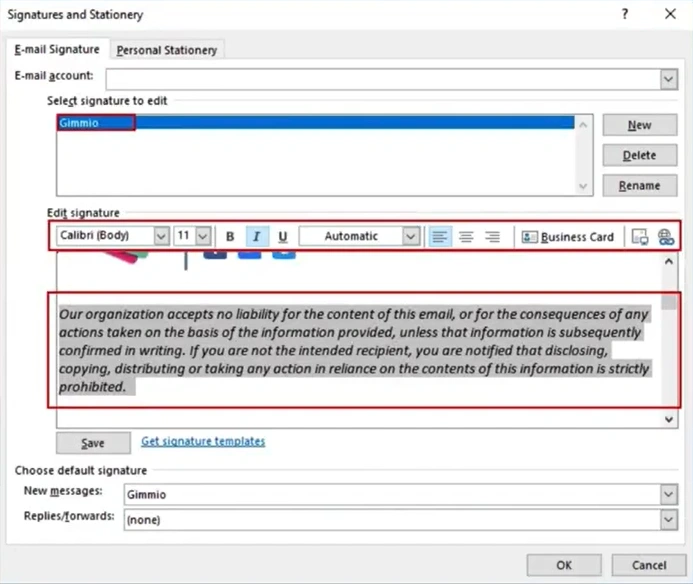
Step 8: Once done, click on OK.
For Mac
Step 1: Open Outlook.
Step 2: Click on the “Outlook” menu (at the top left corner)
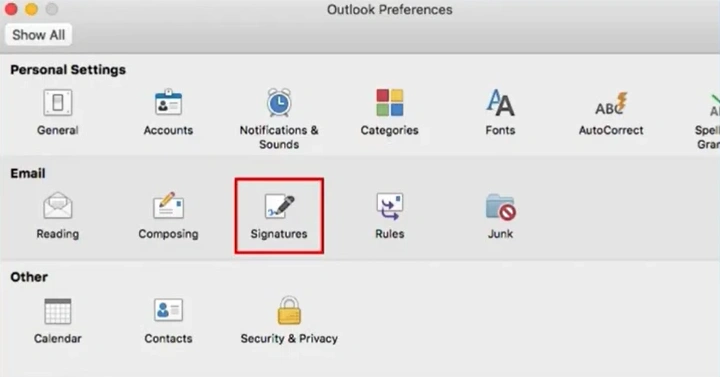
Step 3: Select “Preferences” from the list.

Step 4: From the list, under the Email section, open “Signatures.”
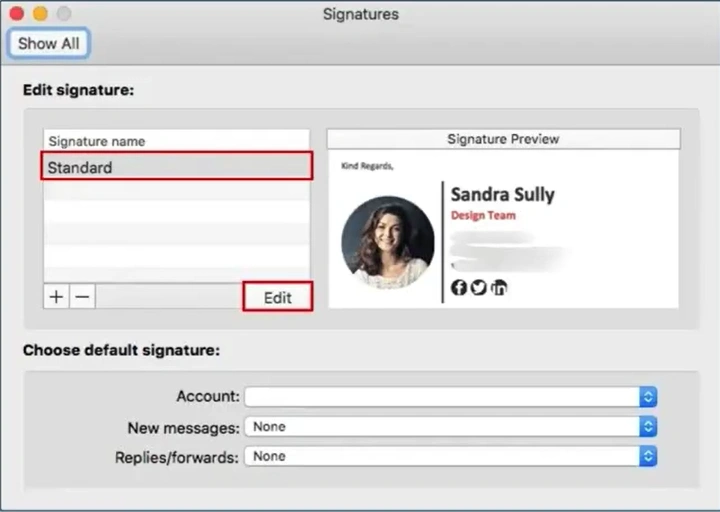
Step 5: In the Signatures window, select the signature you want to edit.
Step 6: After selecting the signature, click “Edit.”
Step 7: Now paste the disclaimer content.
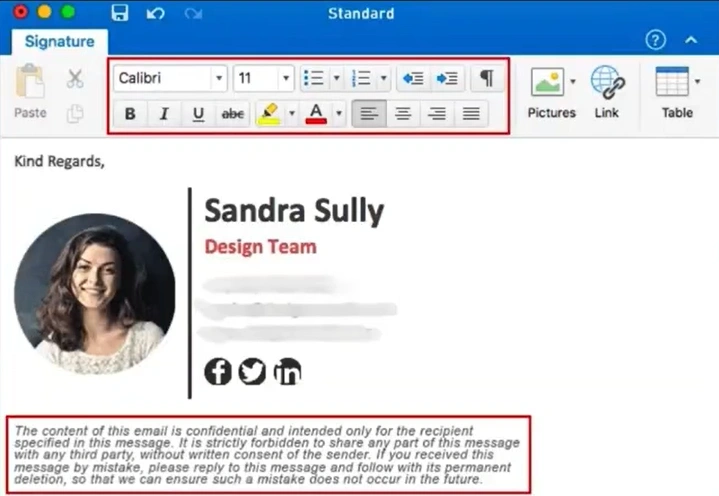
Step 8: Click Save to apply the changes.
Bottom Line
See how simple it was to add a disclaimer in Outlook. Follow the above steps, and soon you’ll be sending your professional emails containing the necessary legal notices and confidentiality statements. This looks professional and also saves time. Be prepared for potential challenges and ensure that you have checked everything.
Frequently Asked Questions (FAQs)
 Verified Expert