
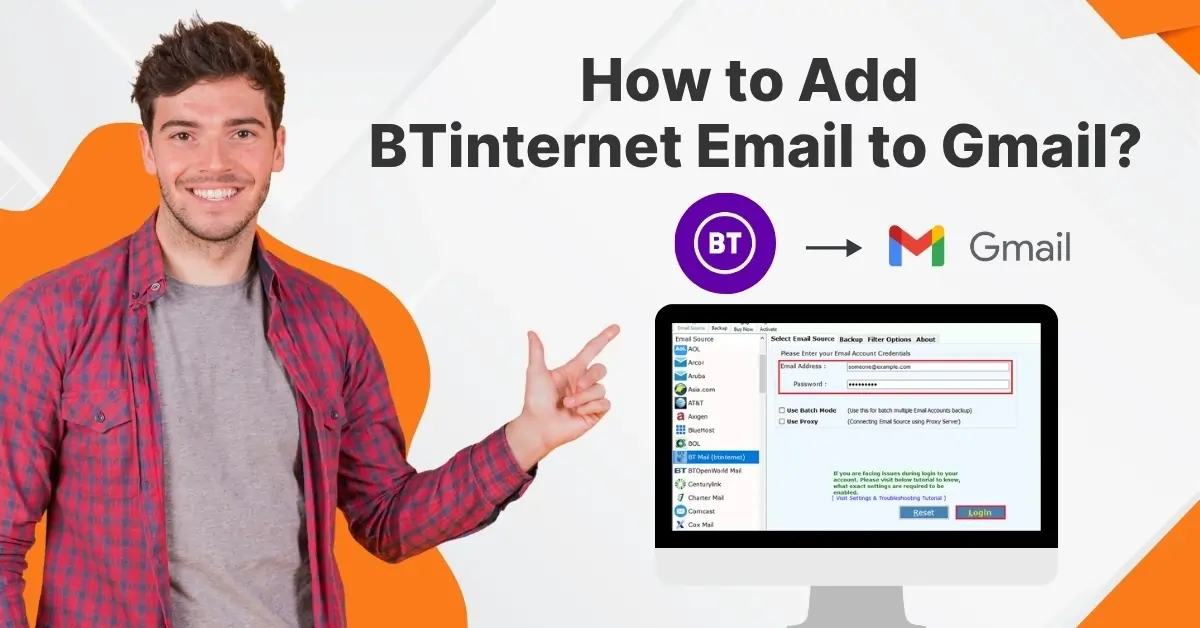
How to Add BTinternet Email to Gmail?
- 0
- 709
Have you ever tried to add your BTinternet email to Gmail but ended up giving up because you got confused? If yes, you are not alone. Maybe you thought it would be a quick setup process, but things turned out differently. Suddenly, you came across unfamiliar terms like SMTP, POP3, and server ports and started seeing error messages like “Connection timed out” or “Could not retrieve mail,” wondering if you had clicked the wrong button. This can be frustrating.
Sometimes, Gmail wouldn’t recognize the BTinternet account, or it would connect and then stop syncing after a few hours. At this point, you may become anxious if you lose access to important emails. Sounds similar? Don’t worry! This guide walks you through all the necessary steps to add your BTinternet email to Gmail and shows the common issues you may face during the process. Read on!
Common Issues When Adding BTinternet Email to Gmail
When adding the BTinternet email to Gmail, users may experience issues. Additionally, there might be challenges when receiving emails in Gmail if you haven’t configured your BTinternet account settings correctly. These are the specific issues:
-
Incomplete or delayed import
-
Folder hierarchy issues
-
Less secure apps are not enabled
-
Outdated or incorrect settings
Steps to Add BTinternet Email to Gmail
When you add your BTinternet email to your Gmail account, you can access your BTinternet emails directly within the Gmail interface. Here are the steps on how to add BTinternet email to Gmail:
Step 1: Open your Gmail account.
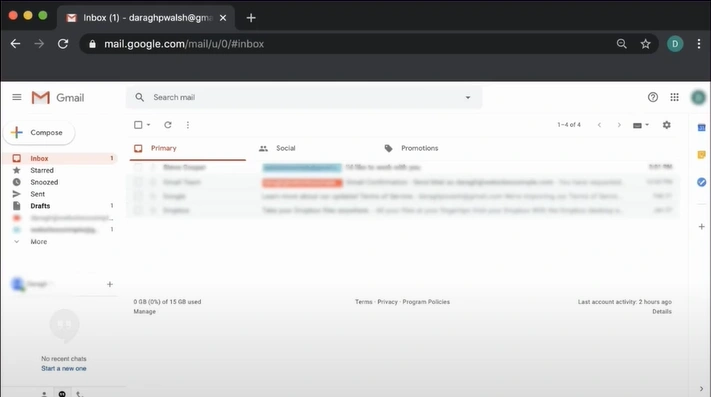
Step 2: Click the gear icon in the right-hand corner.
![]()
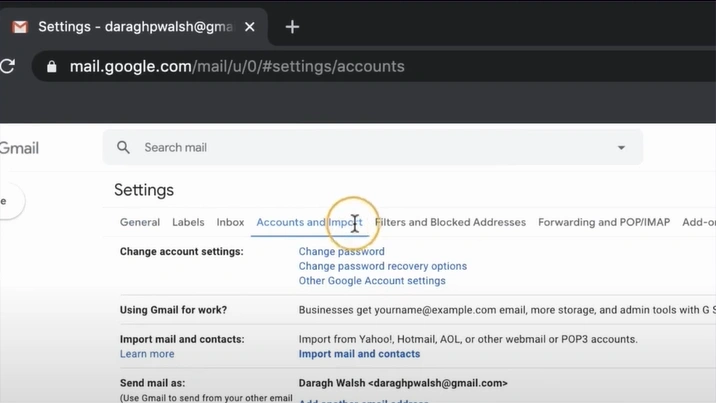
Step 3: Click on Settings.

Step 4: Select the Accounts and Import option.
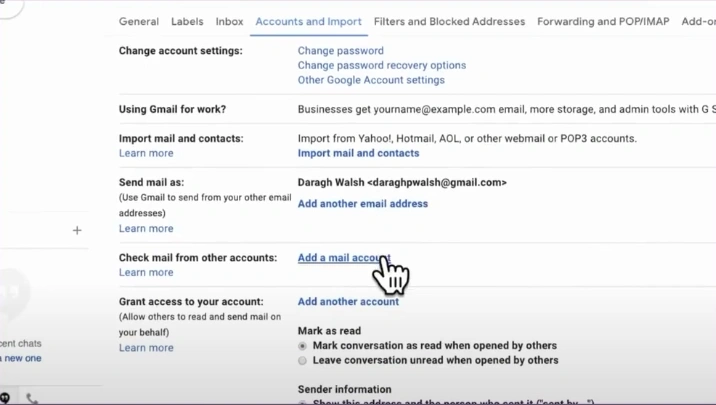
Step 5: Scroll down and click on Add a mail account.
Step 6: A new window will pop up, asking to add a new email account.
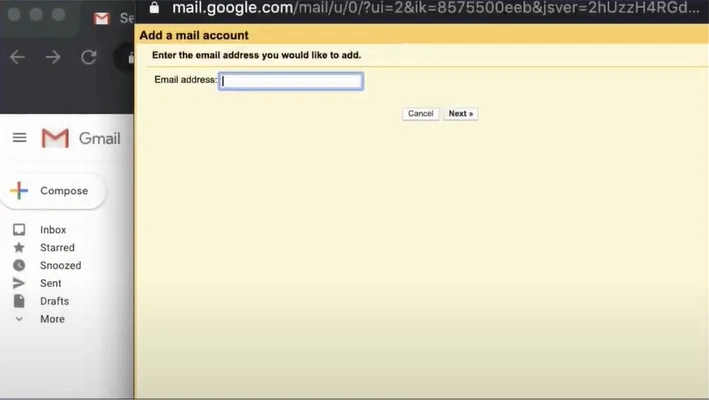
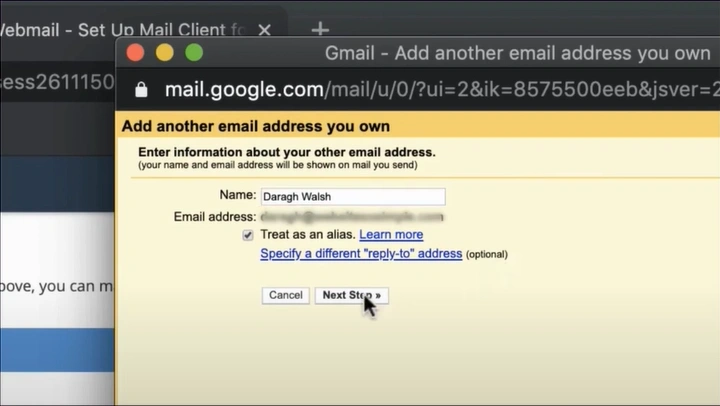
Step 7: Type your email and click on Next.

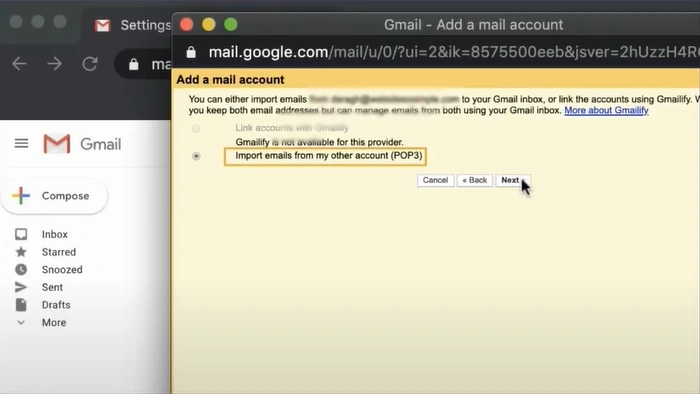
Step 8: To add your BTinternet email, select the POP3 option and click on Next.
Step 9: A window will appear asking for your account details.
Step 10: In the username, use your email address, including the @btinternet or @btopenworld.com part, then type the password.
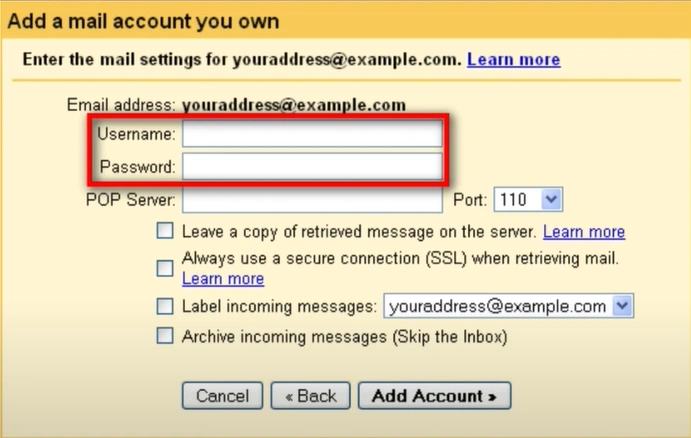
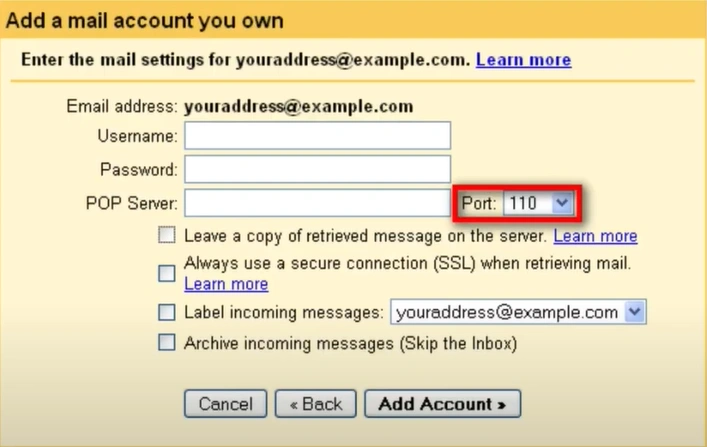
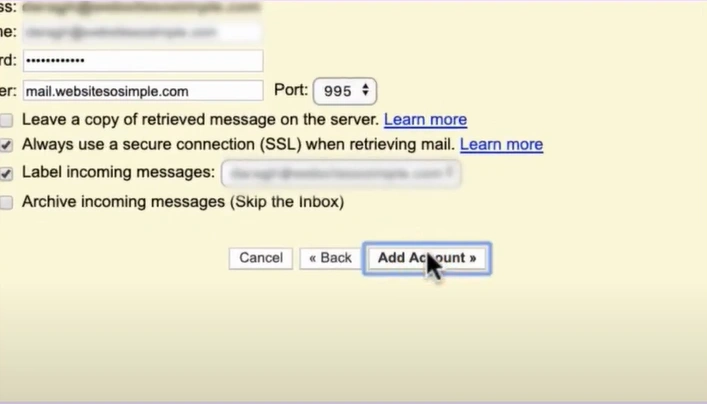
Step 11: In the POP Server field, type in mail.btinternet.com.
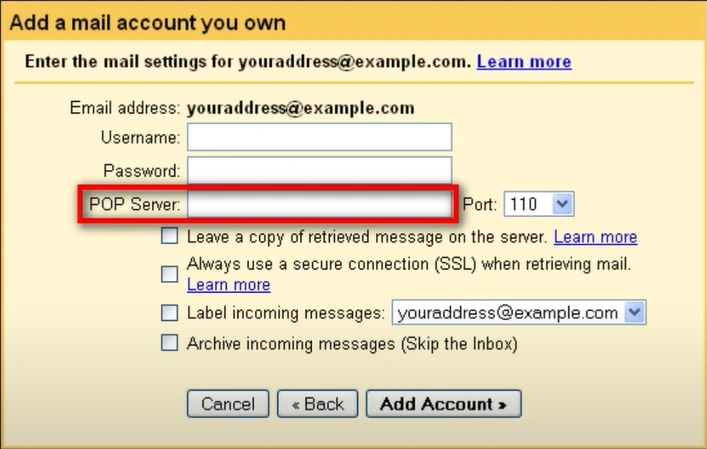
Step 12: In the Port, select 995.
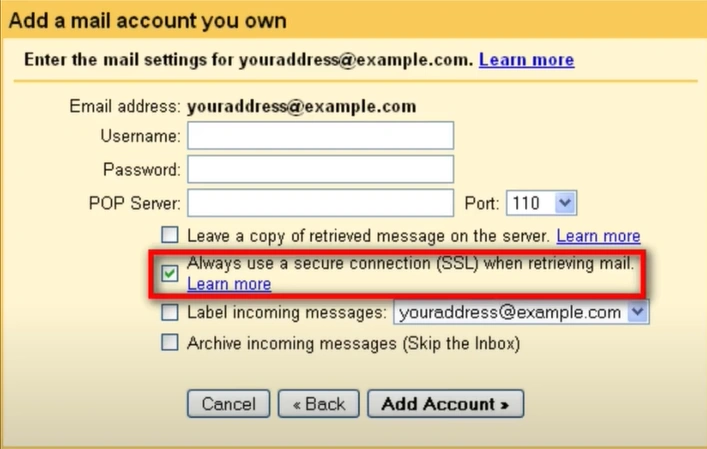
Step 13: Check the Always use a secure connection (SSL) box.
Step 14: Click on the Add Account button.
Step 15: Select Yes to be able to send emails, and then click on Next.

Step 16: Write an account name and proceed to the next step.
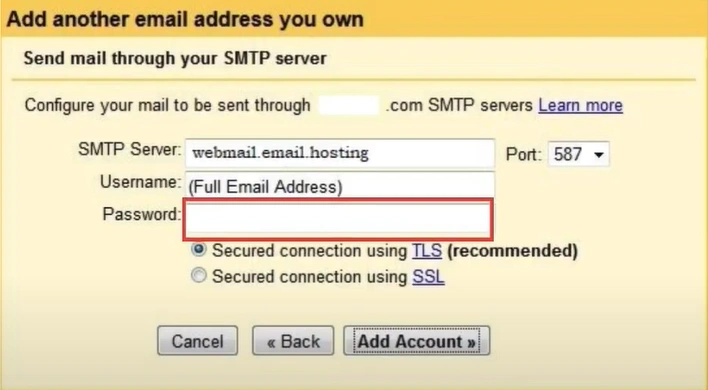
Step 17: In the SMTP server, write mail.btinternet.com.
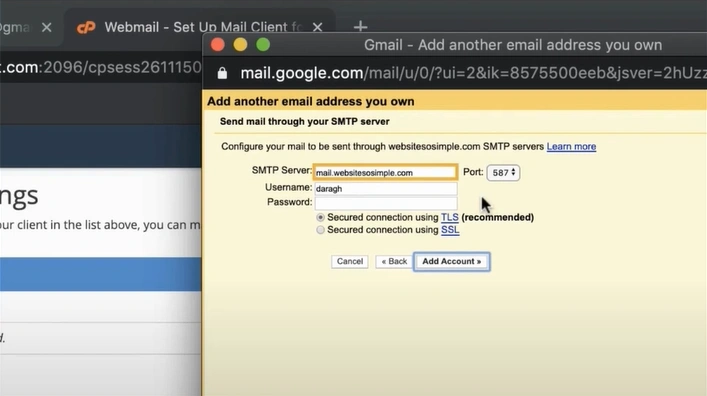
Step 18: In Port, select 465.
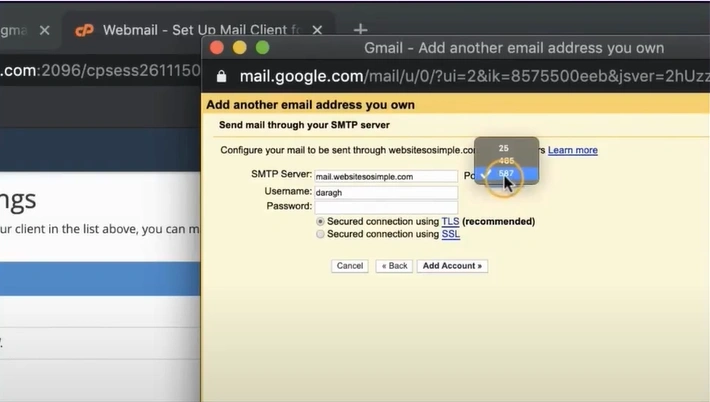
Step 19: In the Username box, enter your full BT email address, such as username@btinternet.com or username@btopenworld.com.

Step 20: Type in your password and click on Add Account.
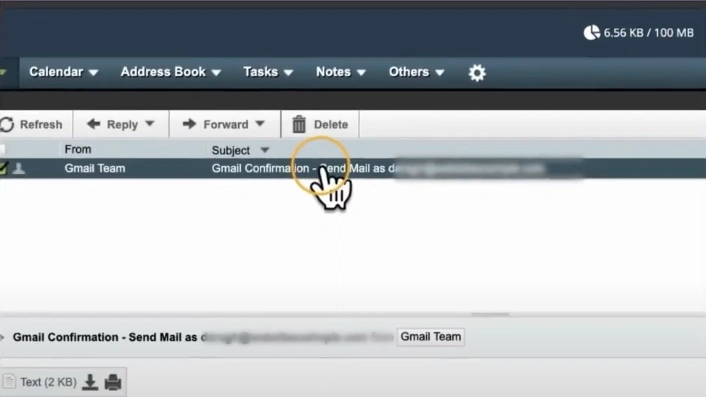
Step 21: Click the confirmation link or type the code sent to your email address and verify.
In a Nutshell
Yes, it may feel tricky at first to add BTinternet email to Gmail, especially when all the technical terms come together. But once you follow the right steps, the process gets much easier. By following the above steps, you will be able to access your BTinternet emails from your Gmail inbox. If you still encounter issues while following these steps, consider connecting with a professional.
 Verified Expert
![Can't Send Emails on BTinternet [Fixed]](https://helpemailtales.com/upload/blog/686f80d8d370a_can-t-send-emails-on-btinternet-fixed-.webp)


