How to Add Hostinger Email to Gmail?
- 0
- 712
Managing multiple email accounts can become difficult, and while switching between accounts, you may miss an important message from a client or team member.
Switching from the Gmail inbox to Hostinger wastes a lot of your time, and you can’t afford that. You might be using Hostinger for work or business and Gmail for daily communication. What if you could get both inboxes in one location? That can ease your everyday stress caused by switching between accounts.
We have outlined the complete process of adding a Hostinger email to Gmail. Before moving ahead, we want to share the possible problems that may obstruct the process.
Potential Problems When Adding Hostinger Email to Gmail
Adding Hostinger email to Gmail is simple, but sometimes there can be issues along the way that create an obstruction. The most common ones are:
-
Port number or server hostname errors
-
Incorrect IMAP, POP, or SMTP settings
-
Wrong email credentials
-
Two-factor authentication is blocking the connection
-
Gmail security or verification issues
Steps to Add Hostinger Email to Gmail
Below, we’ve mentioned the entire process to successfully add Hostinger email to Gmail. Let’s begin with the first part:
Add Hostinger Email to Gmail (Send Mail As - SMTP)
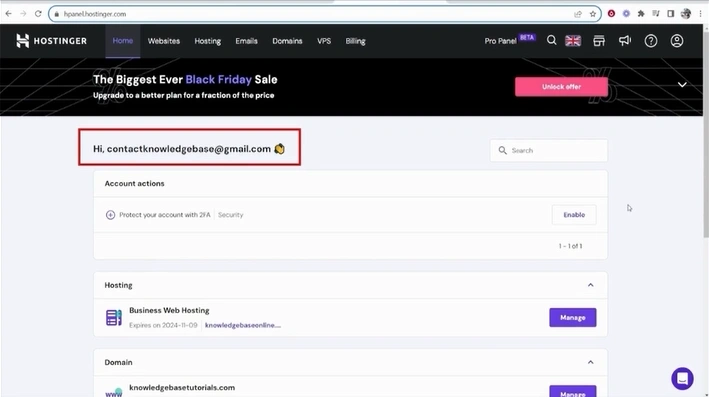
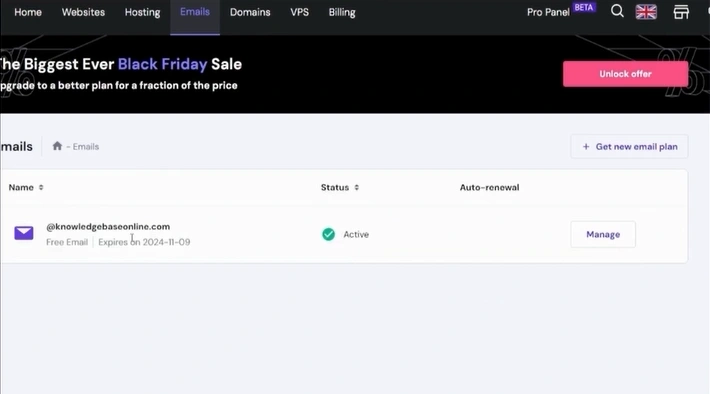
Step 1: Open your browser and go to the official Hostinger website.
Step 2: Log in to your account.
Step 3: Go to the Email tab.
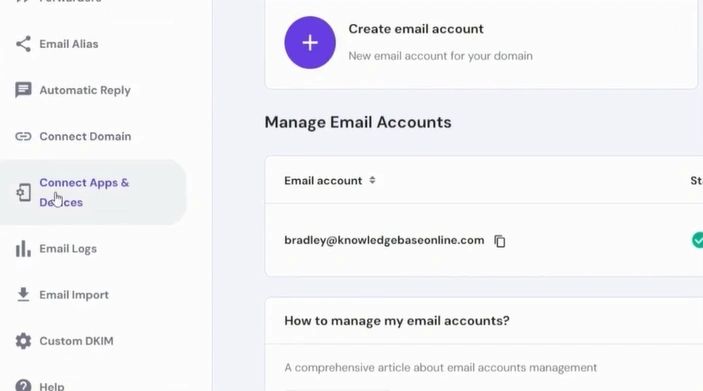
Step 4: Click “Manage” next to the email address you want to add to Gmail.
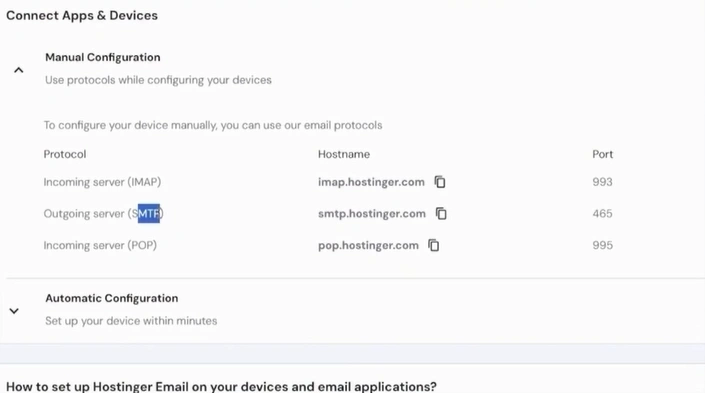
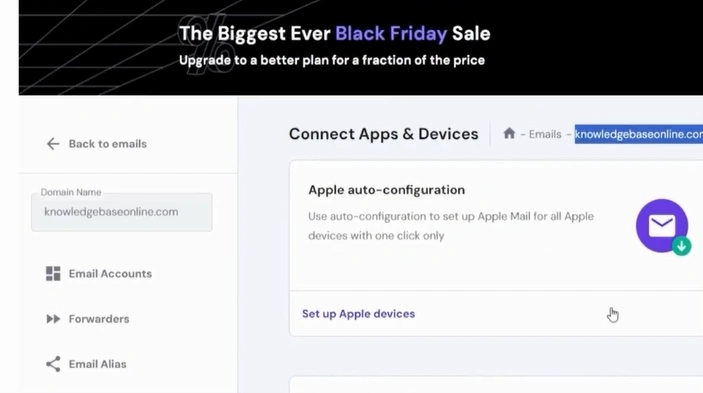
Step 5: On the email dashboard, click on Connect Apps & Devices.
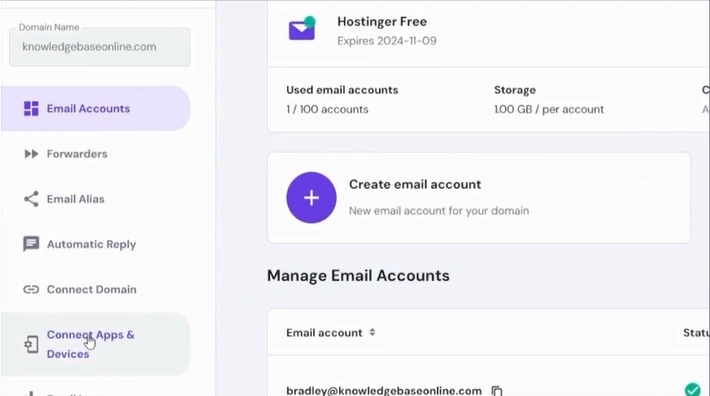
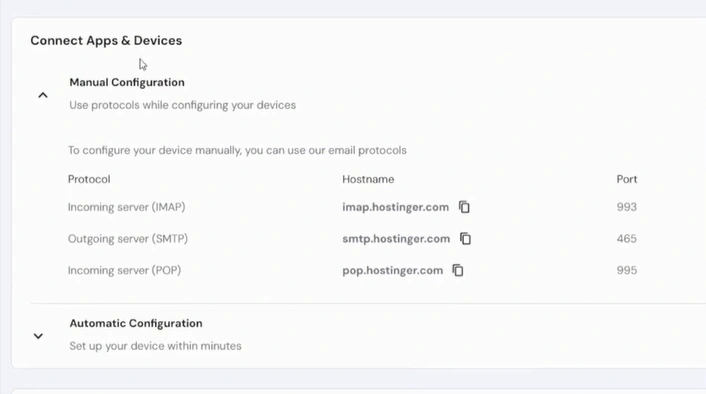
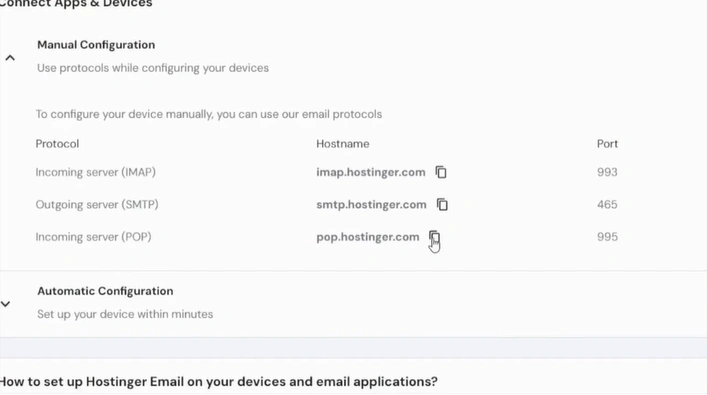
Step 6: Go to the Connected Apps & Devices section. Here, you can find the IMAP, SMTP, and POP information.
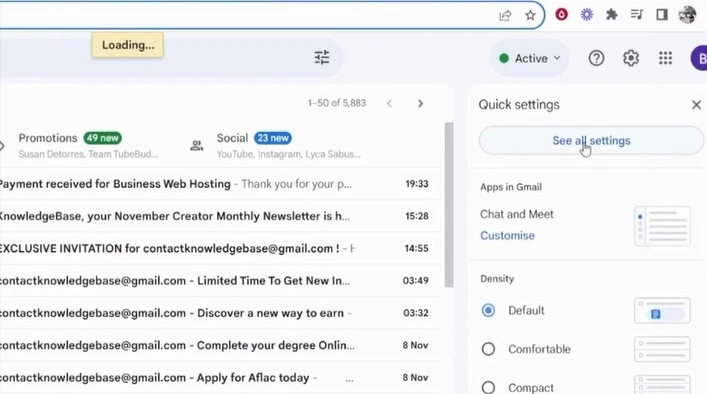
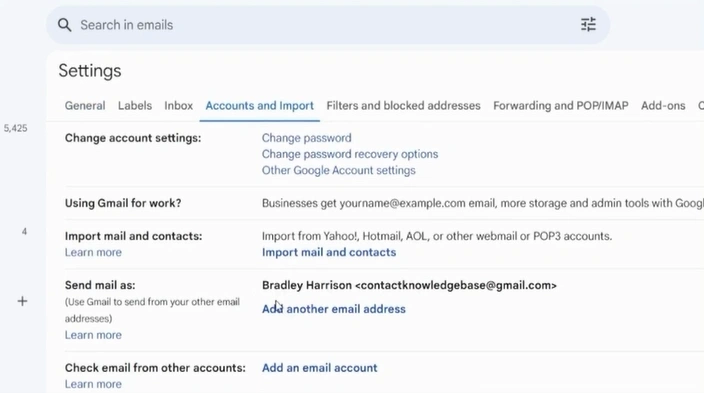
Step 7: In Gmail, click Settings (gear icon).
![]()
Step 8: Click on See all Settings.
Step 9: Open the Accounts and Import tab.

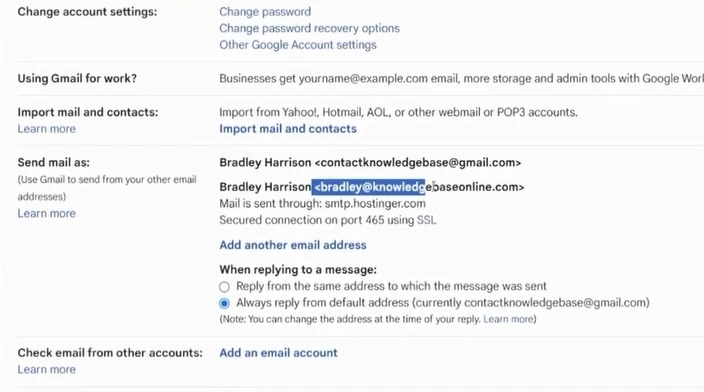
Step 10: Hover over the “Send mail as” section and click on Add another email address.
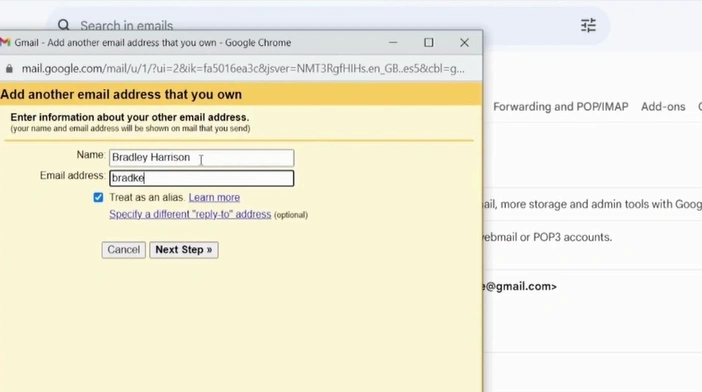
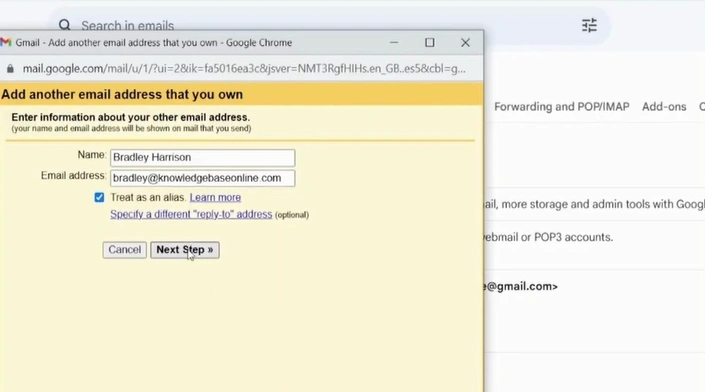
Step 11: A “Add another email address that you own” window will appear.
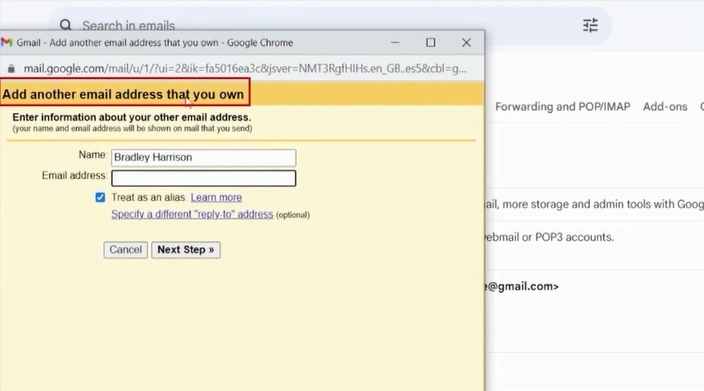
Step 12: Fill in the Hostinger email address you wish to add in the email address field.
Step 13: Click on Next Step.
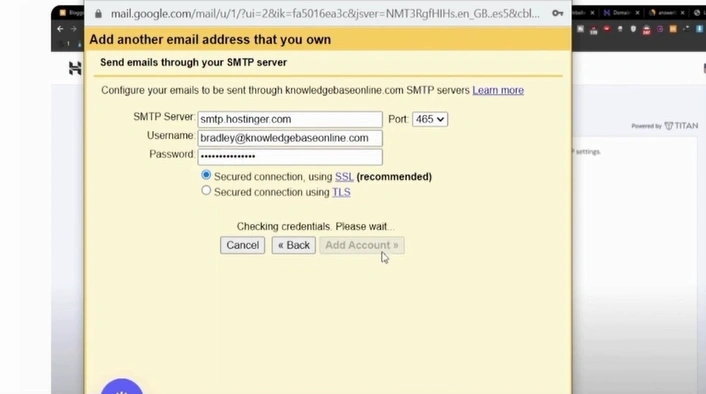
Step 14: “Send emails through your SMTP server” will show up.
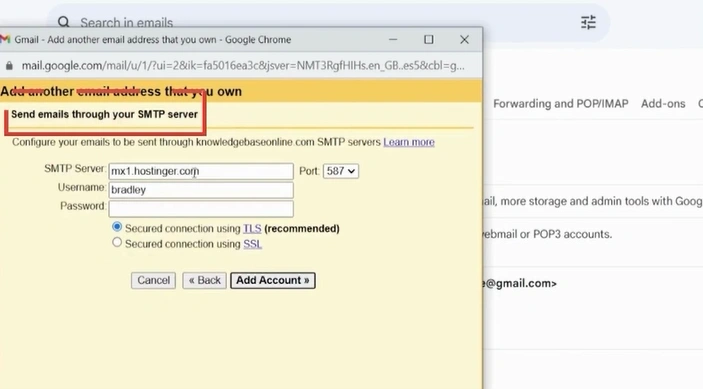
Step 15: In the Hostinger window, copy the SMTP server hostname, and pick up the port number.
Step 16: Return to the Gmail window, paste the hostname in the SMTP server, and select “465” in Port.
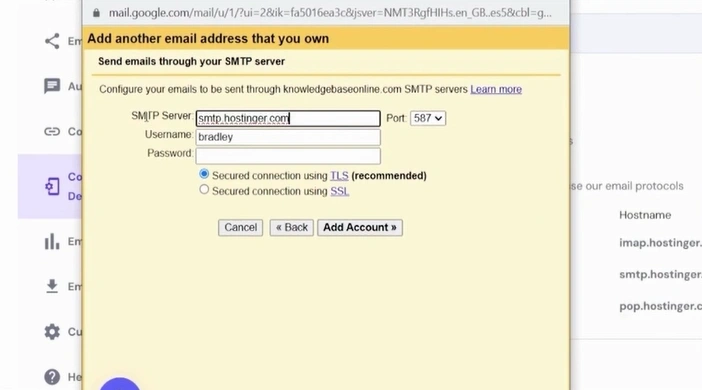
Step 17: Fill in your Hostinger email address in the Username field.
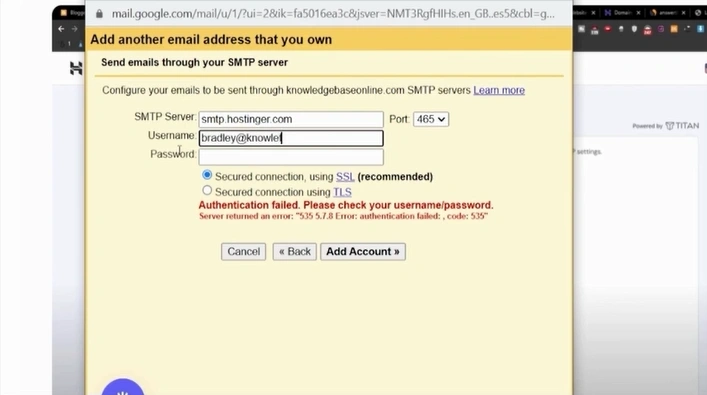
Step 18: Enter your password and click “Add account.”
Step 19: Go back to Hostinger’s email inbox to confirm the verification.
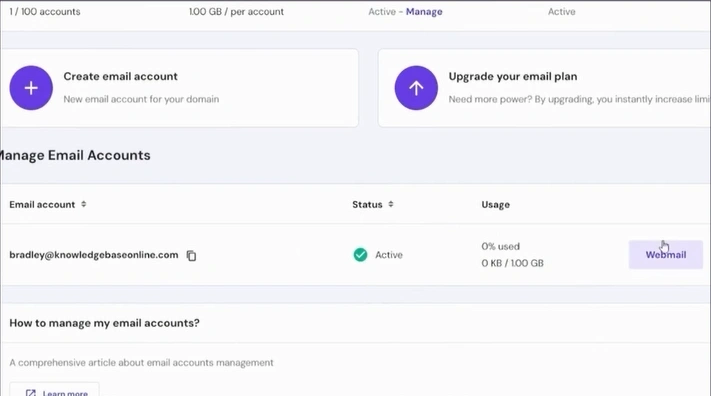
Step 20: Click “Email Accounts” from the left panel.

Step 21: Click on the Webmail button next to the email you want to add to Gmail.
Step 22: You’ll be redirected to your Hostinger email.
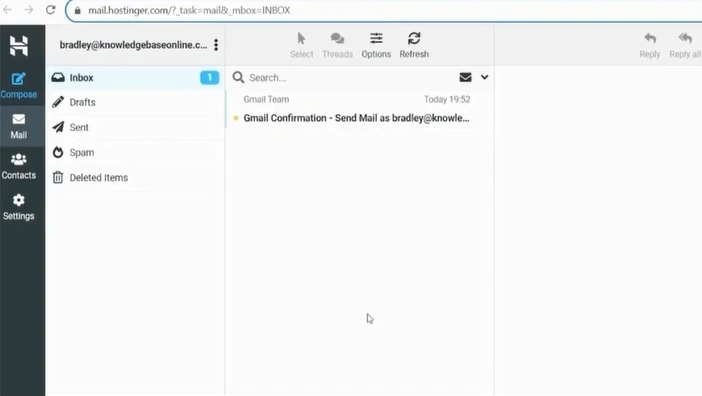
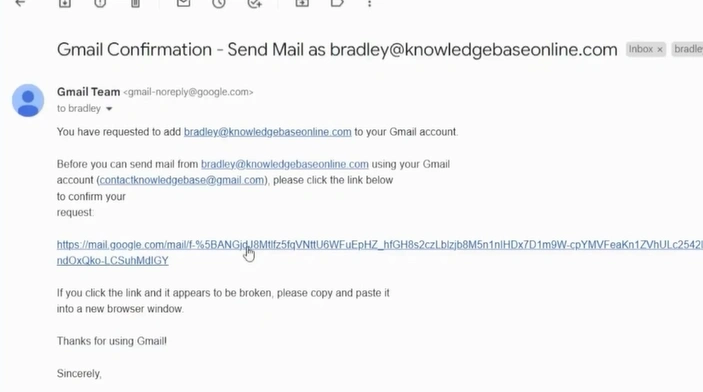
Step 23: From the inbox, click the verification email sent from Gmail.
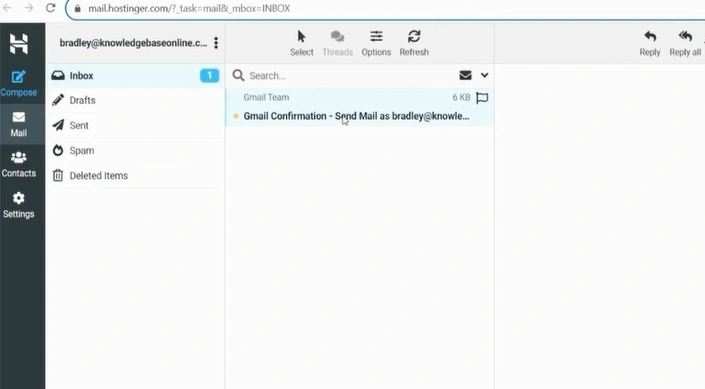
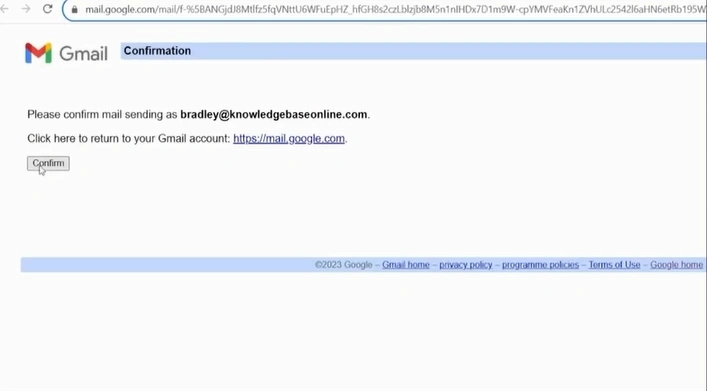
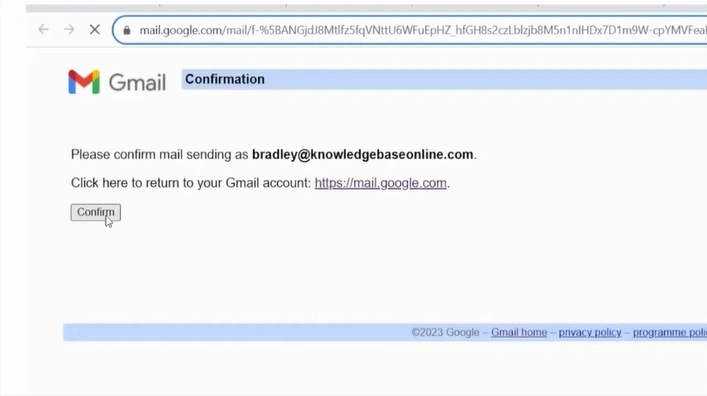
Step 24: Click the link given in the message.
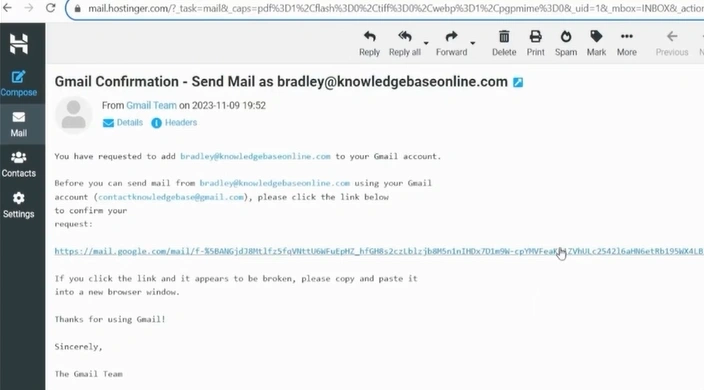
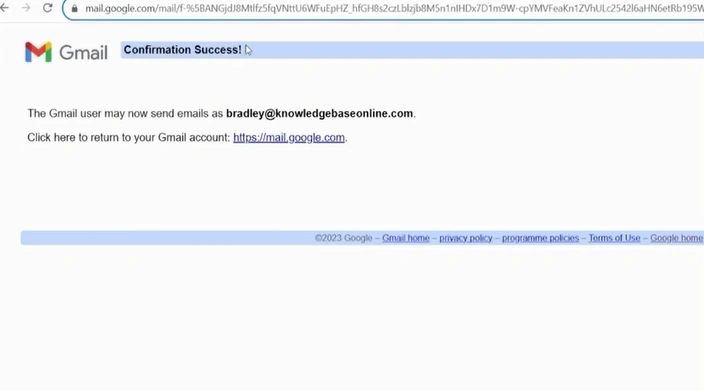
Step 25: Click on the “Confirm” button.
Step 26: You’ll see a confirmation message at the top.
Receive Hostinger Emails in Gmail (POP Settings)
Step 1: Go to Gmail, and click on the Settings icon.
![]()
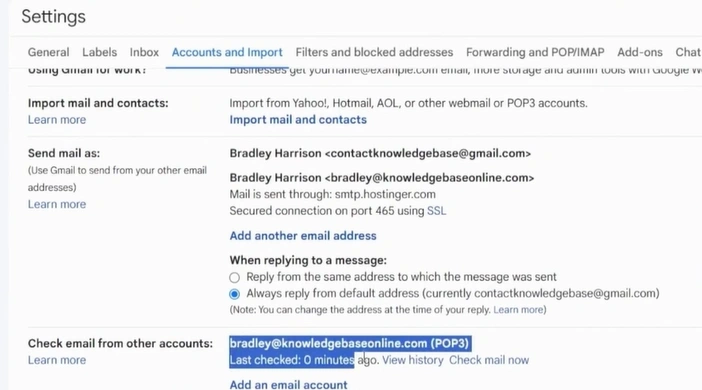
Step 2: Click See all settings, then open the Accounts and Import tab.
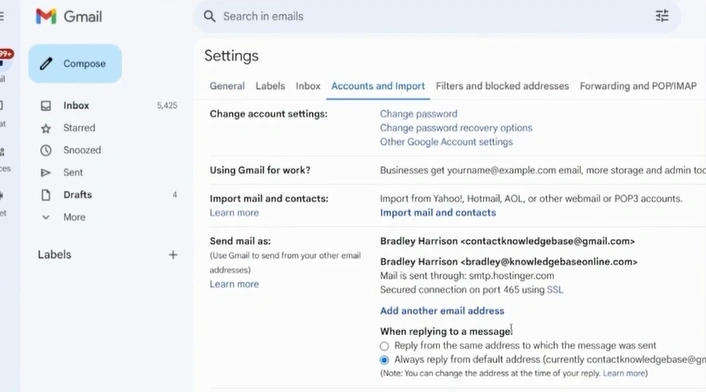
Step 3: Go to the “Send mail as” section and check that the email is listed.
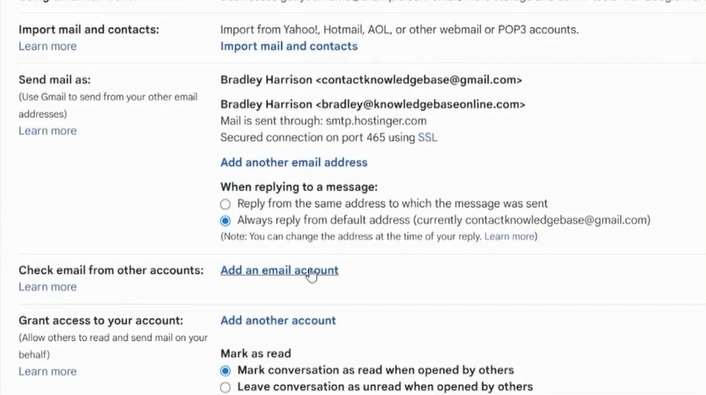
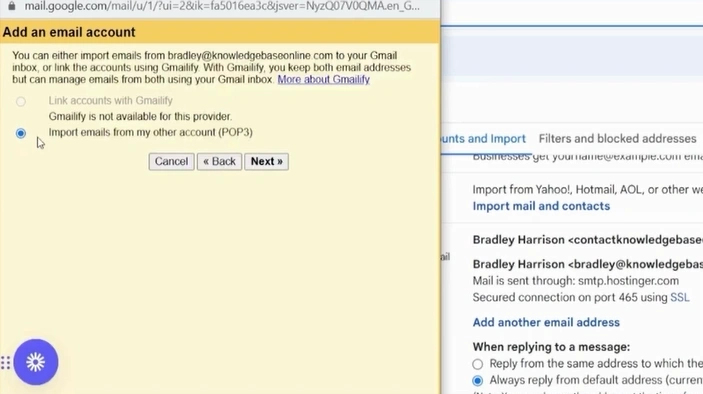
Step 4: Just beside “Check emails from other accounts,” click “Add an email account.”
Step 5: Enter the Hostinger email address you added.
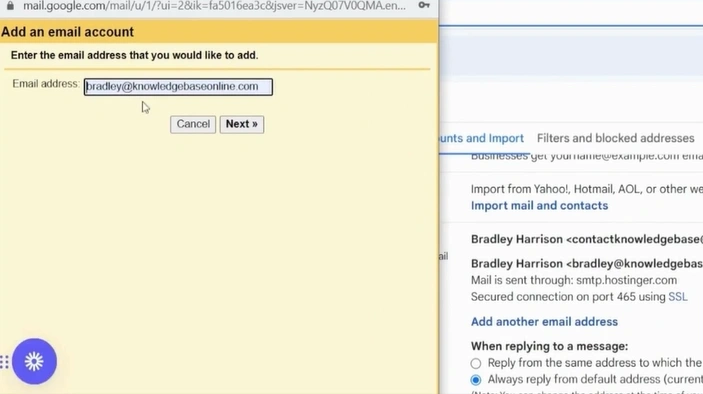
Step 6: Click on the Next button.

Step 7: Choose your import options and click “Next.”
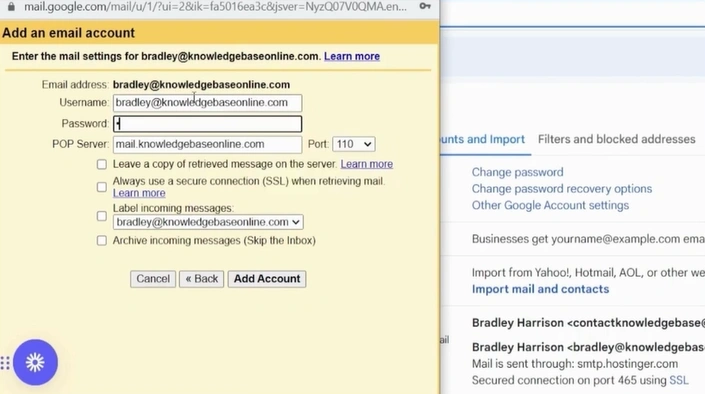
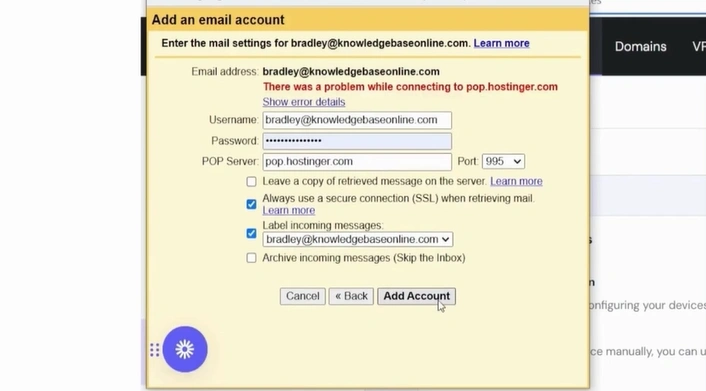
Step 8: In the “Enter the mail settings for” window, enter the username and password.
Step 9: Return to Hostinger and click “Connect Apps & Devices.”
Step 10: Scroll down to Connected Apps & Devices.
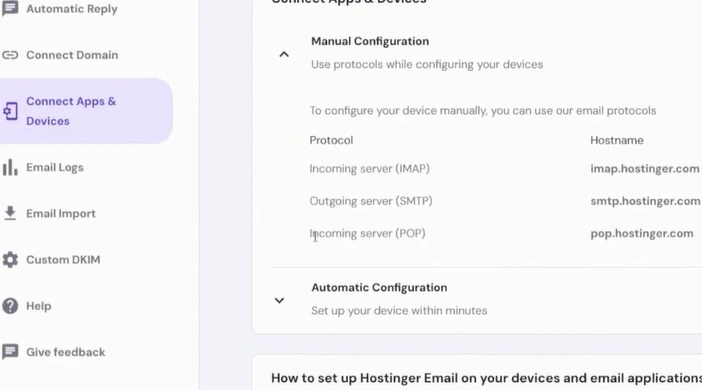
Step 11: Copy the POP server hostname and note the port number.
Step 12: Go to Gmail.
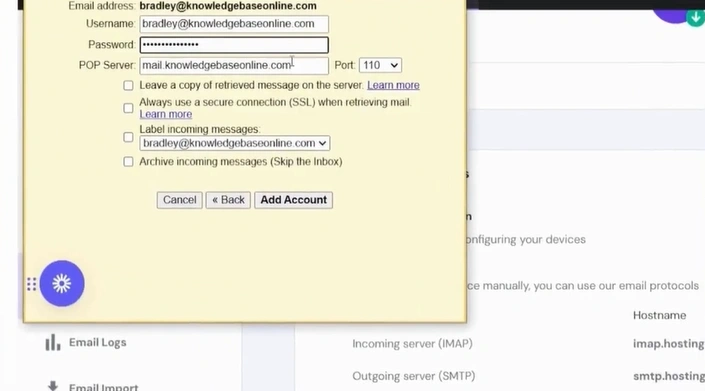
Step 13: Enter the POP server and Port details.
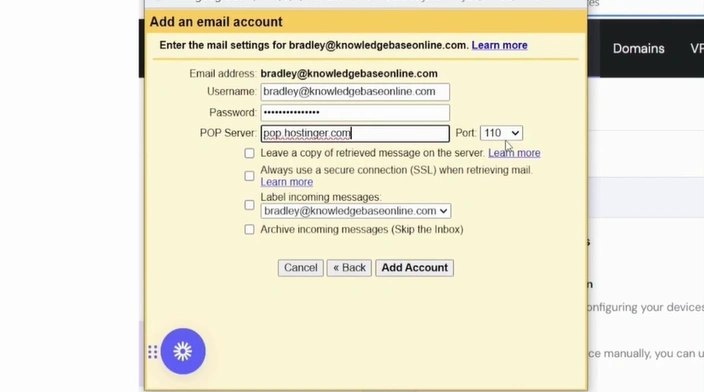
Step 14: Check your desired options.

Step 15: Click on “Add Account.”
Step 16: Open your Gmail and click the confirmation email from Gmail.
Step 17: In the email, click the confirmation link.
Step 18: Click on “Confirm.”
Step 19: Go to Settings > Account and import to check whether your email has been added successfully.
Also Read:- How to Add a Bluehost Email to Gmail?
Final Words
Once the setup is complete, you can effortlessly manage both your Hostinger and Gmail inboxes in one place. Gmail will start syncing emails from your Hostinger account. You can also organize Hostinger emails using labels or filters, which helps keep your inbox clean.
During the process, be sure to enter the correct email credentials and IMAP, POP, or SMTP settings. If 2-factor authentication is blocking the connection, disable it for a while.
Frequently Asked Questions (FAQs)
 Verified Expert