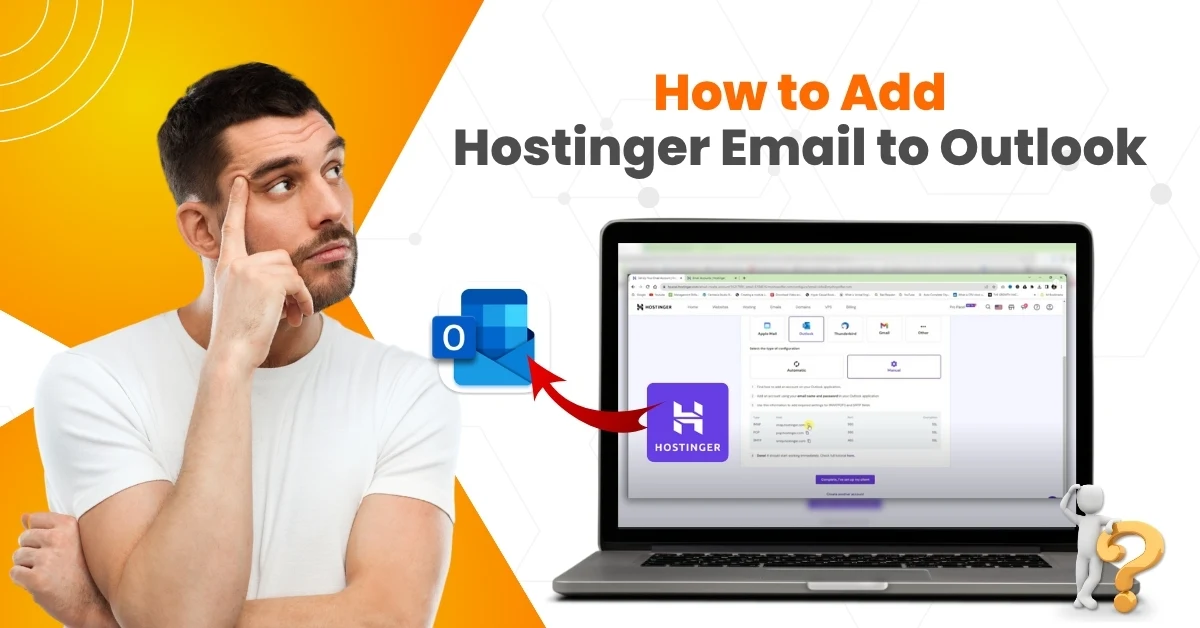
How to Add Hostinger Email to Outlook?
- 0
- 632
Your website is finally live, complete with everything from a sleek design to engaging content - the result of months of brainstorming and planning. Now, it’s time to move to the next step: setting up a professional domain email that makes it easier to connect with clients and partners.
Sending emails from a generic address might not leave a strong impression on recipients, as it can make your communication seem less professional. Wouldn’t it be great if you could use your domain-based Hostinger email in Outlook? Just imagine seeing all your Hostinger emails neatly organized alongside your other accounts.
Once it’s set up, you can easily view, compose, and reply to emails, even when you’re offline. Plus, Outlook offers added security with phishing protection, spam filters, and encryption options. So, how can you add Hostinger Mail to Outlook? Let’s go through the proper steps after checking a few important prerequisites.
What to Know Before Connecting Hostinger Email to Outlook
Here are the key points that you need to know before you link your Hostinger email to Outlook:
Check Your Login Details
Wrong email details can stop your Hostinger account from connecting to Outlook. So, ensure that you have your correct email address and password at hand.
Make Sure Outlook Is Compatible
Make sure you’re using the latest version of Outlook. If you have an older version, it may lack certain features, security improvements, or configuration options necessary for a smooth integration.
Select the Right Settings
Decide whether to use POP3 (downloads mail to one device) or IMAP (syncs mail across all devices). Hostinger recommends IMAP for better accessibility.
Ensure a Stable Internet Connection
When trying to link Hostinger email with Outlook, ensure you have a stable internet connection. A weak network may cause syncing problems or connectivity issues.
Common Problems When Adding Hostinger Email to Outlook
These are some common problems that you might encounter when you add Hostinger email to Outlook:
-
Authentication failures
-
Port number conflicts
-
Outlook version compatibility issues
-
Sync issues after setup
-
Temporary server outages
Steps to Add Hostinger Email to Outlook
Make your email communications more manageable and boost productivity by connecting Hostinger email with Outlook. Follow the steps mentioned below to do this integration:
Step 1: On your computer, open an internet browser and log in to your Hostinger account.
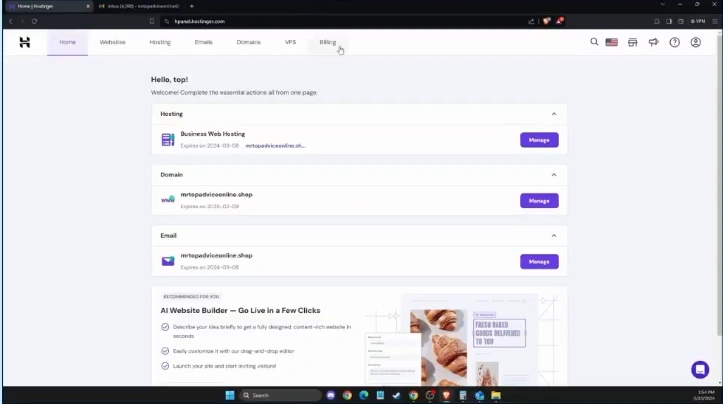
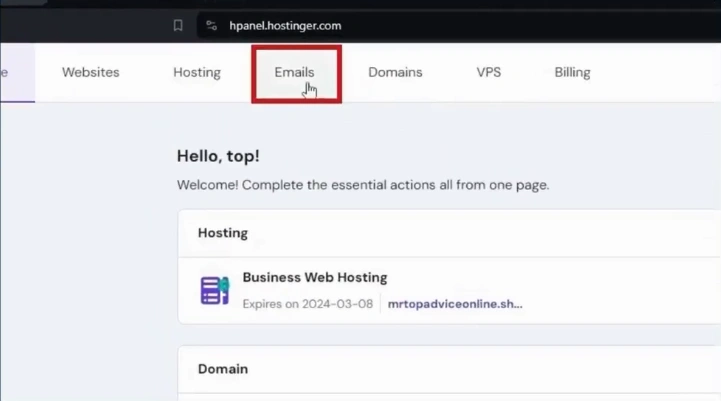
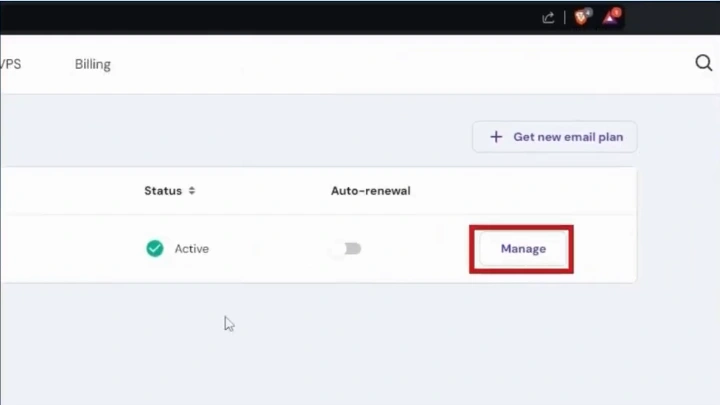
Step 2: From the top bar, select the Emails section.
Step 3: Next, click the “Manage” option next to the email you wish to set up on Outlook.
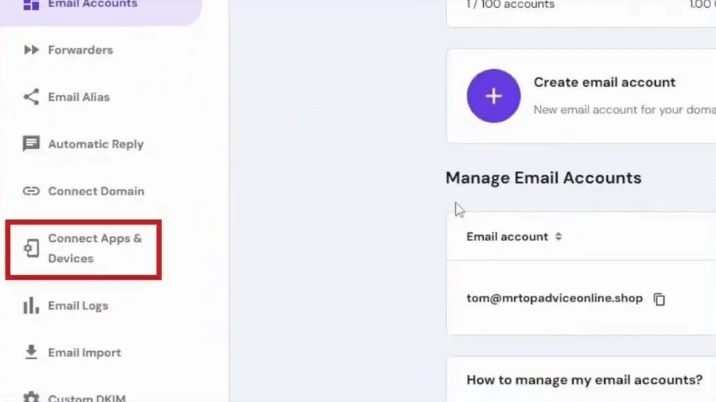
Step 4: Go to the left panel, locate the “Connect Apps & Devices” option, and click on it.
Step 5: Scroll down to the IMAP, SMTP, and POP settings information section.
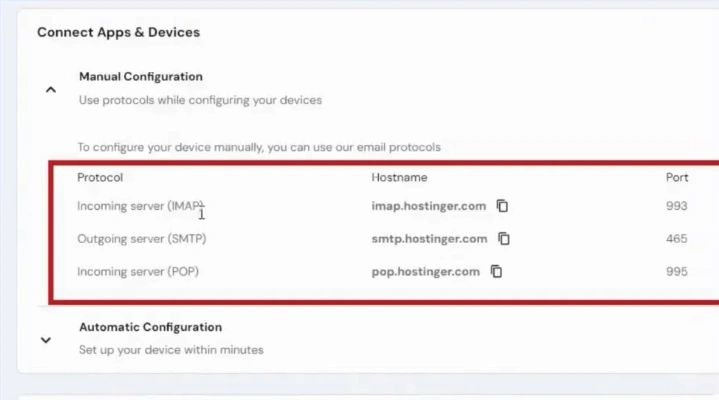
Note: You need the server settings information to add an email to Outlook.
Step 6: Open Outlook on your computer.
Step 7: Locate and select the Settings option in the top-right of the screen.
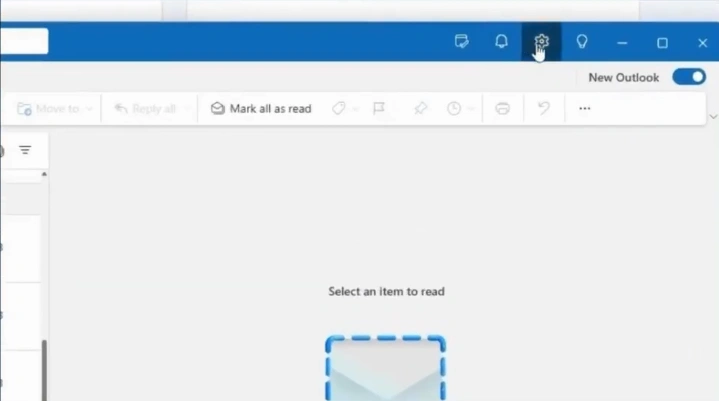
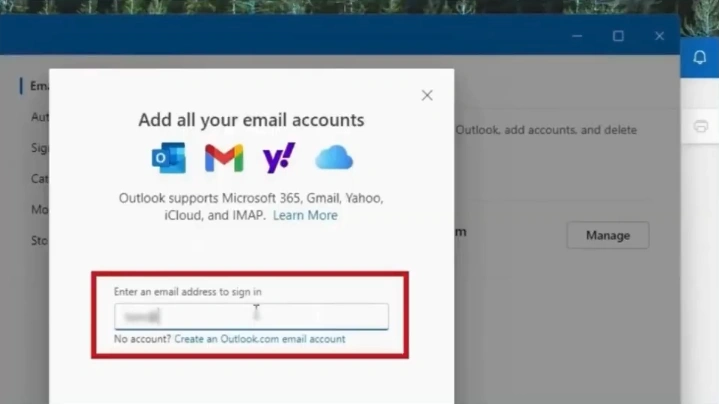
Step 8: Under Email Accounts, click on the + Add Account button.

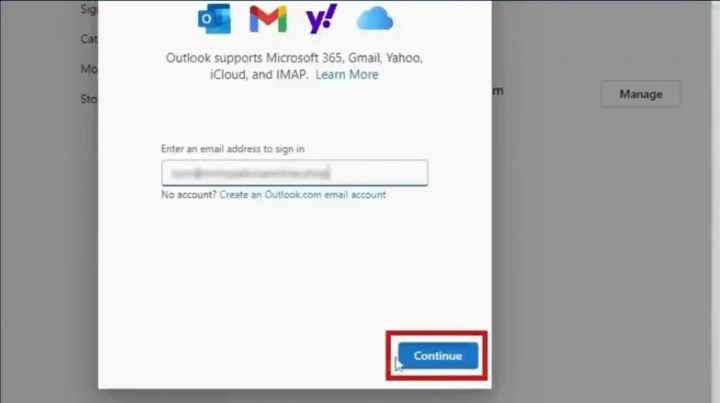
Step 9: Fill in the Hostinger email address you want to add.
Step 10: On the following screen, click the “Continue” button.
Step 11: Now, click “Show more” to view additional options.
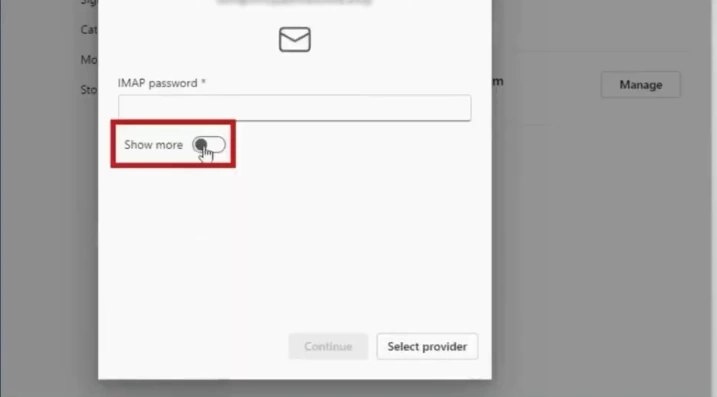
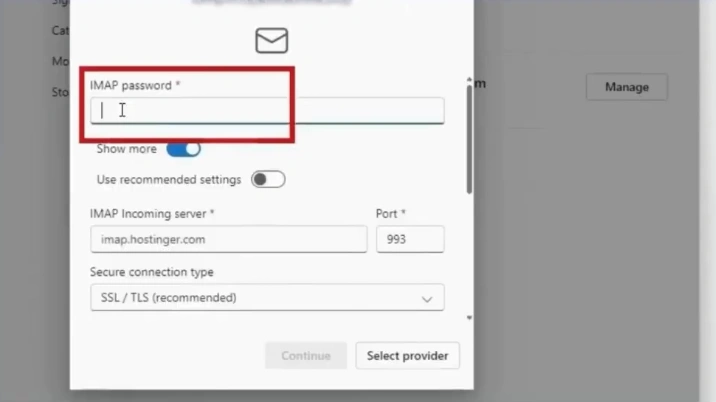
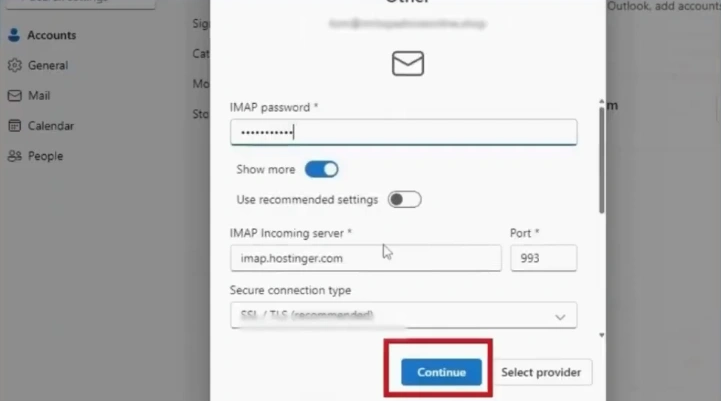
Step 12: Enter the password for your Hostinger email account.
Note: The IMAP password is the password you set to create your business email account.
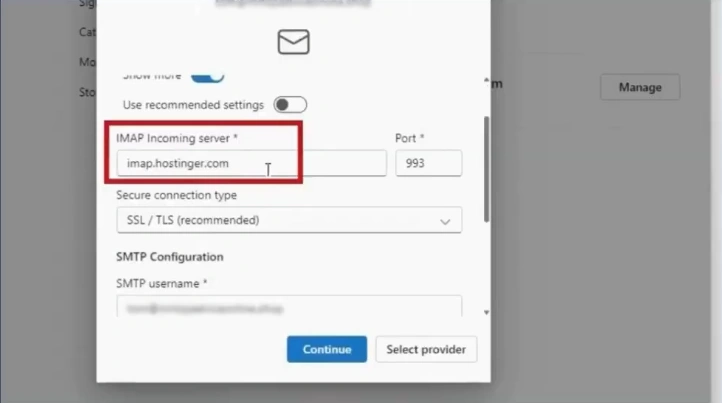
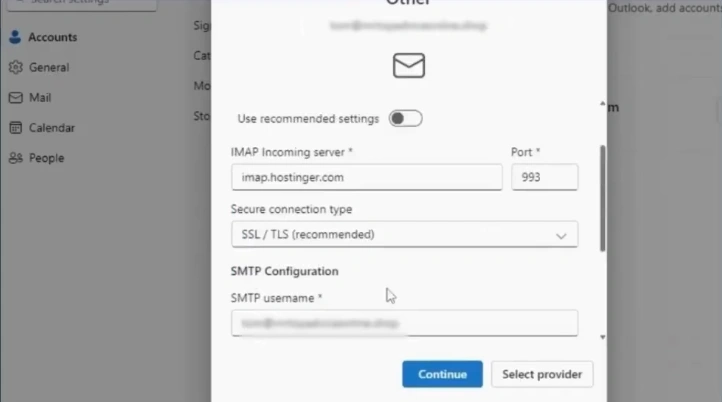
Step 13: Verify the IMAP server settings by matching them to the server settings information provided by Hostinger.
Step 14: Scroll to the SMTP configuration section.
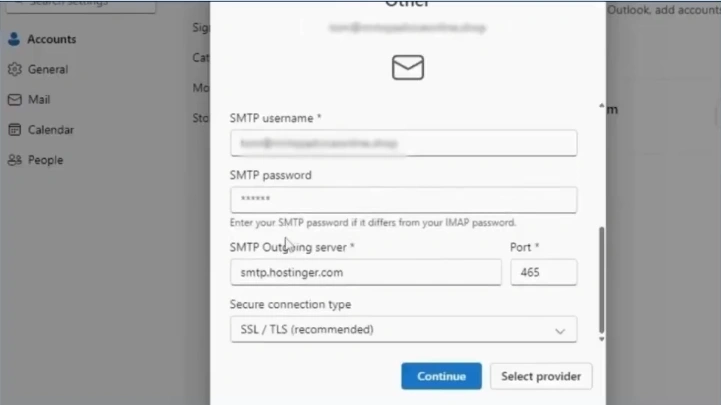
Step 15: Review the SMTP server information.
Step 16: After entering the settings and passwords, click Continue.
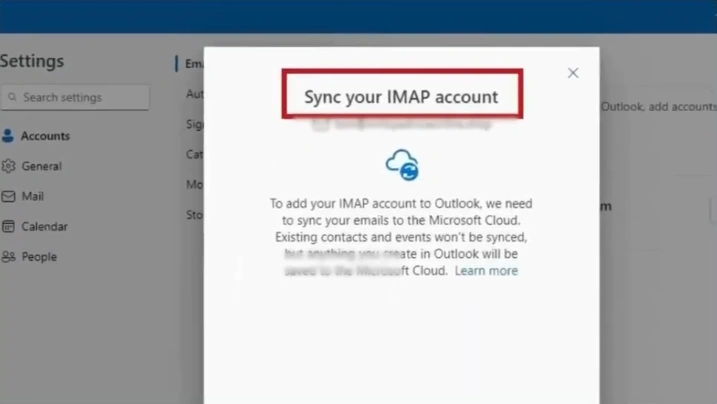
Step 17: In the “Sync your IMAP Account” window, click Continue.
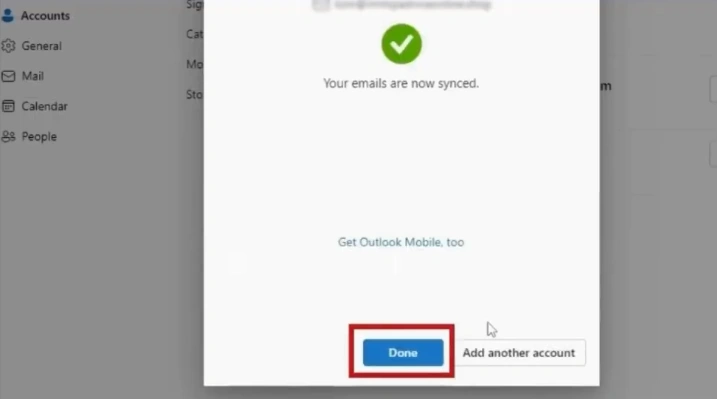
Step 18: After the email gets synced, click on Done.
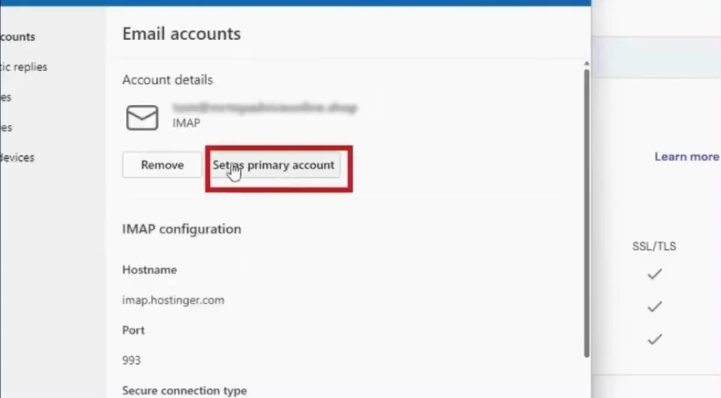
Step 19: In the Email Accounts window, click “Manage” next to the email account you set up.
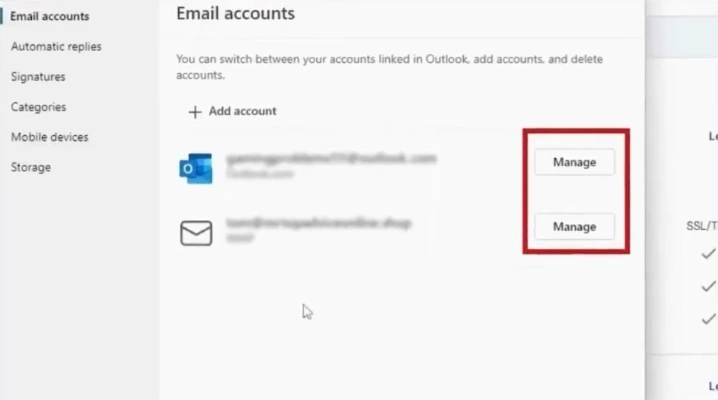
Step 20: Click the “Set as primary account” button if you want to use the account as your primary account.
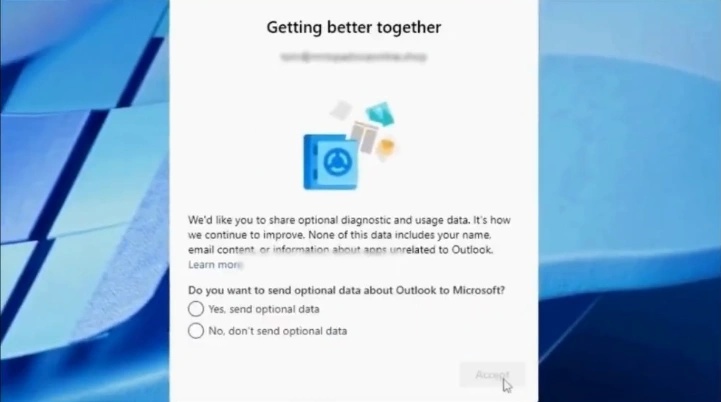
Step 21: Go back to your Outlook, and you will see it setting things up.

Step 22: Follow the on-screen prompts in Outlook to finish setting up your Hostinger email.
Also Read:- How to Configure Outlook for AOL Mail
In a Nutshell
Stick to the instructions we’ve discussed, and you’ll have your Hostinger email connected to Outlook with ease. However, problems such as login failures, port number conflicts, or compatibility issues with older Outlook versions may arise along the way. Make sure to address them properly so that everything runs smoothly.
Once the integration is complete, you can keep all your conversations in one place - no more switching between multiple tabs or accounts. This setup helps you respond to client messages and manage daily tasks while maintaining a completely professional workflow.
 Verified Expert