How to Export Mail From Gmail to Outlook?
- 0
- 537

You have been using Gmail for a long time for your daily work, but now you need to switch to Outlook. In your new job, Outlook is required for communication, and you want all your emails in one place. The good thing is that switching from Gmail to Outlook doesn’t mean transferring all your messages manually, as there is an easy way to export them directly. Curious to learn how to export mail from Gmail to Outlook? You are in the right place! We have explained the entire process in detail, but before that, here are some common mistakes to avoid.
Common Mistakes When Exporting Mail From Gmail to Outlook
Take a look at some of these common mistakes when trying to export mail from Gmail to Outlook:
Not Enabling IMAP Access in Gmail
Many users forget to turn on IMAP in their Gmail settings. Without it, Outlook can’t sync or import emails from your Gmail account.
Using the Incorrect Account Type
If you choose POP instead of IMAP, it can cause missing folders or one-way syncing. For smooth two-way email sync, always select IMAP.
Skipping Data Backup
Exporting without creating a backup can be risky. It may lead to accidental data loss, so download a backup through Google Takeout before starting the sync.
Wrong Email Address or Password
If you have enabled two-factor authentication (2FA), you have to create an App Password for Outlook in place of your regular Gmail password.
Problems That May Occur When Exporting Mail From Gmail to Outlook
Exporting emails from Gmail to Outlook is quite simple. However, certain issues may appear and interrupt the process. These include:
-
Authentication errors
-
Connectivity issues
-
Large mailbox size
-
Duplicate emails
-
IMAP/POP configuration problems
Steps to Export Mail From Gmail to Outlook
Here are all the essential steps to know for exporting mail from Gmail to Outlook:
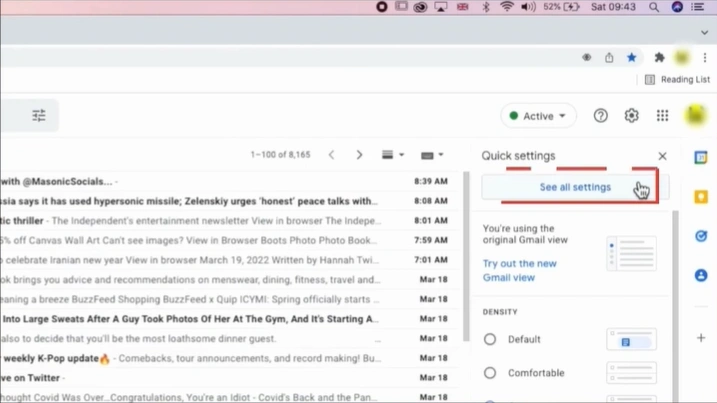
Step 1: First, open Gmail and click on the Settings icon located at the top right.
![]()
Step 2: Next, click the “See all settings” option.
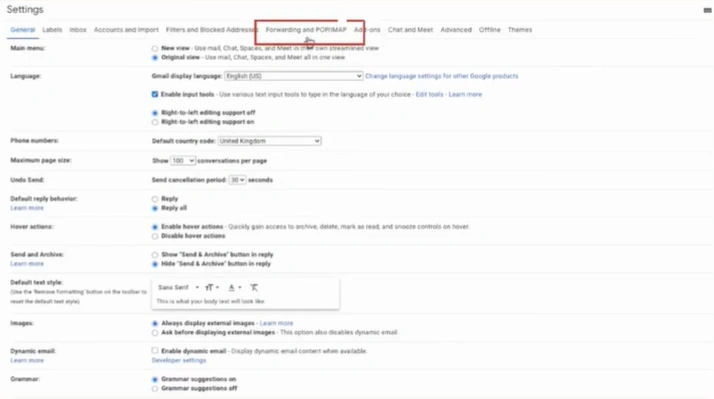
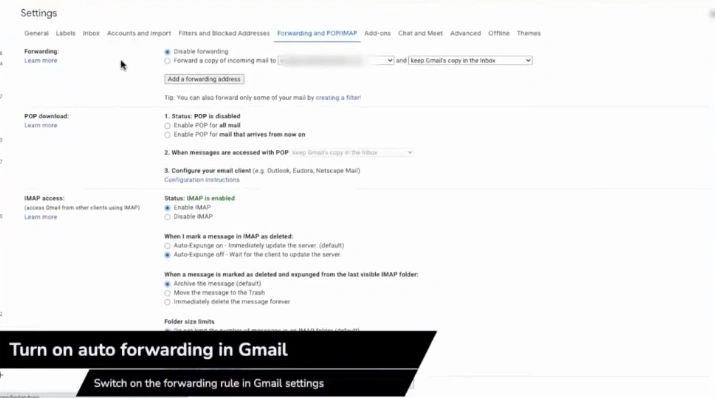
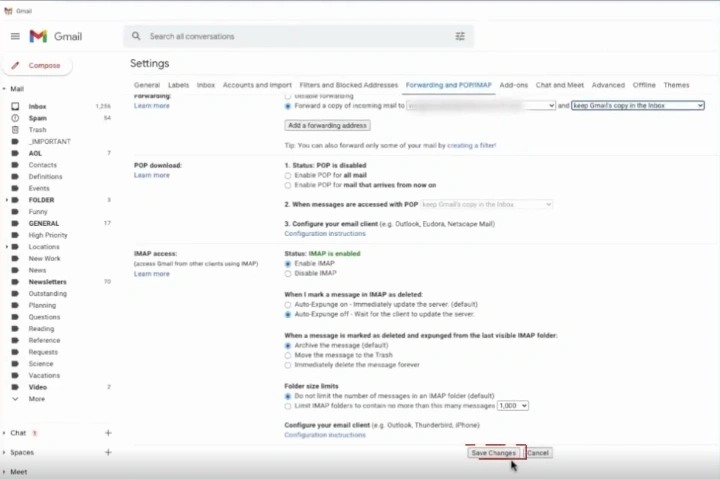
Step 3: Open the Forwarding and POP/IMAP tab.
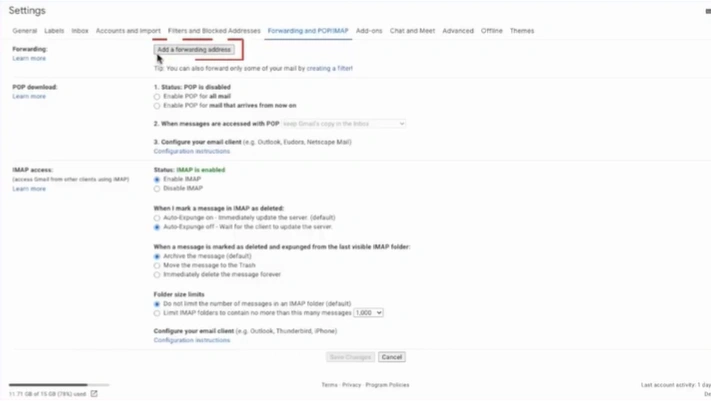
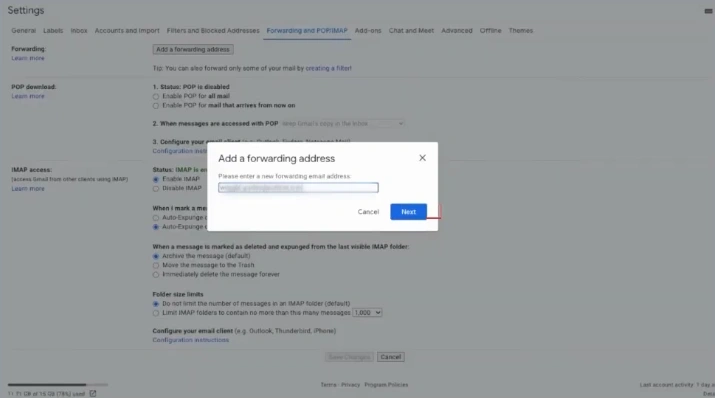
Step 4: Click “Add a forwarding address.”
Step 5: Enter your Outlook email address and click on the “Next” button.
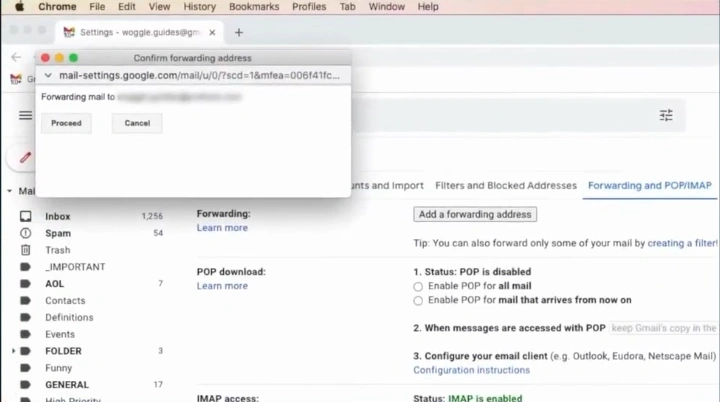
Step 6: The “Confirm Forwarding Address” window will pop up. On that, click on Proceed.
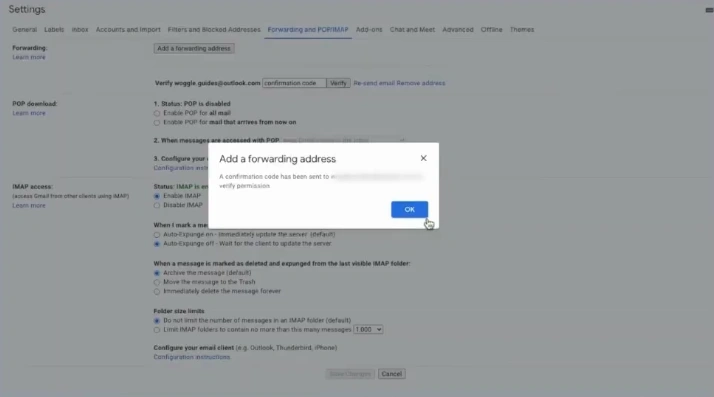
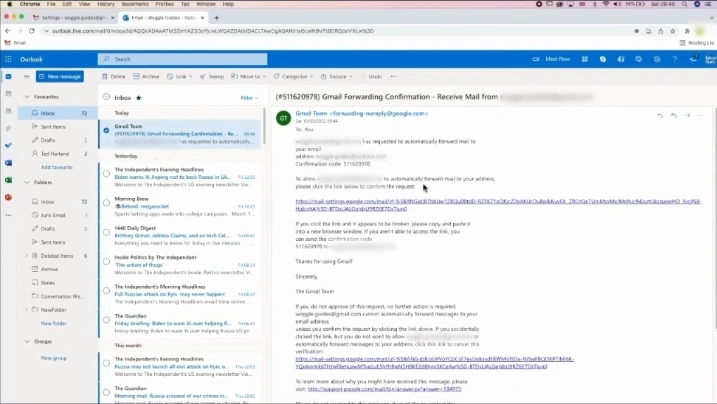
Step 7: Click on the OK button when you see the confirmation code message.
Step 8: Open Outlook and check the confirmation email you received.
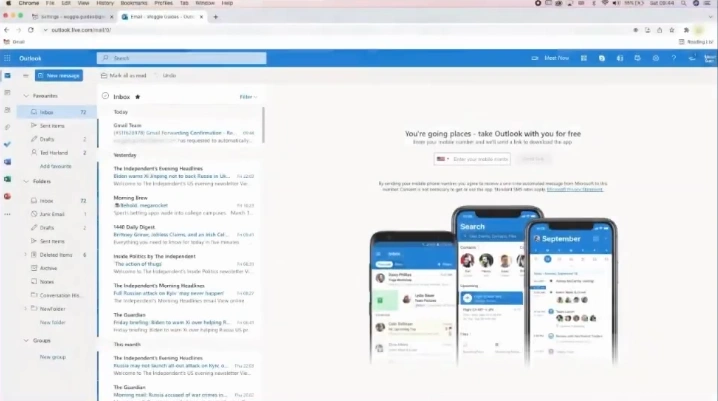
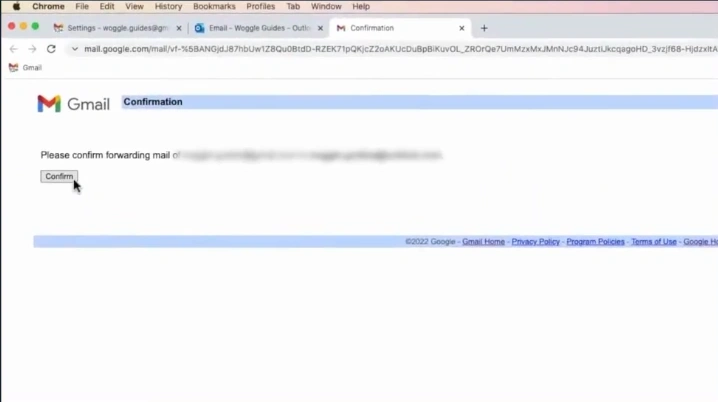
Step 9: Enter the code or open the attached link to set up automatic forwarding.
Step 10: If you have opened the link, click on “Confirm.”
Step 11: Select the “Forward a copy of incoming mail” option.
Step 12: Verify the selected email address in the To field.
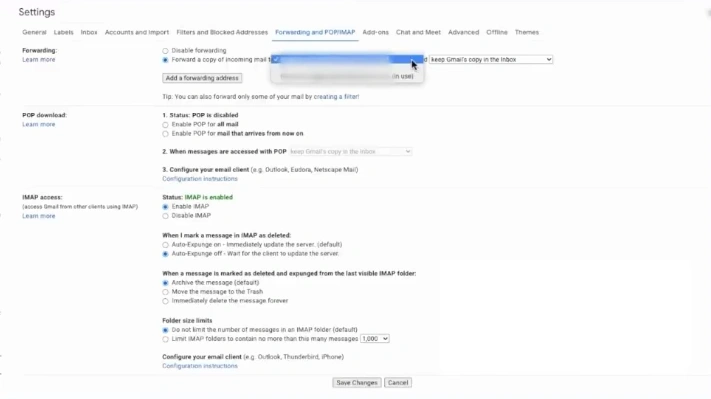
Step 13: Select your preferred option from the “and” field dropdown.
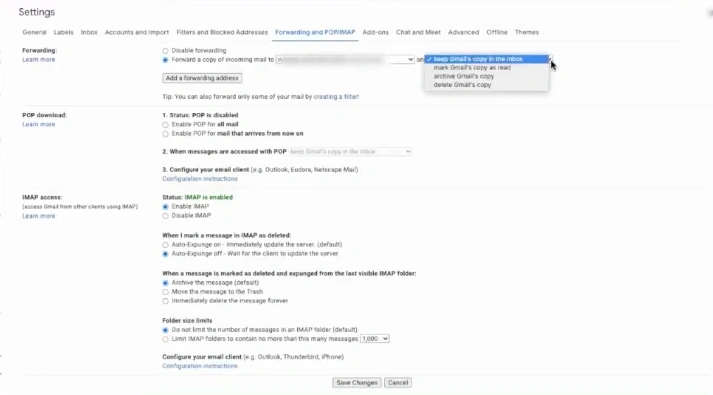
Step 14: Click Save Changes at the bottom of the page.
Also Read:- How to Add Hostinger Email to Outlook?
To Sum Up
Keep your inbox organized and store all your emails in one place. Instead of manually transferring hundreds of messages, follow the simple method above to make your work easier. While following the steps, problems like authentication or connection errors may occur, so stay alert and handle them carefully. Always keep a backup of your data and enable IMAP access in Gmail before starting.
 Verified Expert