How to Add Comcast Xfinity Email to Mac?
- 0
- 659
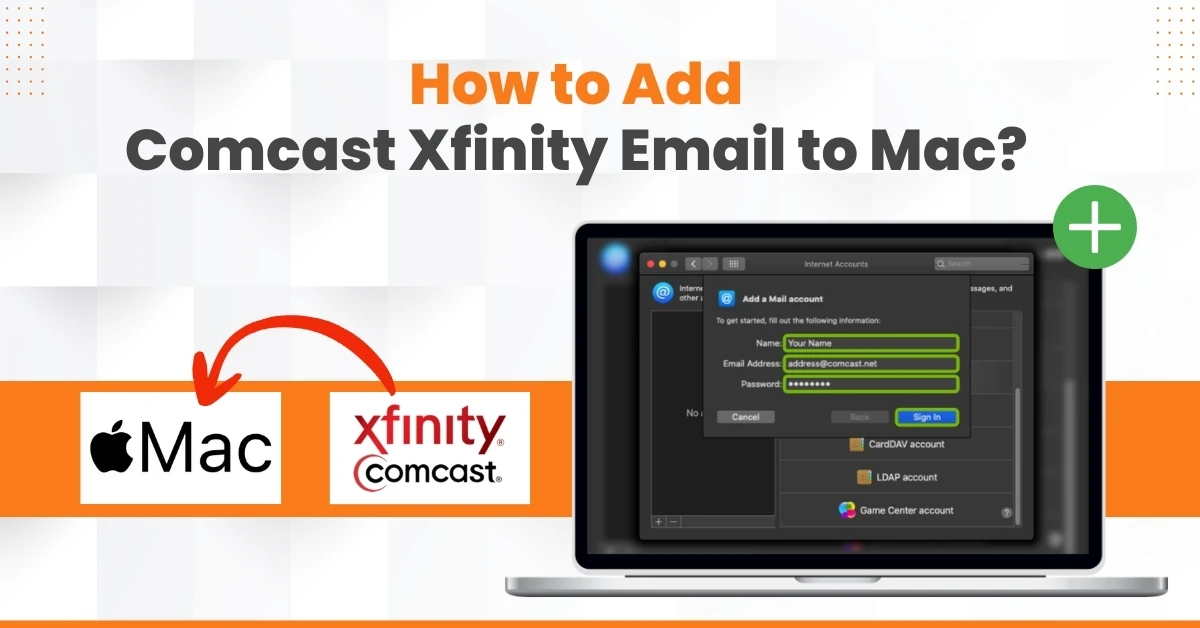
After setting up your new MacBook, you might want to add your Comcast Xfinity email account to it. Connecting your Xfinity email to the built-in Mail app makes things much easier, as you won’t need to log in to webmail every time. Instead, all your emails can be managed in one convenient place.
So, how do you add Comcast Xfinity email to your Mac? Don’t worry - we have explained the steps below. But before jumping into them, let’s first look at a few key things you should know.
Things to Check Before Adding Comcast Email to Mac
Do you wish to include the Comcast email on your Mac computer? If so, then it’s just a matter of a few steps, but you must be aware of some important information, like the following:
Check Two-Step Verification
Comcast allows 2-step verification to improve your account security. If it is on, you will have to create an app-specific password before you can add a Comcast email to your Mac.
Manual or Automatic Setup
Although macOS automatically detects email settings, Comcast servers may still require manual configuration. This is particularly true when you are on an older version of macOS or face setup errors.
Allow Third-Party Access
You must enable access for third-party email apps in your account settings, including Apple’s Mail app. To do this, open Xfinity email settings and check if third-party access is enabled. If you are prompted, agree to any security or terms of use notifications.
Check macOS Compatibility
It may not be possible for every macOS version to handle Comcast email the same way. Older versions might have trouble with the latest security regulations, and they may also not support app-specific passwords.
Review Sync Settings
After adding your email, review and adjust your sync settings on Mac. Review your sync settings to customize the email’s behavior. Choose whether you want your Mac to fetch new messages manually or automatically. Check if your Drafts, Sent, Trash, and Junk folders are mapped correctly.
Common Issues When Adding Comcast Email to Mac
Adding a Comcast email account to a Mac can sometimes be challenging when you encounter issues, like:
-
Two-factor authentication (2FA) issues
-
Firewall blocking connection
-
SSL or Port errors
-
Account added, but emails not showing
-
Server rejection or timeout
-
macOS keychain issues
Steps to Add Comcast Xfinity Email to Mac
Follow all the instructions below to correctly add a Comcast Xfinity email to your Mac computer:
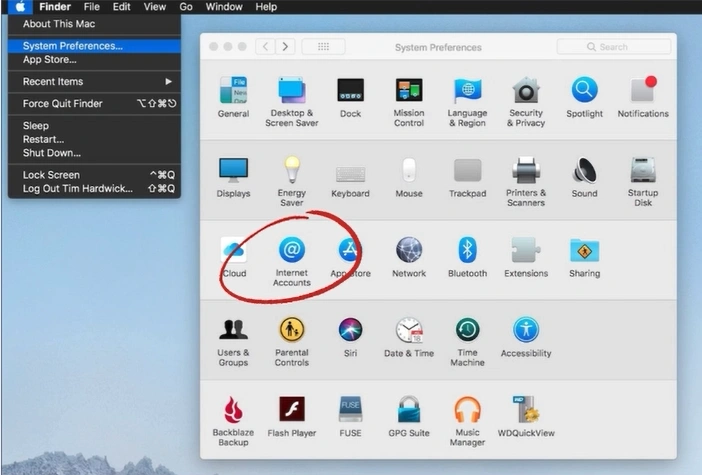
Step 1: On your Mac, click on the Apple icon and open System Preferences.
![]()
Step 2: Click on Internet Accounts.
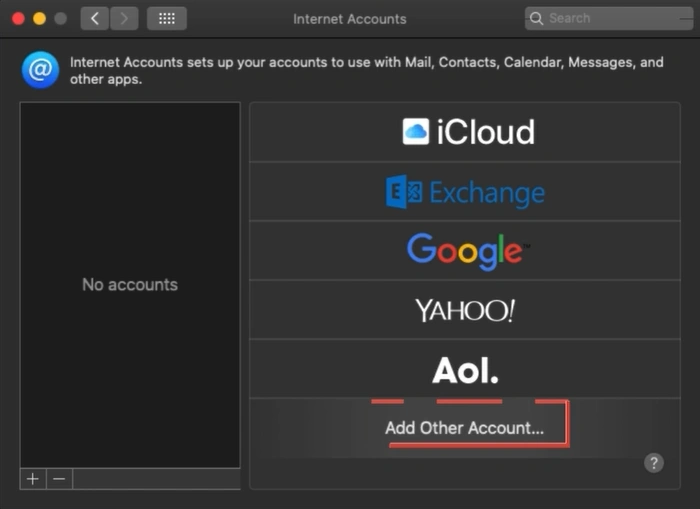
Step 3: Click on Add Other Account.
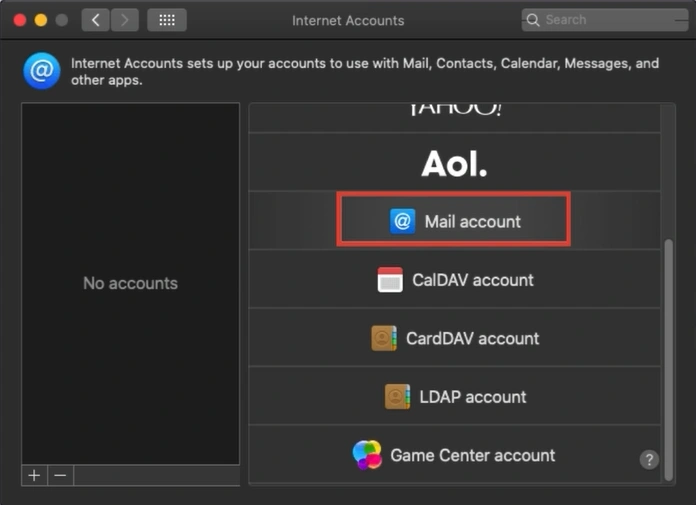
Step 4: Click on Mail Account.
Step 5: Enter your name, email ID, and password, then click on Sign in.

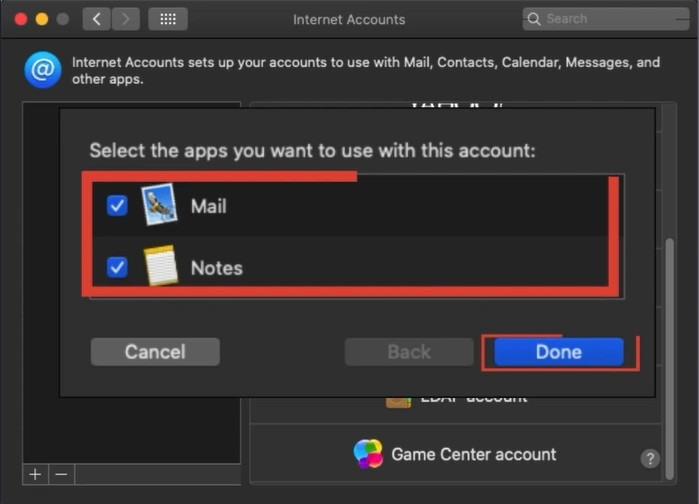
Step 6: Select the apps you want to use with the account and click on Done.
Also Read:- How to Forward Email From Comcast (Xfinity) to Gmail?
In a Nutshell
With everything in one place, it is simple to manage your Comcast email along with your other accounts. Whether you are sending emails or tracking updates, the Apple Mail app keeps everything organized and easily accessible.
There’s no need to juggle between browsers or log in repeatedly. You get simple and efficient email management directly from your Mac.
 Verified Expert