How to Auto Forward Emails in Outlook?
- 0
- 218
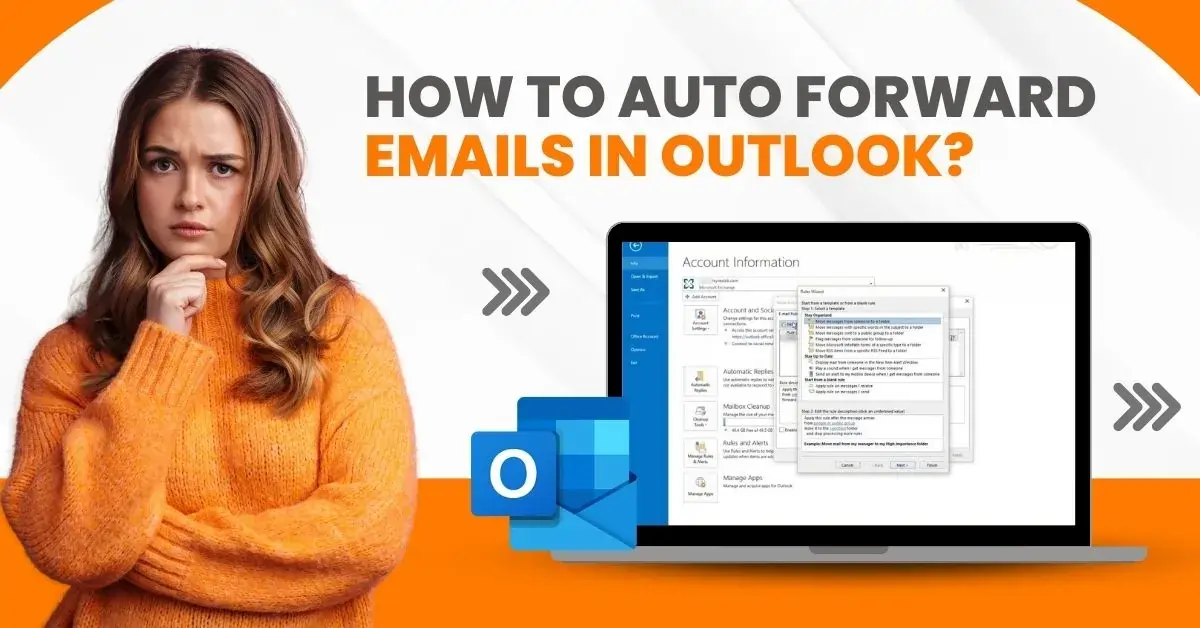
Auto forward emails in Outlook is a great feature that automatically redirects emails to another email address. This can be either temporary or permanent. Auto-forwarding emails save time and effort by eliminating the need to manually forward each mail. In addition, team members can stay updated on each other’s emails, even when they are not actively watching their inboxes.
Auto forwarding can also be a backup for the users. It ensures that important emails are duplicated in another account, which can reduce the risk of data loss due to account issues or technical failures.
There are lots of advantages to auto-forwarding emails in Outlook, but how can you enable it? Here is a complete guide on how to auto forward an email in Outlook. Continue reading to learn more!
Potential Issues to Occur With Auto-Forwarding Emails in Outlook
The users may experience the following issues when attempting to auto-forwarding Outlook emails:
-
External forwarding restrictions
-
Compatibility issues
-
Rules not applying
-
Error messages
Steps to Set Up Auto-Forwarding Emails in Outlook
You may be wondering how to auto forward emails in Outlook. Here are the essential steps to do auto-forwarding emails:
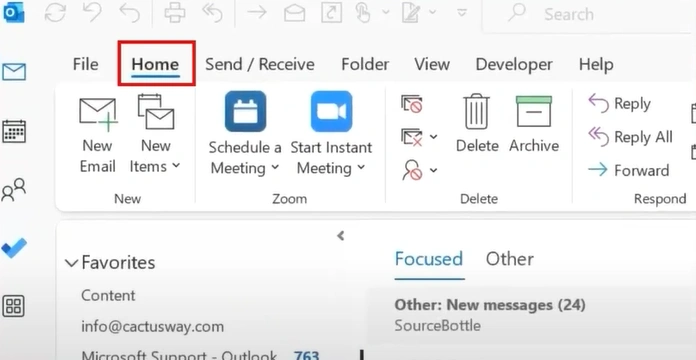
Step 1: First, make sure that you’re in the Home tab.
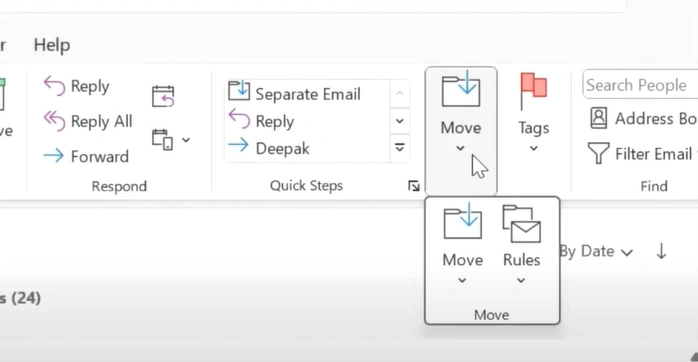
Step 2: Go to the Move section, click Rules, and select Manage Rules & Alerts.
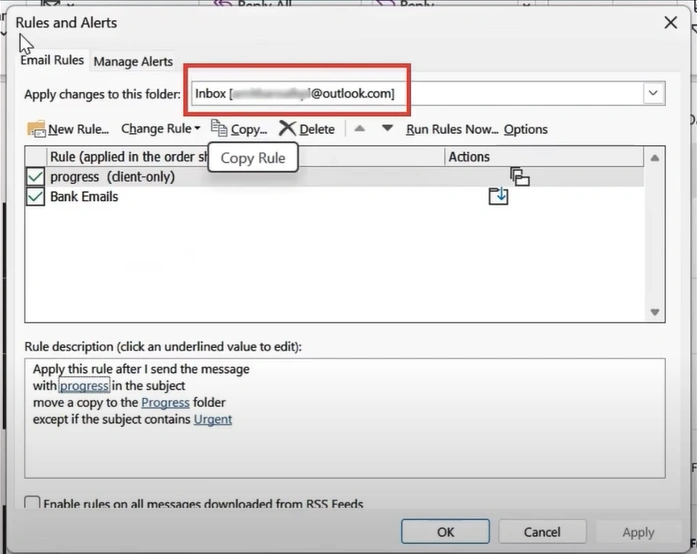
Step 3: If you’ve set up multiple emails, select the email address to which you want to apply the rule.
Step 4: Click New Rule, and a new window will pop open.
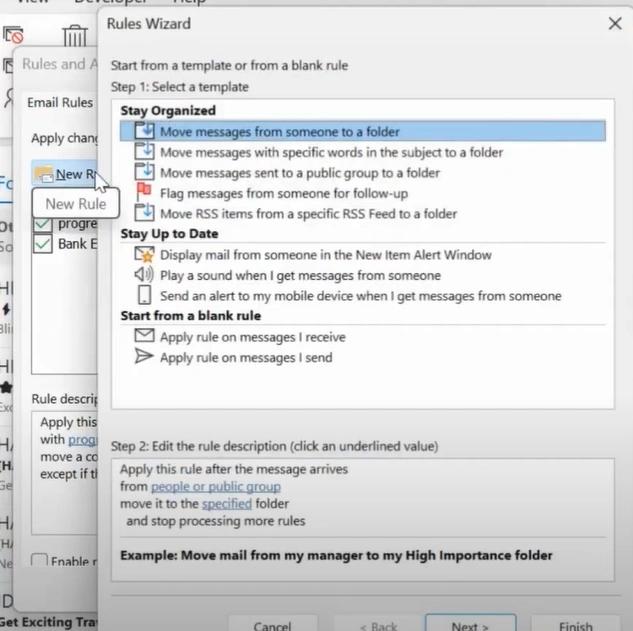
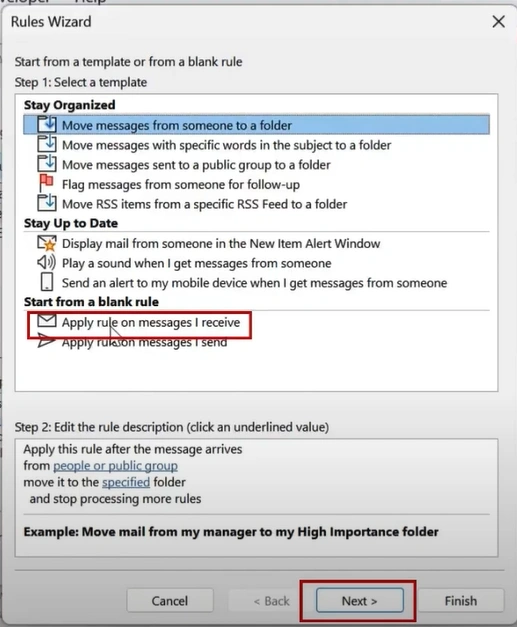
Step 5: Go to Start from a Blank Rule section, click Apply Rule on Messages I Receive, and click Next.
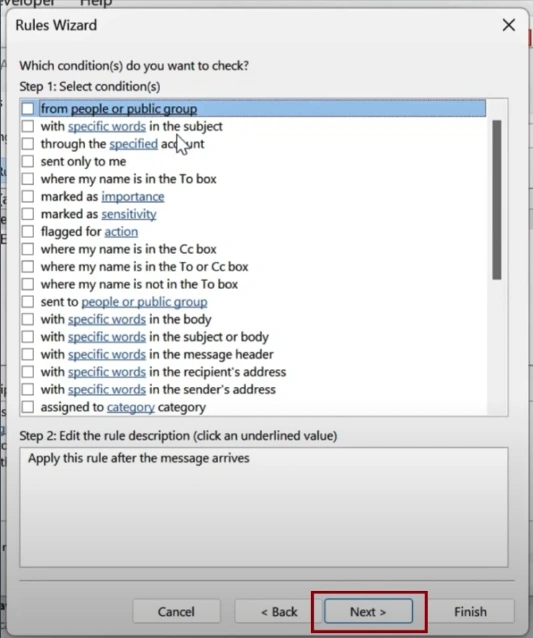
Step 6: When it tells you to select Conditions, simply click Next.
Also Read:- How to Set Up Btinternet Email On Outlook?
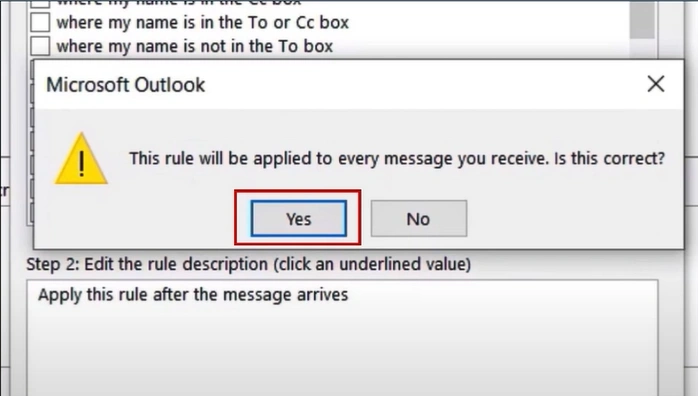
Step 7: Click Yes in the pop-up prompt to proceed.
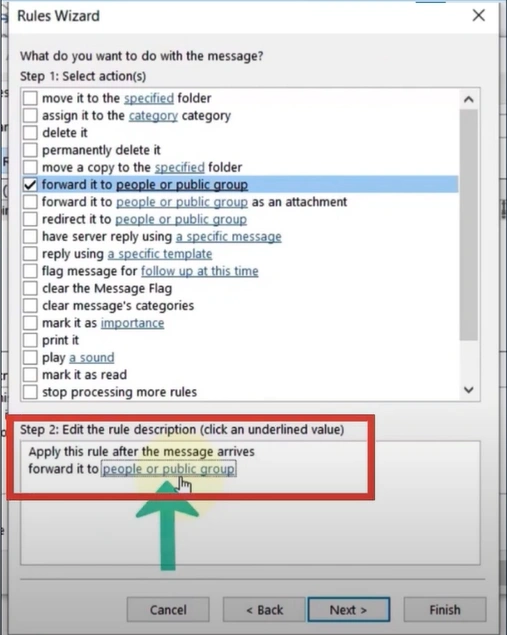
Step 8: When it tells you to Select Actions, select the Forward it to People or Public Group option.
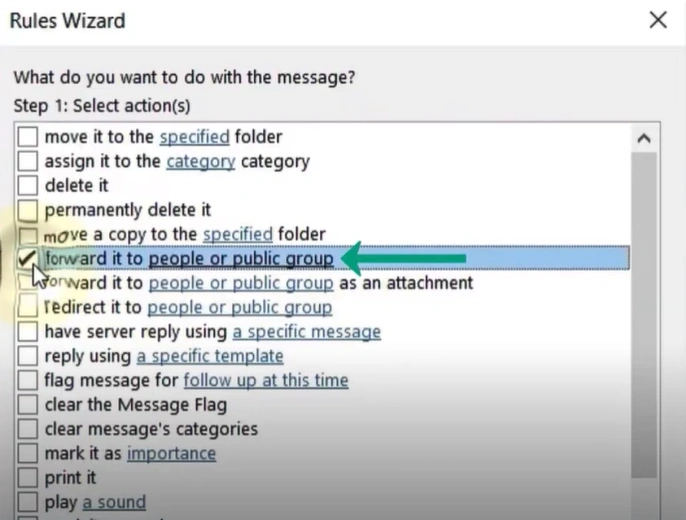
Step 9: Click the People or Public Group link in the Step 2 description.
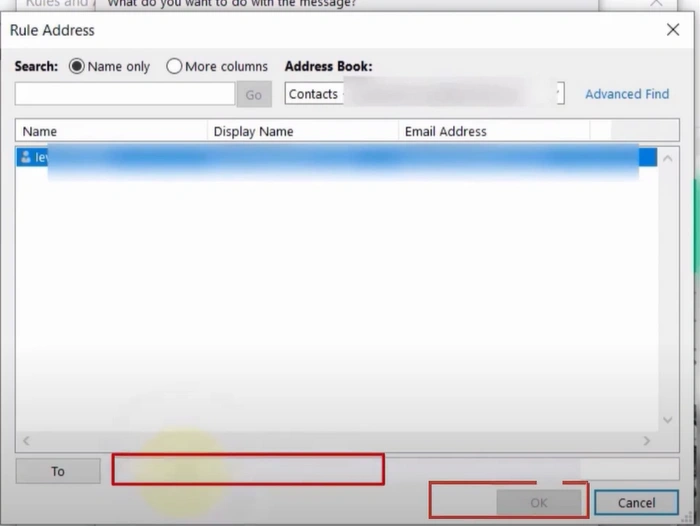
Step 10: Type in the email address you want the emails to be forwarded to in the To field and click OK.
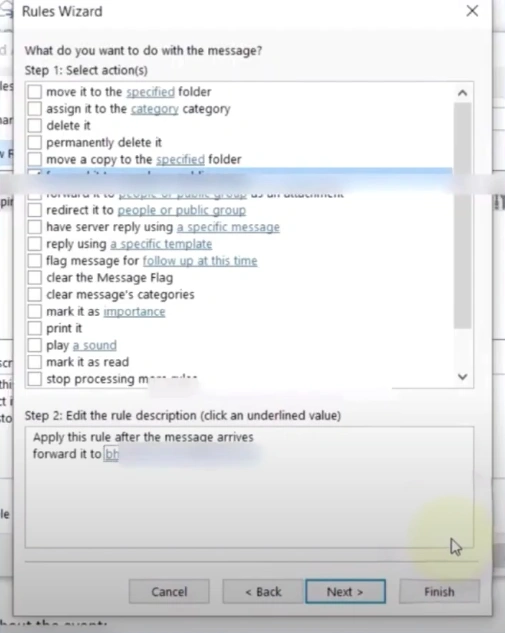
Step 11: Once done, click Next, then click Next again.
Step 12: Go ahead and specify a name for the rule in the field.
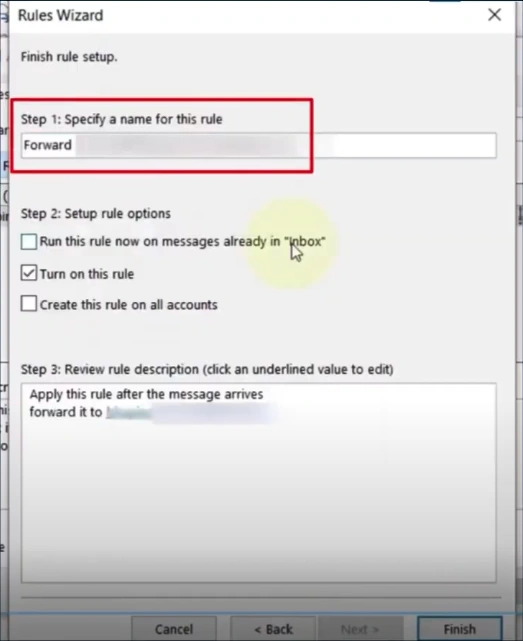
Step 13: Ensure the Turn on this Rule option is checked in the Step 2 section.
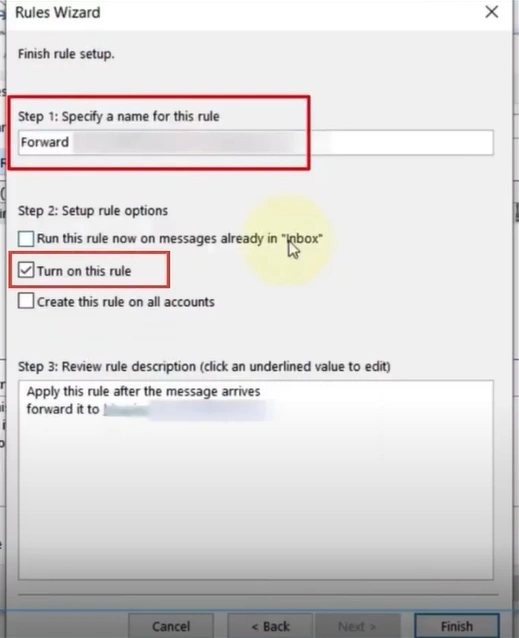
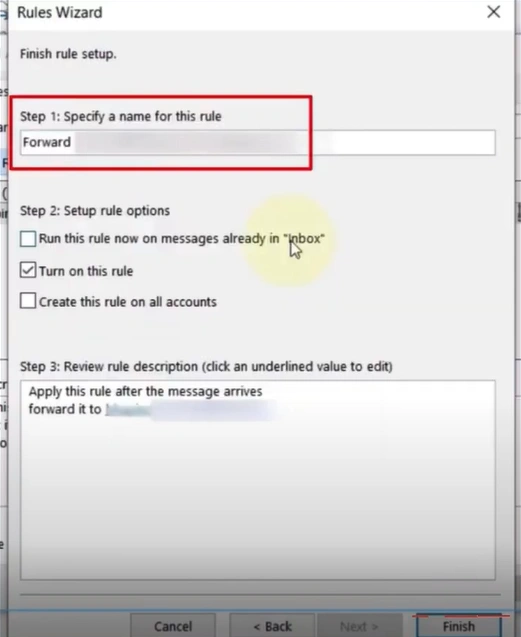
Step 14: Once done, click Finish.
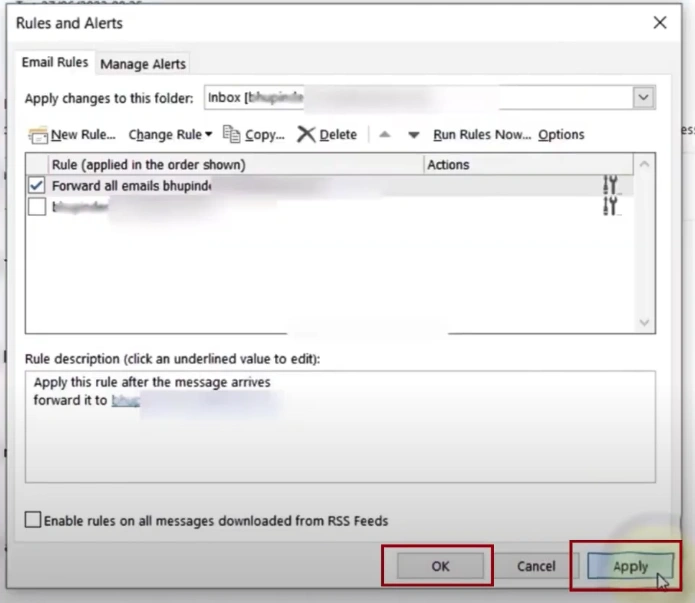
Step 15: Click Apply and OK to save the changes.
To Conclude
Auto forwarding can be an effective solution for streamlining email management and improving collaboration. This enhances the overall workflow and productivity.
When following the above steps to auto forward emails in Outlook, it is important to be aware of potential problems that could arise. Being informed about these potential issues will help you navigate the process more effectively.
Contact an expert if you have difficulty enabling auto-forwarding emails in Outlook even after attempting the above steps.


