How to do BTinternet Email IMAP Settings (Outlook/iCloud/Thunderbird)?
- 0
- 453
Are you having trouble doing BTinternet email IMAP settings on Outlook, iCloud, or Thunderbird mail? Worry not, because it is common to get some issues if you are doing it for the first time. Also, some technical glitches could contribute to problems during the procedure. However, you can learn about the comprehensive procedure to complete the BTinternet IMAP settings in any email you like. Therefore, to make this easier for you, this article contains descriptive guidance on how to perform the BTinternet iMAP settings on Outlook, iCloud, and Thunderbird.
Solution 1: On Your Outlook Mail
These are the steps you need to follow to do the BTinternet email IMAP settings in your Outlook Mail.
-
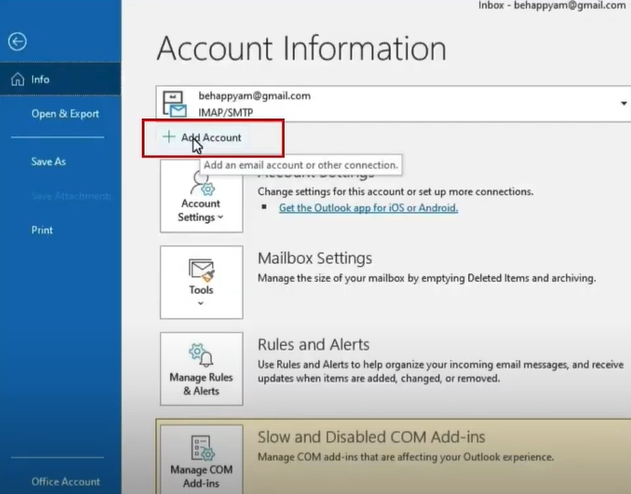
Initially, open Outlook email, navigate to the Outlook Account Information page, and click Add Account.
-
On the open page, type your BT mail address and click on Connect.

-
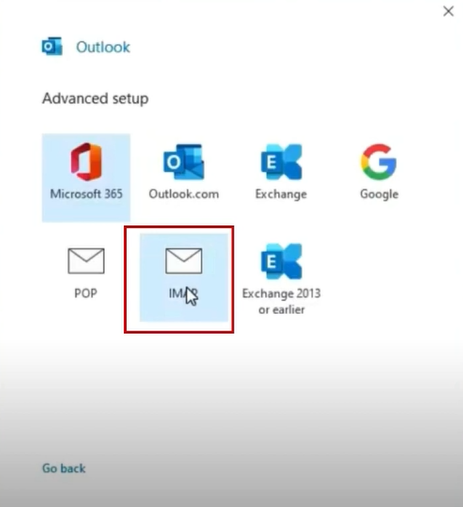
Now, in the Outlook window, choose the IMAP option.
-
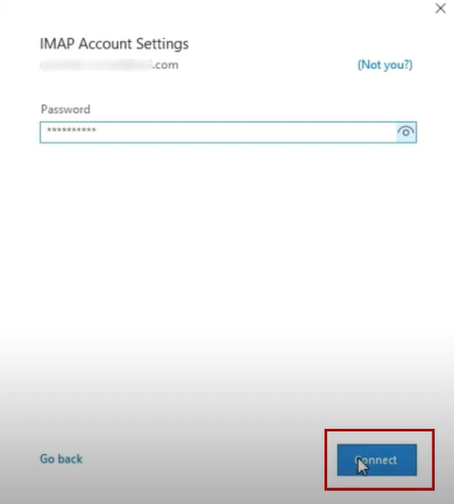
Next, you need to enter your correct password and select the Connect button.
-
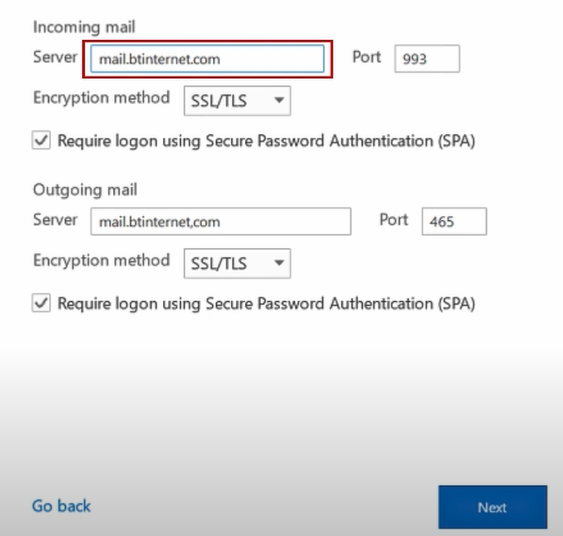
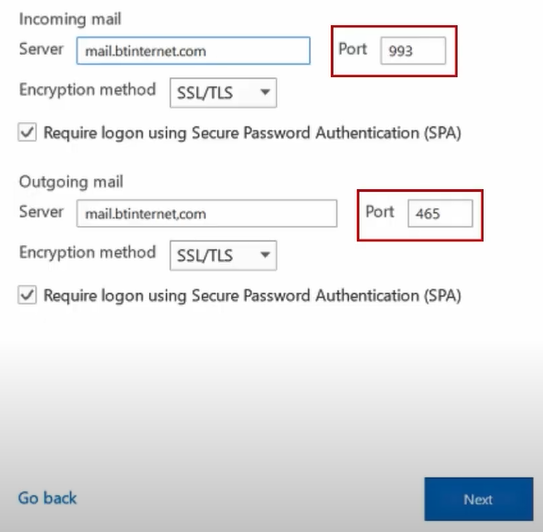
In the IMAP Account Settings window, make sure that the Incoming mail Server field says mail.btinternet.com.
-
In addition, you need to ensure that the Incoming mail port is 993 and the Outgoing mail port is 465.
-
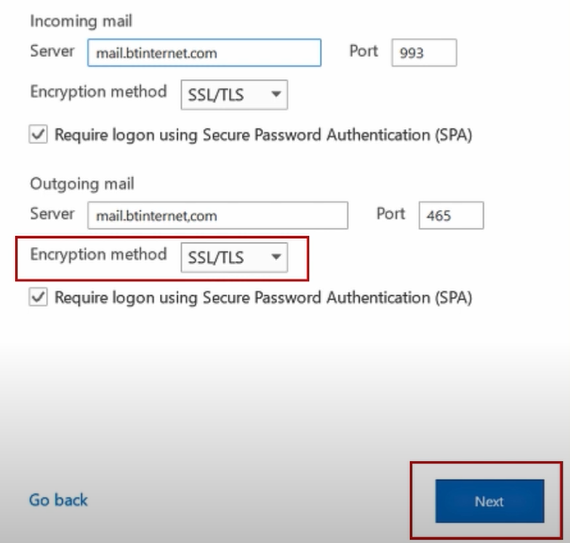
After that, it is time to set the Encryption Method to SSL/TLS and choose the Next button.
-
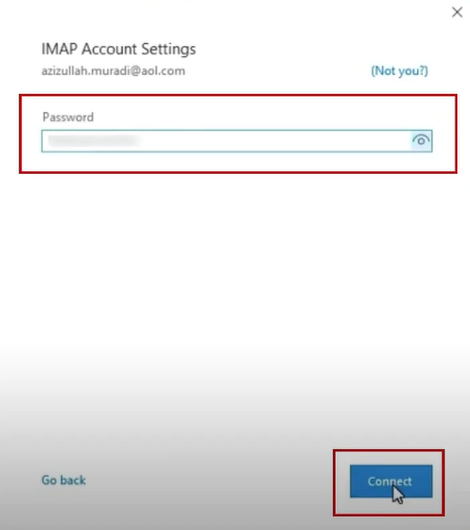
On the open page, type the correct password and click on the Connect option.
-
Now, the BTinternet IMAP settings on Outlook will be complete.
Solution 2: BTinternet Email IMAP Settings On Apple Mail
If you want to do the Btinternet email IMAP settings on iCloud then these are the steps you need to follow.
-
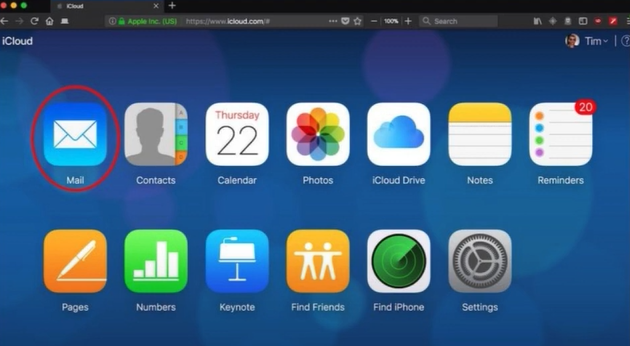
For the first step, navigate to the Mail in your system.
-
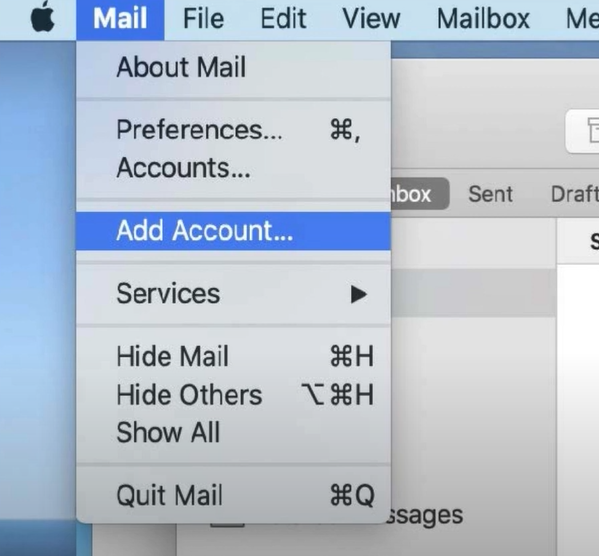
After that, click on the Mail icon on the top left side of the screen and select Add account.
-
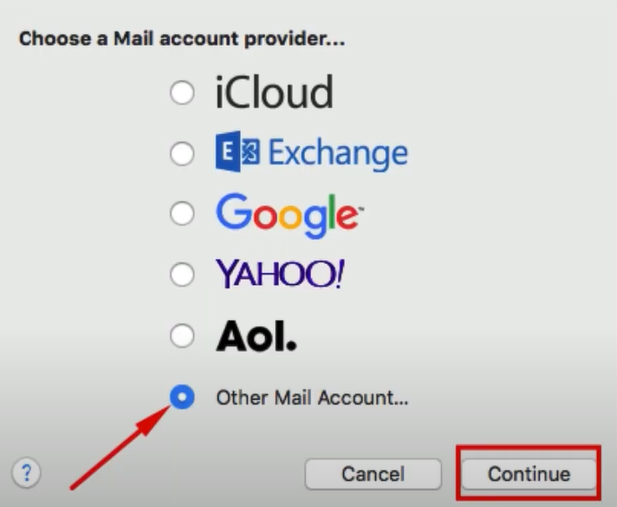
In the next window, click on the Other Mail Account radio button and choose Continue.
-
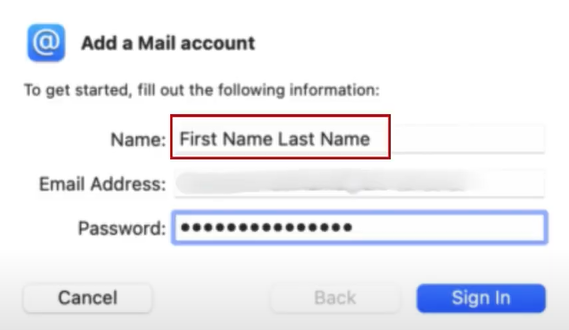
Now, you can enter the name you would like to appear in the name field.
-
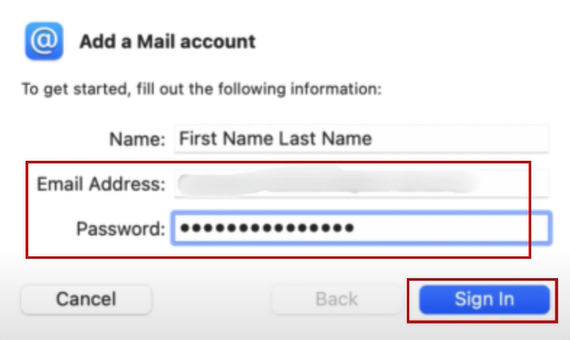
Next, you are required to fill in your username and password in their dedicated fields and then click the Sign-in button.
-
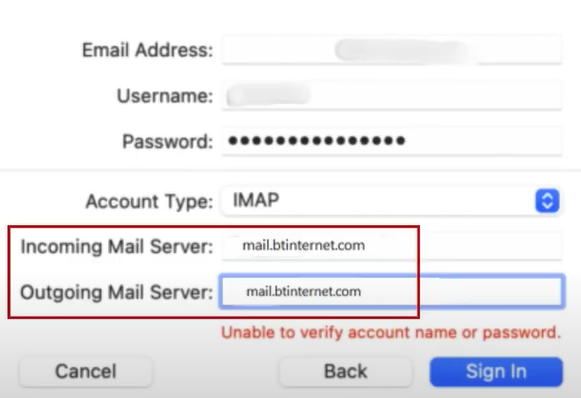
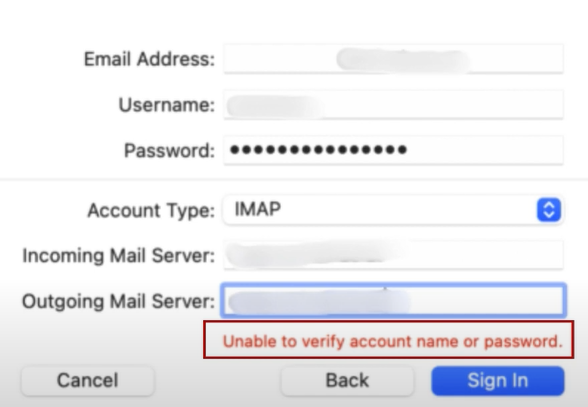
If Apple Mail informs you that it is unable to verify the account name and password, you need to fill out the form to configure it manually.
-
Furthermore, the email address and password should be populated, enter a User Name, and set the Account Type to IMAP.

-
Next, in the incoming and outgoing mail server field, mail.BTinternet.com.
-
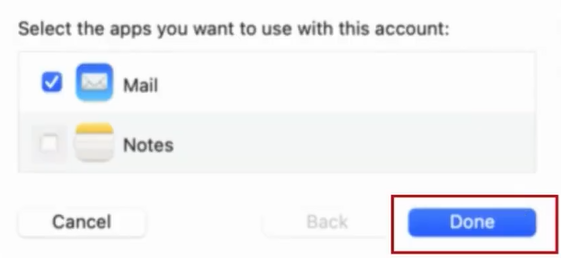
Click on Sign-in, then select Mail, and then click Done.
-
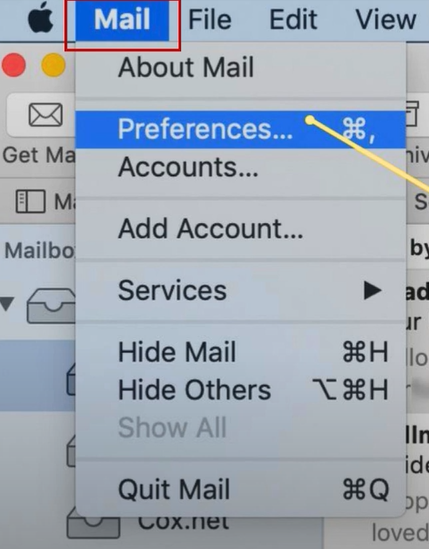
Once you have signed in, move to the top left side of the screen and choose the Mail option.
-
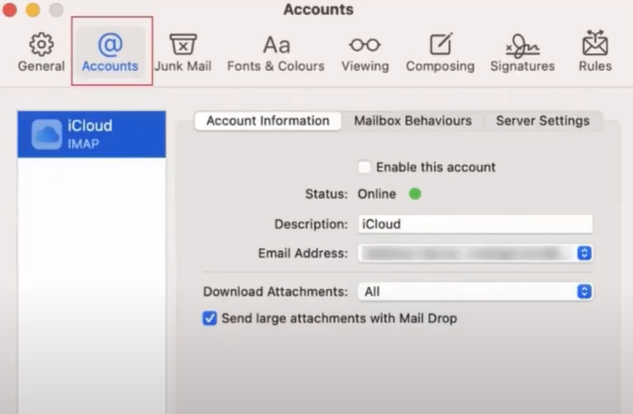
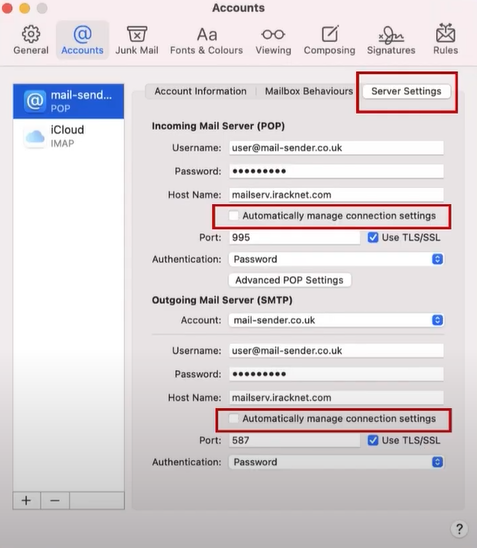
Now, you need to select Preferences, then select your BT mail from the Accounts section.
-
Furthermore, head to the Server Settings tab and then uncheck the box ‘Automatically Manage Connection Settings’ option for both your incoming and outgoing mail servers.
-
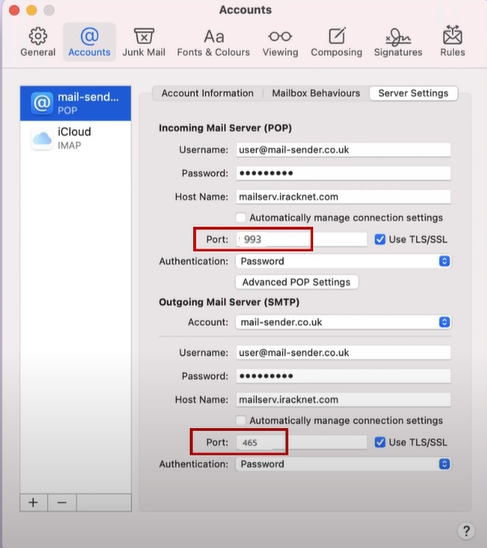
After that, the incoming port was set at 993 and the outgoing port at 465, respectively.
-
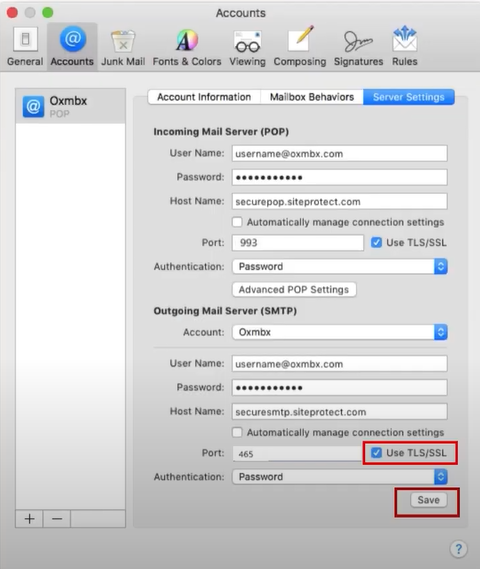
Next, you need to ensure that the Use TLS/SSL option is selected and then choose the Save option.
-
Finally, the BTinternet IMAP settings on iCloud will be finished.
Solution 3: On the Thunderbird Mail
Carefully follow the follow-up procedure to complete the BTinternet email IMAP settings on the Thunderbird Mail product.
-
At the start, you need to open Thunderbird, click on the Settings or Gear icon on the bottom left side of the display, and select Account Settings.

-
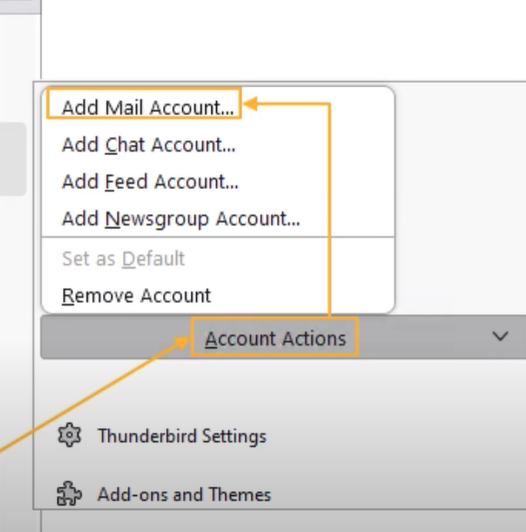
After that, click on the Account Action drop-down and select the Add Mail account option.
-
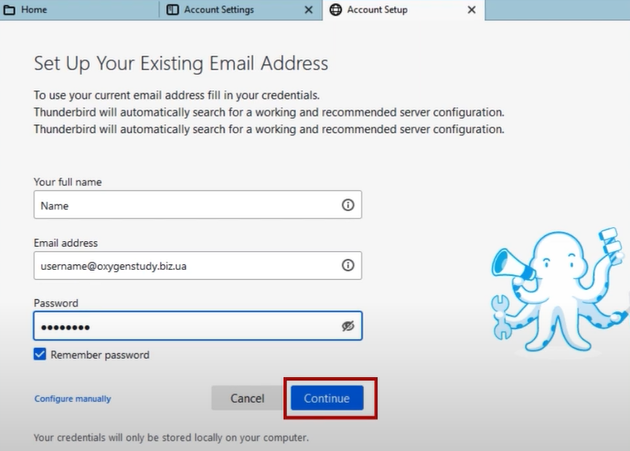
Now, on the open page, type your name, email address, and password and choose the Continue option.
-
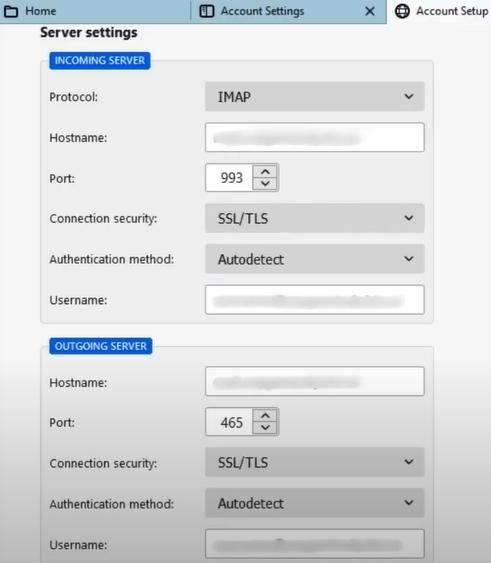
Next, it will start looking up configurations and ask you to enter the details manually.
-
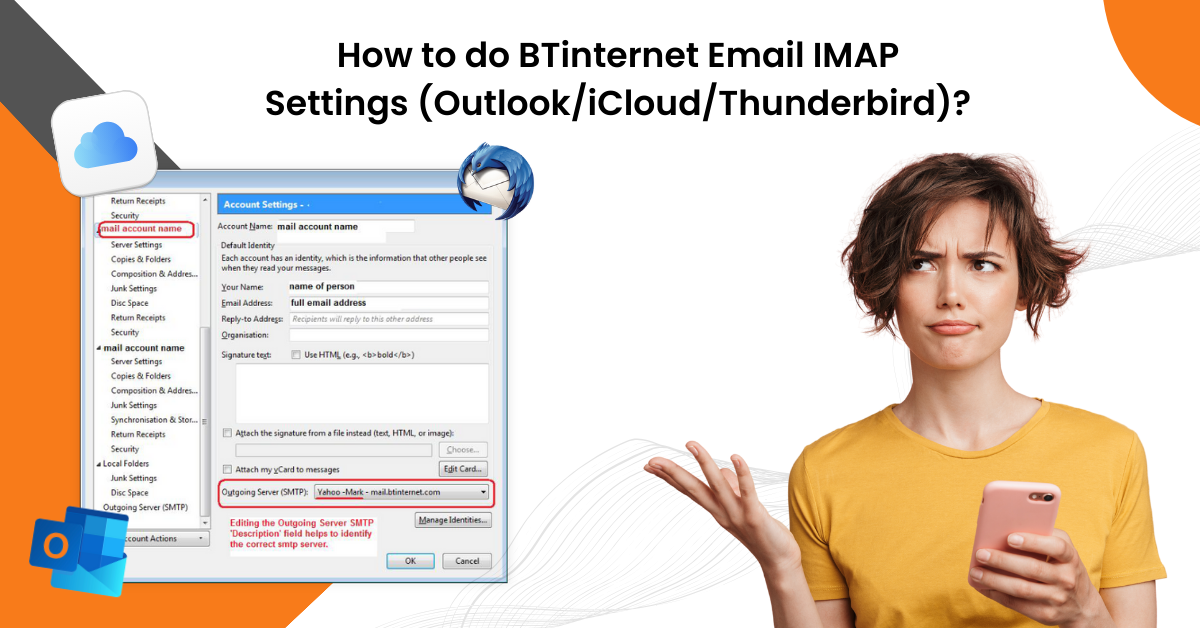
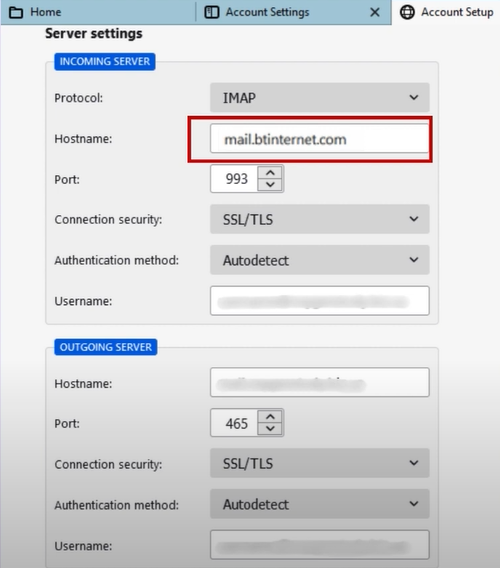
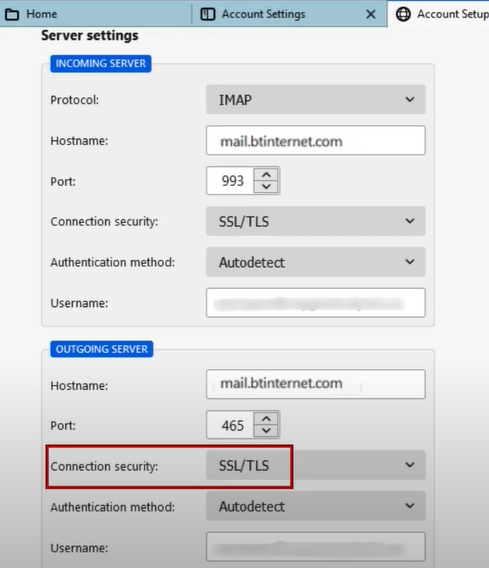
Furthermore, in the incoming mail server section, set the protocol to IMAP and fill in mail.bitinternet.com in the Hostname field.
-
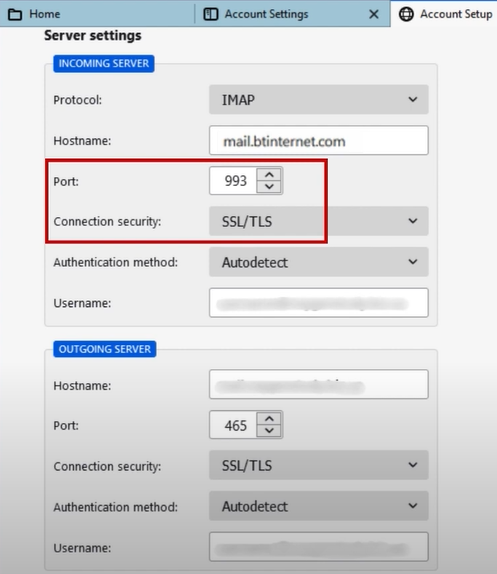
And then, select Connect Security to SSL/TLS and set the Pot to 993.
-
Moreover, in the outgoing mail server section, set the Hostname to mail.btinternet.com.

-
Next, set the Port to 465 and the Connection Security to SSL/TLS.
-
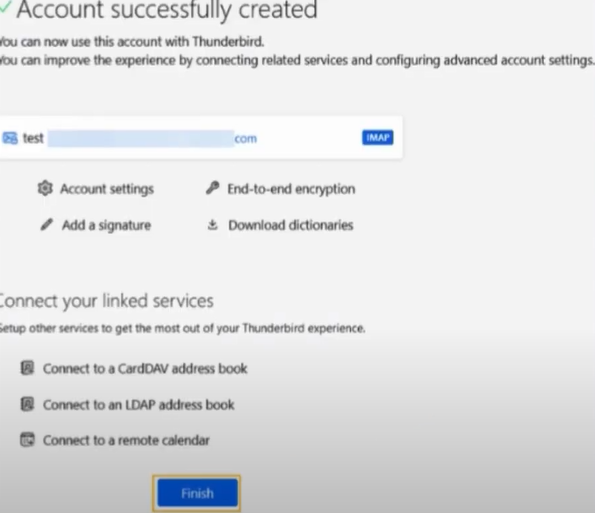
Click Done, then click Finish when you get the Account Successfully Created screen.
-
At last, the IMAP settings process will be completed.
Conclusion
Anyone with the proper knowledge of the procedure can complete the BTinternet email IMAP settings. With the help of our instructions, you can perform the BTinternet IMAP setting process on your preferred email products, such as Outlook, iCloud, and Thunderbird. If you are having any problem in the first attempt then it is best to try the methods one more time. If you are having issues and are unable to do IMAP settings even after following the correct methods, then you should look for additional help.
