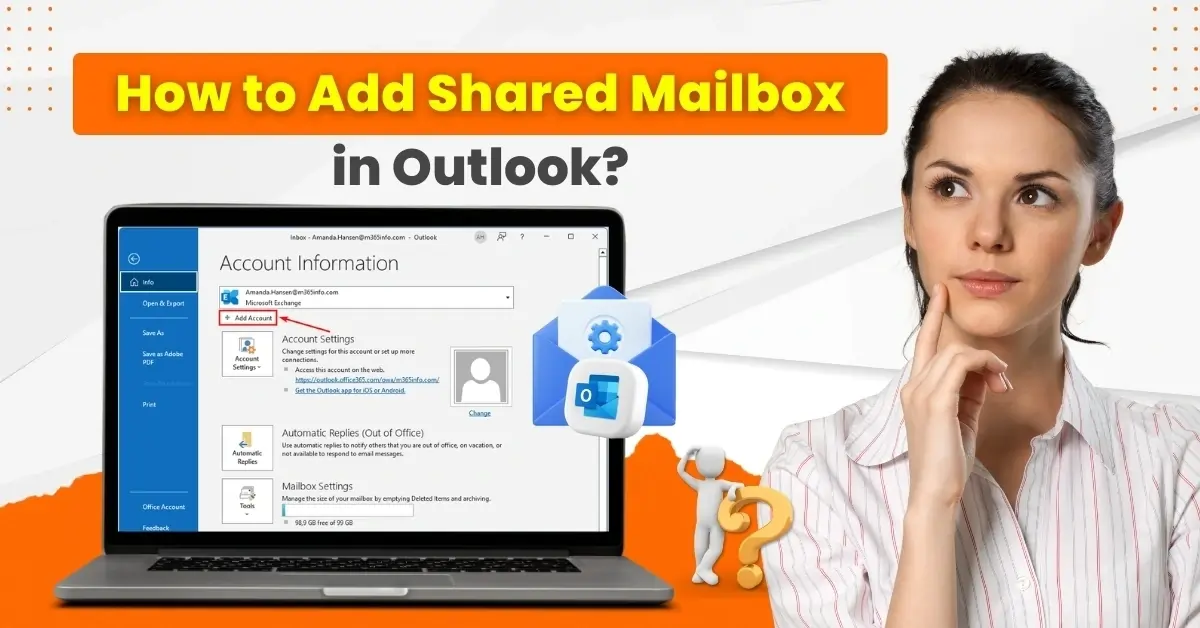
How to Do BTinternet Email POP3 Settings?
- 1
- 634
If you open BTinternet Mail and see an empty mailbox, it can be frustrating. This is often caused by incorrect POP3 settings, which you can fix by configuring your BTinternet email correctly.
POP3 settings control how your BTinternet email is downloaded to your device. They may seem complicated, but this guide makes the process simple. You can stay worry-free, as we have provided the easiest steps to configure BTinternet email POP3 settings. Before we start, let’s look at some important things to keep in mind.
Things to Keep in Mind Before You Start
Here are some important things that you should know before you start setting up your BTinternet email with POP3:
Stable Internet Connection
Make sure you are on a stable, working internet connection to verify your settings and download messages from the BT server.
POP3 vs IMAP
Learn the difference between IMAP and POP3. POP3 downloads emails to your device and often removes them from the server (unless you change the settings). On the other hand, IMAP keeps your emails stored on the server and synced across all devices.
Check Firewall/Antivirus
Some antivirus programs or firewalls may block email ports. In case setup fails, temporarily turn them off to see if they are causing the issue.
Common Problems When Configuring BTinternet Email POP3 Settings
When you are trying to set up BTinternet email POP3 settings, you may encounter these issues:
-
Duplicate messages
-
Slow mail retrieval
-
Email deletion
-
Performance issues
Steps to Configure BTinternet Email POP3 Settings
Configuring BTinternet email POP3 settings is simple - just follow the steps in the section below:
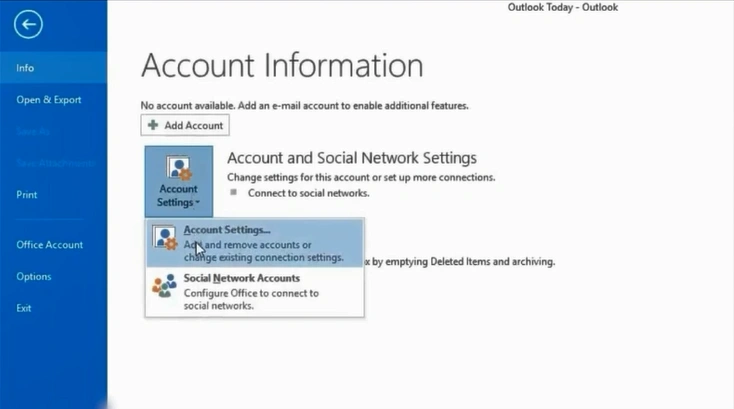
Step 1: Open Outlook, then click File at the top-left.
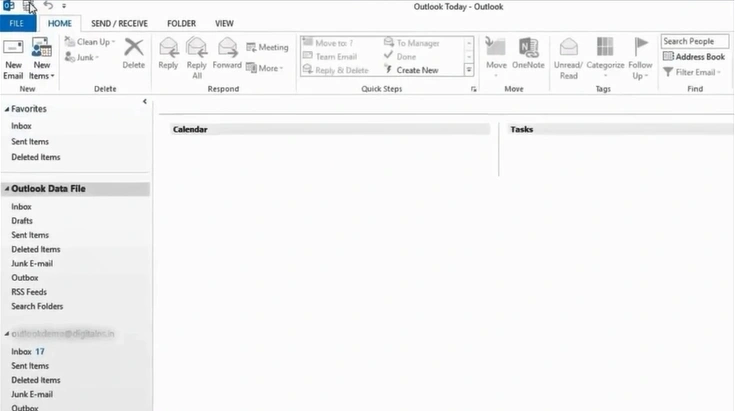
Step 2: Click on Account Settings, then click on Account Settings again.
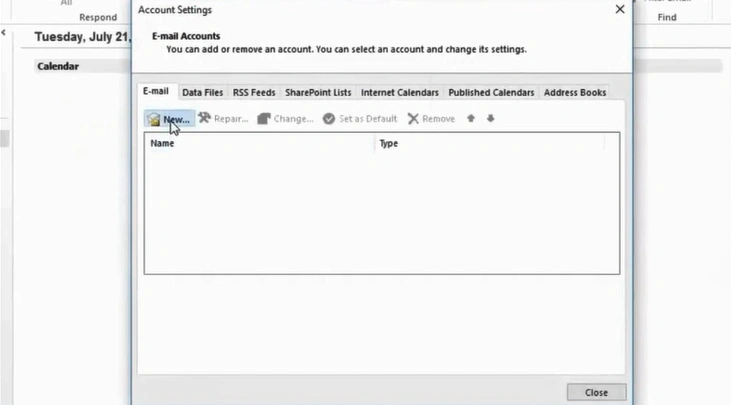
Step 3: Click New.
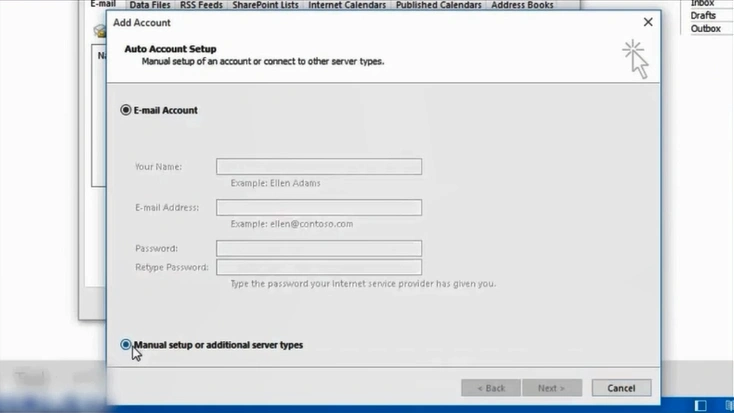
Step 4: Choose manual setup or additional server types and click on Next.
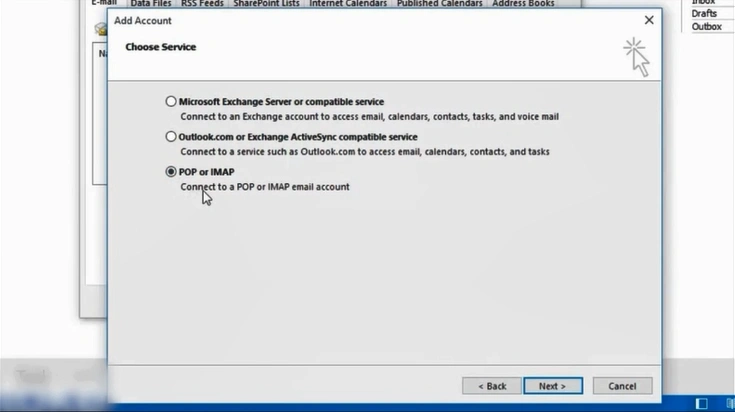
Step 5: Select the POP or IMAP option and click on Next.
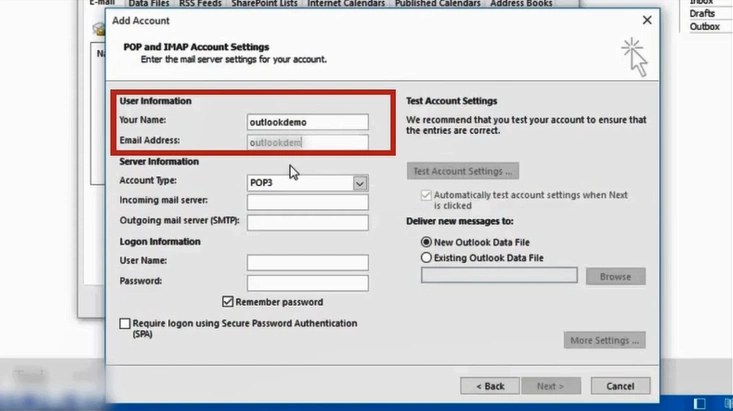
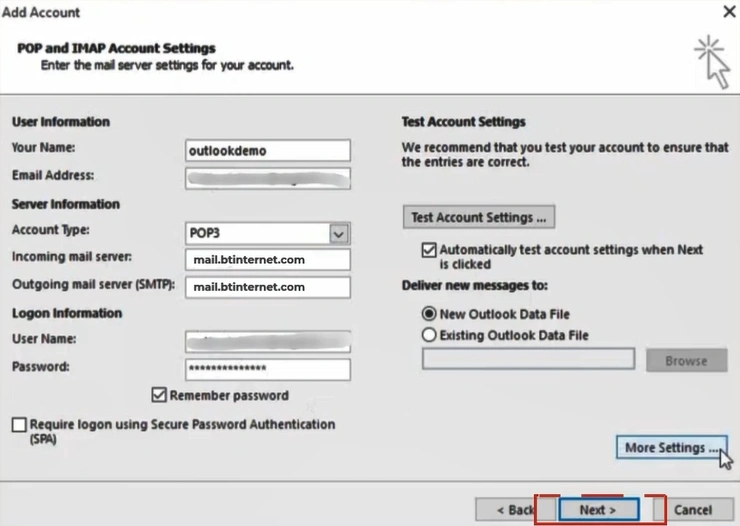
Step 6: Fill in the User Information.
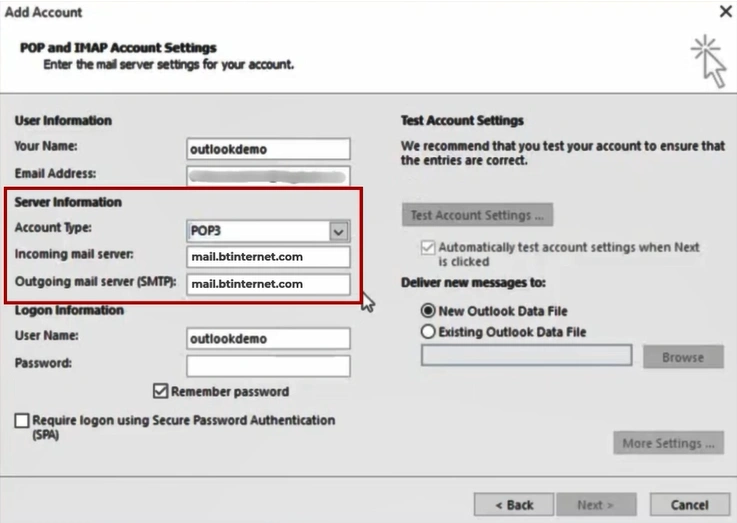
Step 7: Go to the Server Information section and type mail.btinternet.com in both incoming and outgoing mail servers.
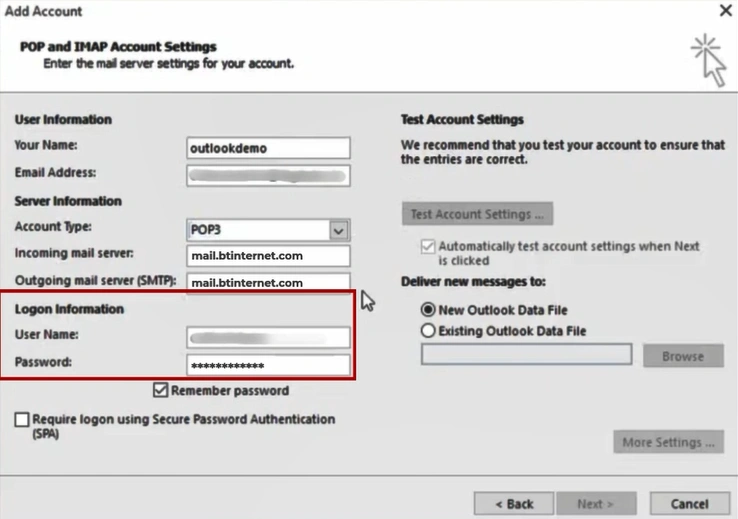
Step 8: In the Logon information, enter your email address, including @btinternet.com or @btopenworld.com, and the password.
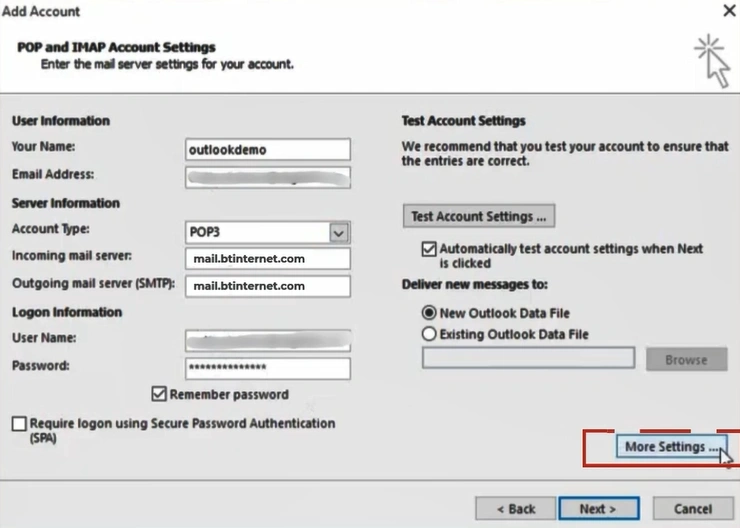
Step 9: Click on More Settings on the bottom right.
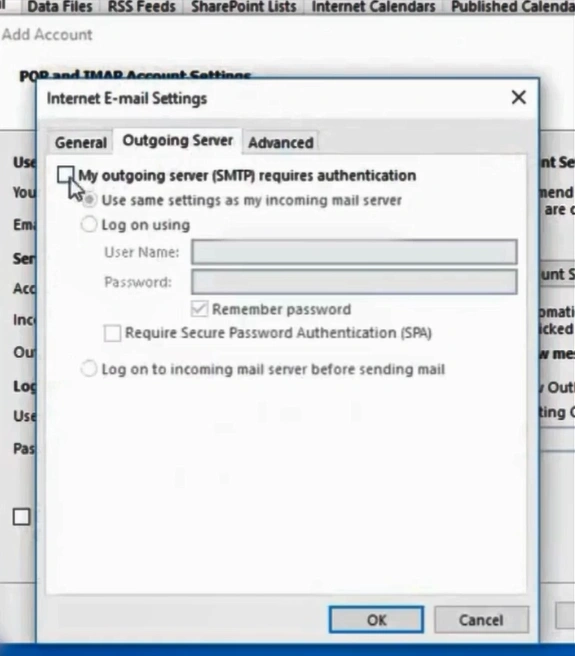
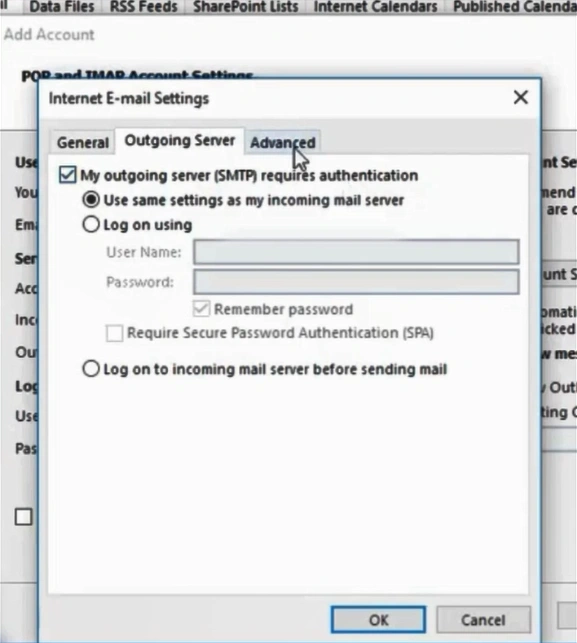
Step 10: Select the outgoing server and check the My outgoing server (SMTP) requires authentication option.
Step 11: Click on the Advanced tab.
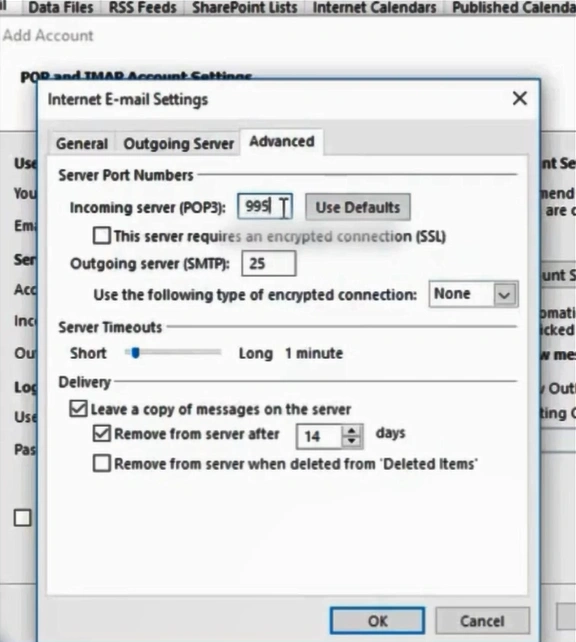
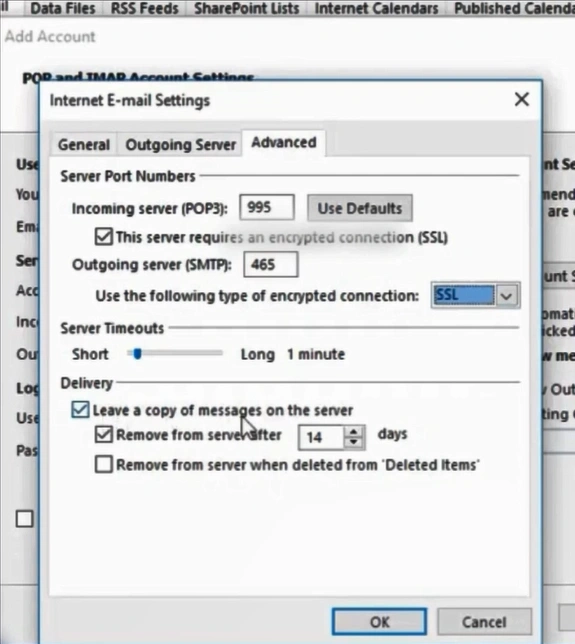
Step 12: Enter 995 for the incoming server and check “This server requires an encrypted connection (SSL).” Enter 465 for the outgoing server and select SSL for encryption.
Step 13: In the deliver section, choose the option that best suits your needs. Then, click on OK.
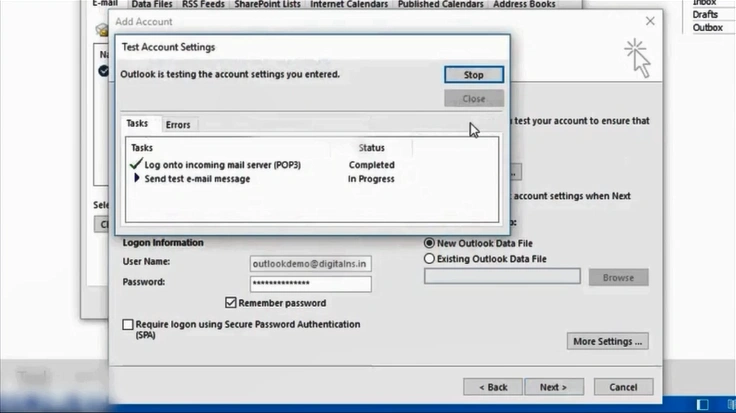
Step 14: Click on the Next button.
Step 15: The Test Account Settings window will appear. Wait for the test to complete, then click Close.
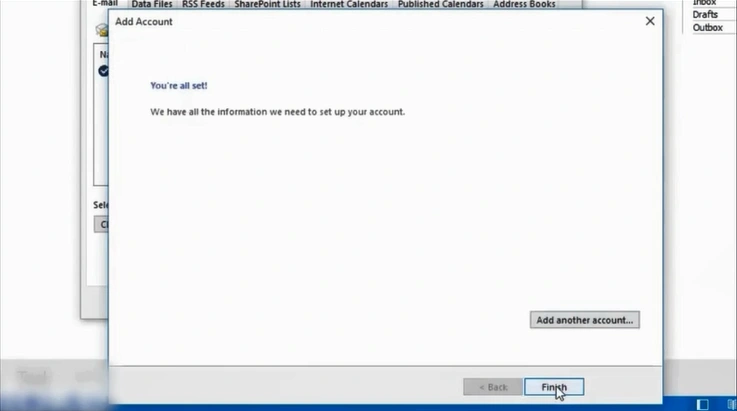
Step 16: Click on the Finish button.
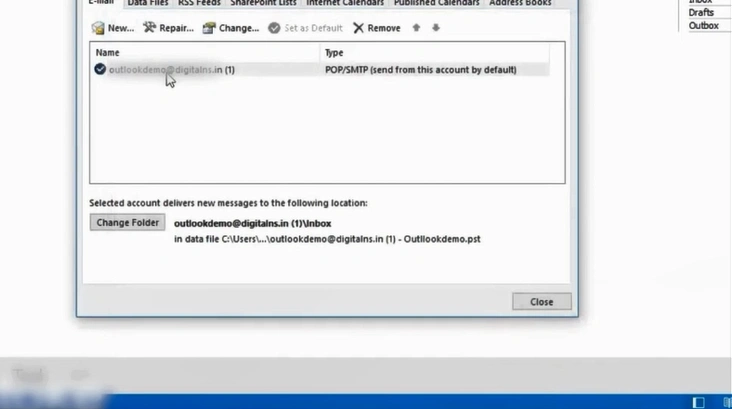
Step 17: Click on Close.
Also Read:- Can't Send Emails on BTinternet [Fixed]
Summary
That’s all you have to do to configure BTinternet email POP3 settings. Just carefully follow the instructions we have mentioned. You may encounter challenges like duplicate messages, slow mail retrieval, or email deletion when doing the same. So, be wary of these issues.
 Verified Expert