How to Make an Email Group in Outlook?
- 0
- 221
Outlook has many incredible features for its users. One of them is the ability to create an email group. An email group in Outlook can save you time and effort while sending messages to the same group of people repeatedly. You do not have to type in individual email addresses; simply add them to a group and send a single message.
An email group streamlines the sending process, keeps your email contacts organized, and reduces the chances of missed messages or errors.
Are you wondering, “How do I make an email group in Outlook?” Creating an email group in Outlook can be simple. There are options to edit or delete groups. Here we cover the entire process of creating an email group in Outlook, so read further to learn more.
Potential Issues to Arise While Making an Email Group in Outlook
Take a glance at the potential that may arise when making an email group in Outlook:
-
Group settings may not be configured correctly.
-
Hidden from Exchange clients
-
Missing or incomplete member list
-
Autodiscover settings
-
Outdated Outlook version
The Process to Make an Email Group in Outlook
Make your communication easier and more effective with an email group. Here are the steps to know for making an email group in Outlook:
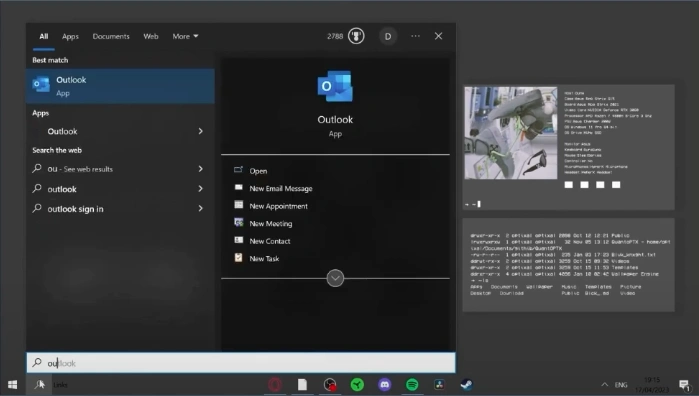
Step 1: Open Outlook application.
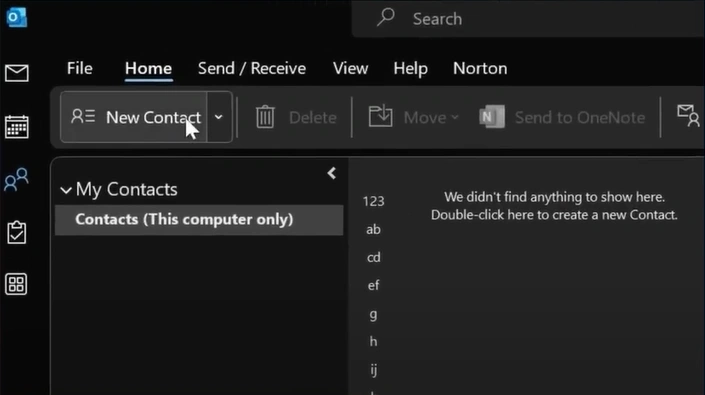
Step 2: Click the People icon in the left panel.
![]()
Step 3: Click the drop-down arrow next to New Contract, then select Contract Group.
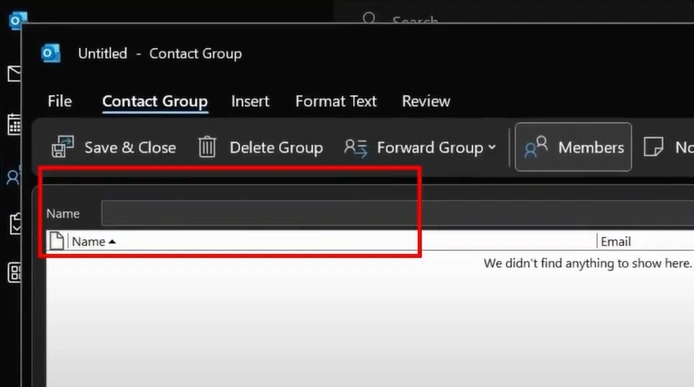
Step 4: Name the group you’re creating.
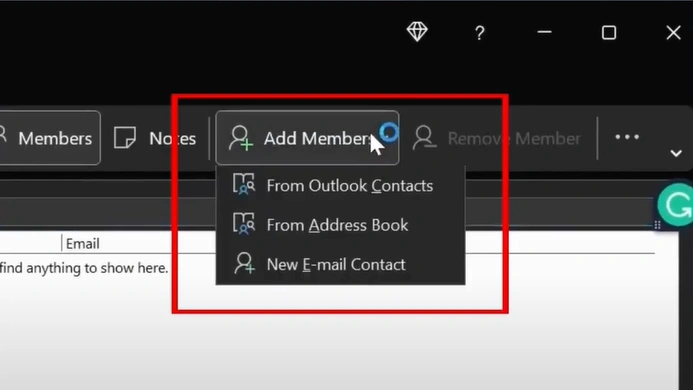
Step 5: Click Add Members and select whether you want to add from Contacts, Address Book, or New E-mail Contact.
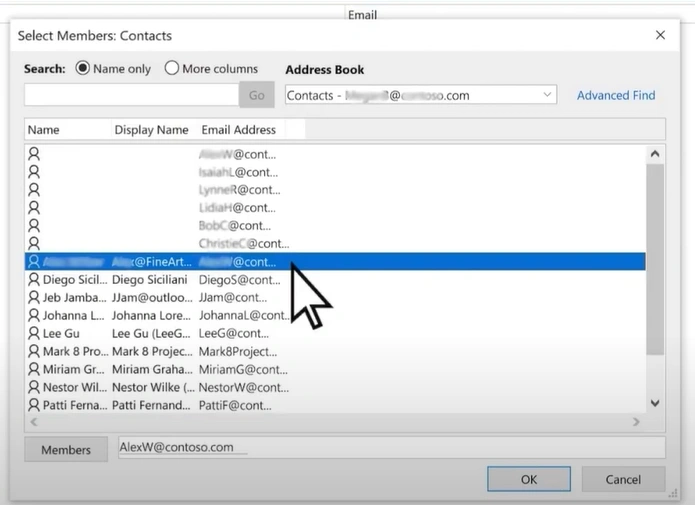
Step 6: In the new pop-up window, double-click to add the contact to the list.

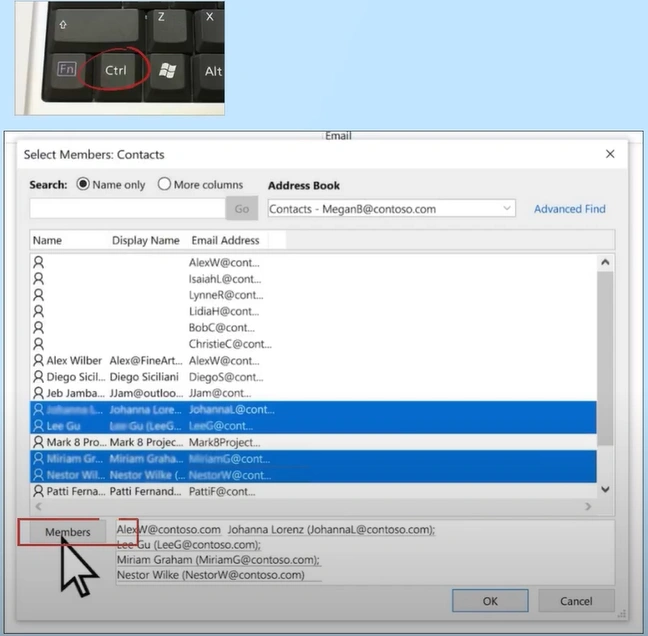
Step 7: To select multiple contracts at once, hold down the Ctrl key and select contacts, then click the Members button.
Also Read:- How to Set Up Btinternet Email On Outlook?
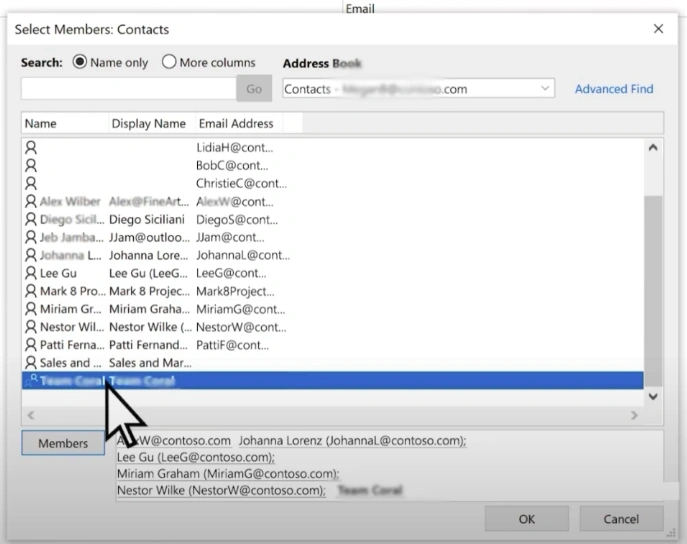
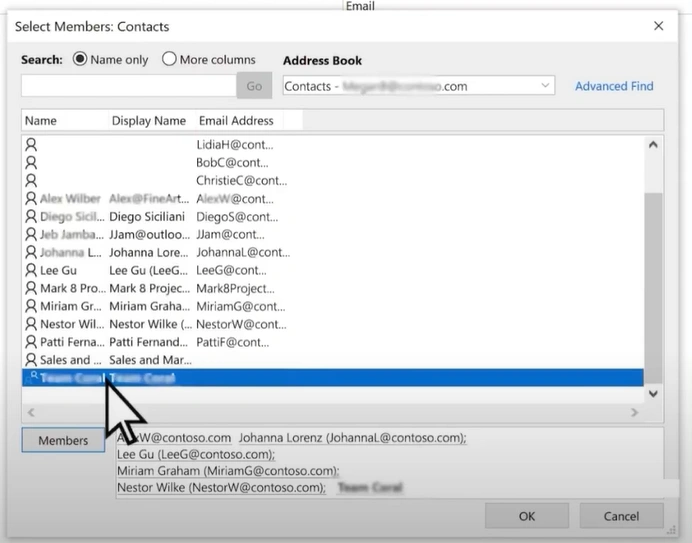
Step 8: You can also add existing groups to the new group by simply selecting the group.
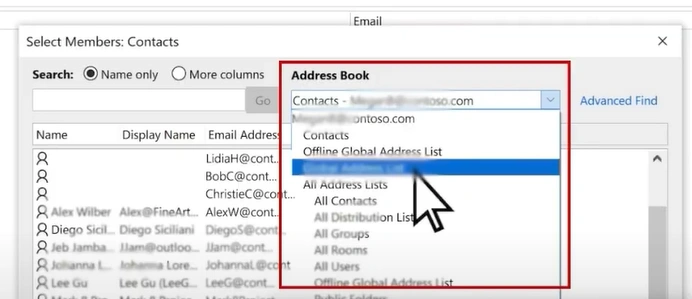
Step 9: To add addresses from a different address book, click the Address Book drop-down and select one.
Step 10: Repeat the same steps to select and add the email addresses.
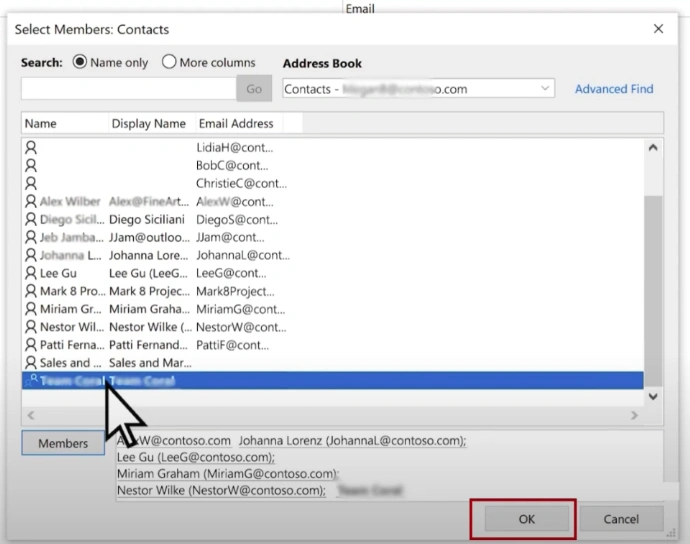
Step 11: Once done, click OK.
Step 12: To remove a member, select their email address and click Remove Member.
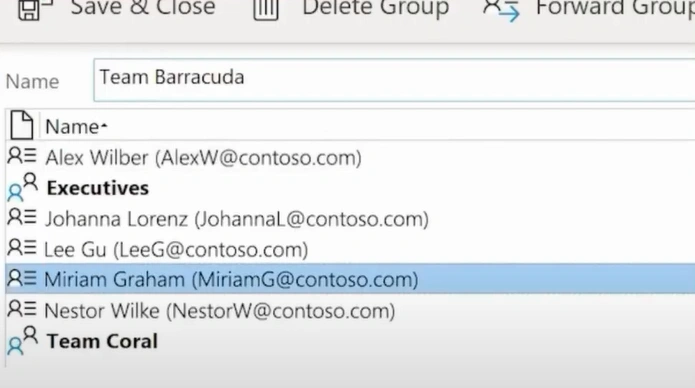
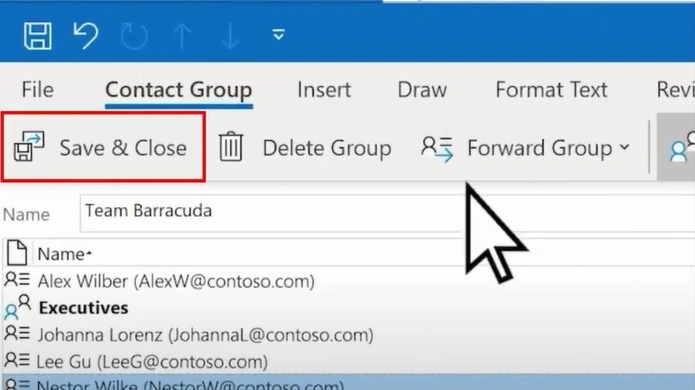
Step 13: When you’ve added all the members, click Save & Close.
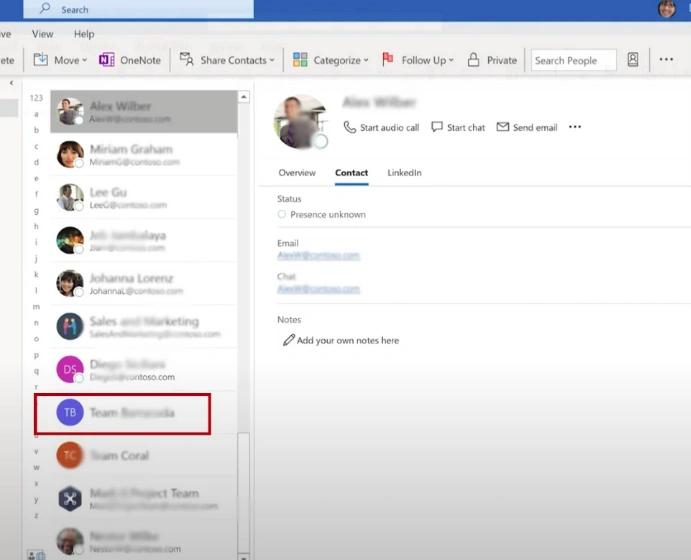
Step 14: Once done, the new group will appear in the contact list.
Summing Up
That’s all in this guide on how to make an email group in Outlook. Create an email group in Outlook to keep your inbox clutter-free. In no time, you can send messages, updates, and documents to multiple recipients. Enjoy a shared space for your team or project partners and enhance communication and productivity.
Follow each instruction to create an email group in Outlook easily. If you face any trouble, you can contact an expert.


