How to Setup a Recurring Email in Outlook?
- 0
- 456

It was the usual Monday afternoon when you opened your Outlook Mail and sent the same weekly report to your team. The same content, the subject line, and the same recipients. That’s a routine you repeat week after week. It seems a small task, but it eats a lot of your time and focus without notice.
What if you could schedule a message to get delivered automatically, right on schedule, without making any effort? That’s quite possible with Outlook’s recurring email feature. But the question you may be asking yourself is, how can it be done?
We have explained the complete process for creating an email that sends itself on a schedule, whether it’s a daily reminder, a weekly update, or a monthly newsletter. Before heading to the steps, we want to ensure you learn a few important things.
What to Know Before Getting Started?
Before you start creating a recurring email in Outlook, you must understand and keep in mind a few things, like:
Frequency and Timing
You must know how often and when you will be sending the email. For example, daily, weekly, or monthly.
Recipient List
It is important to see that your recipient list is current and is relevant to the purpose of the email.
Content Consistency
Another vital thing is to prepare a clear and reusable email template. This can help you maintain consistency in your message.
Challenges When Setting up a Recurring Email in Outlook
These are a few challenges that might arise while you are setting up recurring emails in Outlook:
-
Missed scheduled emails when Outlook is closed
-
Duplicates or overlaps
-
Template or attachment issues
-
Macros or scripts disabled
-
Add-in conflicts
The Correct Steps to Set Up Recurring Email in Outlook
A recurring email can make your daily work very stress-free. Apply the following instructions to successfully set up a recurring email in Outlook:
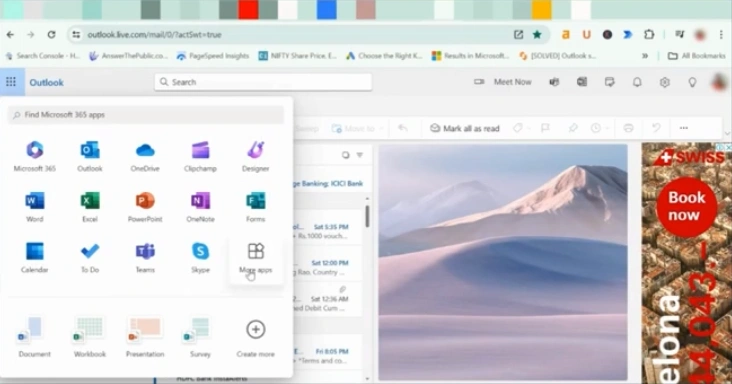
Step 1: Open Outlook and click the App Launcher icon.
![]()
Step 2: Click on More Apps.
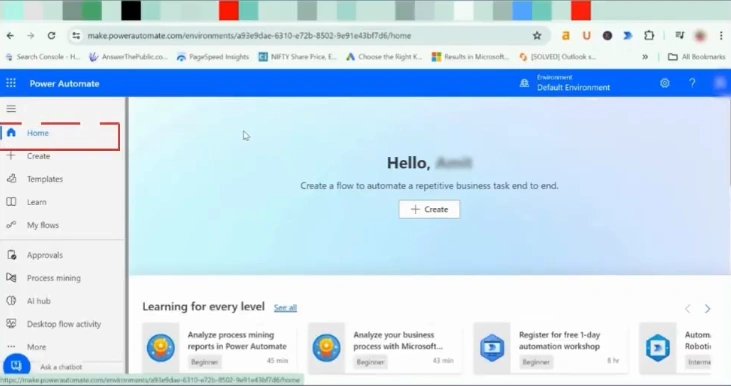
Step 3: Open the Power Automate application.

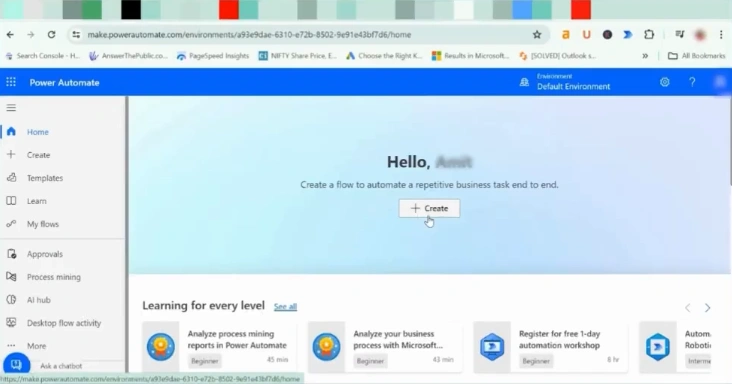
Step 4: Click on the Home tab.
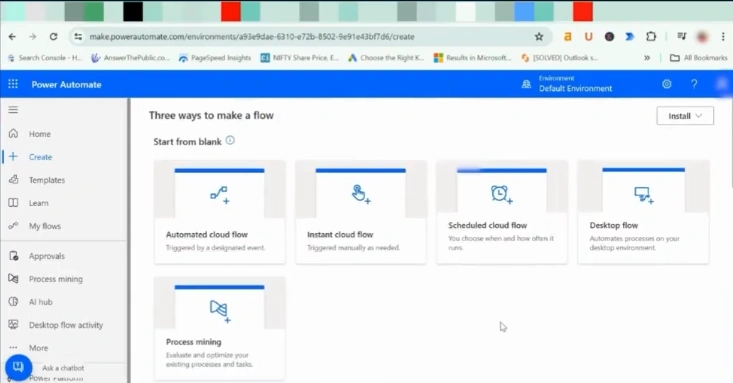
Step 5: Click on Create.
Step 6: Scroll and click on Schedule cloud flow.
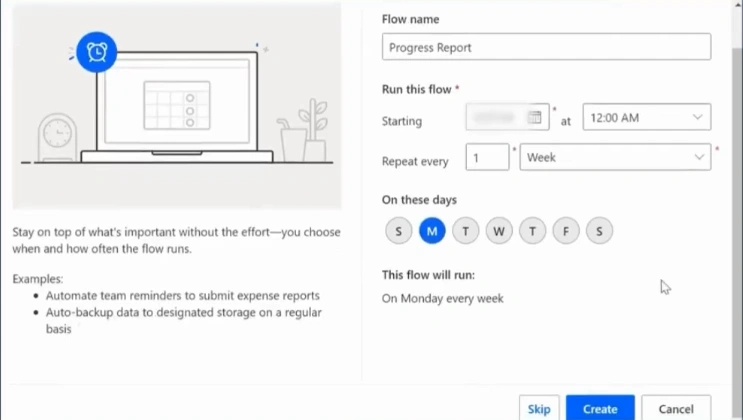
Step 7: Enter the Flow name.
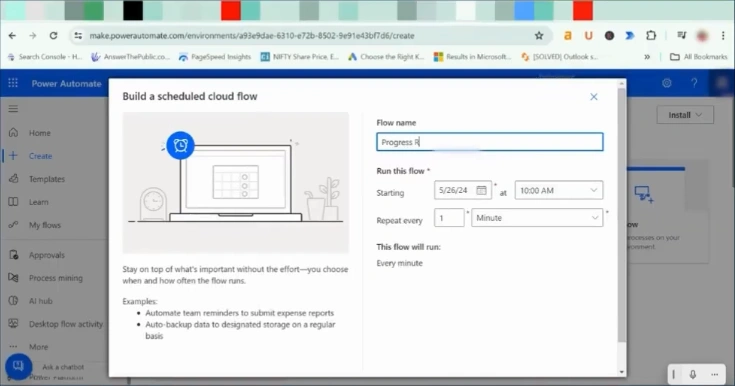
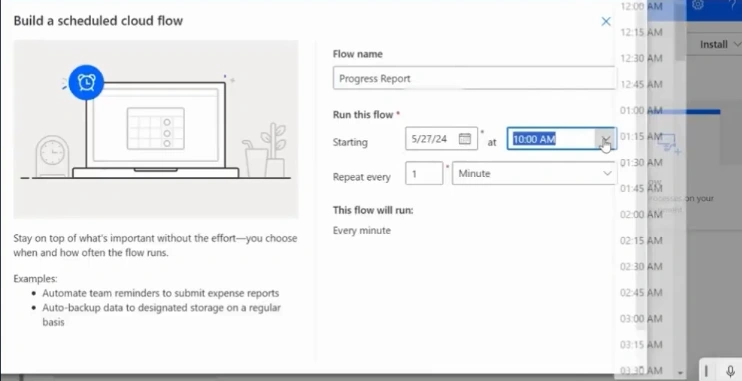
Step 8: Enter the starting date and time.
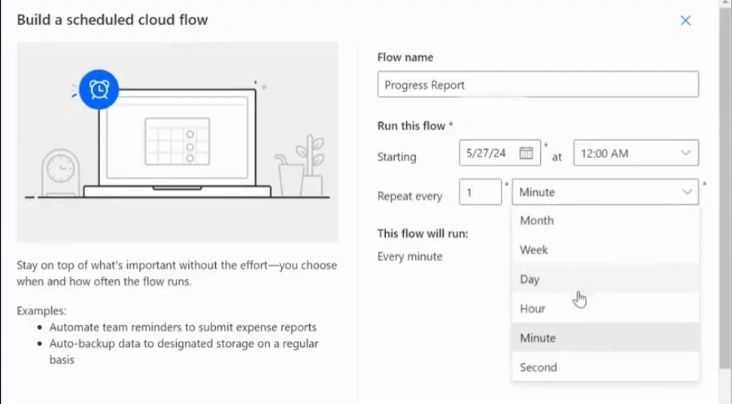
Step 9: Fill in the “Repeat Every” section.
Step 10: Unselect the days you don’t want.
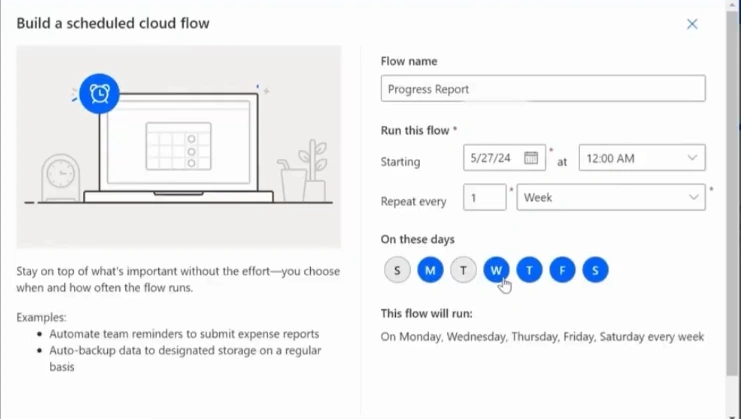
Step 11: Click on Create.
Step 12: Click on your flow.
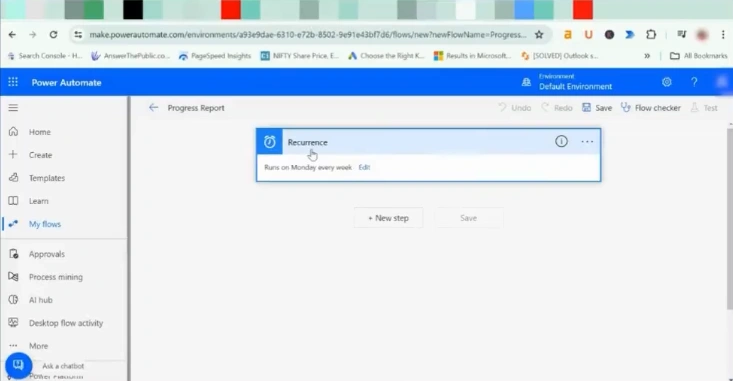
Step 13: Click “Edit” and then select “Show advanced options.”
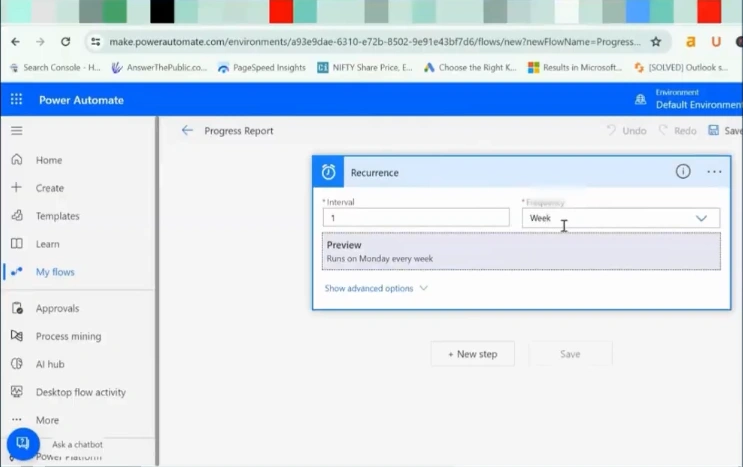
Step 14: Set the Time Zone.

Step 15: Click on the Save icon.
![]()
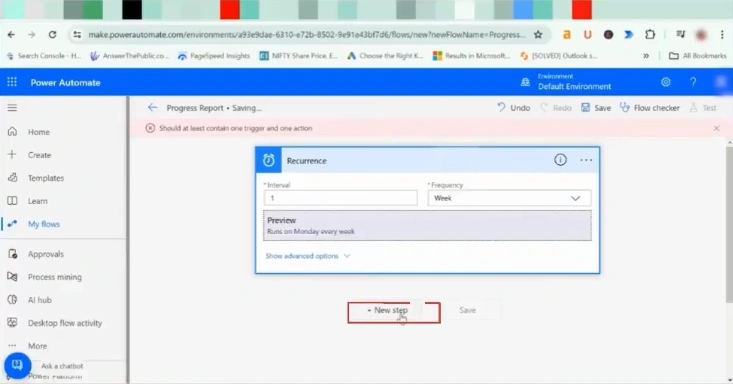
Step 16: Click on the new step.
Step 17: Enter Outlook and select your app.
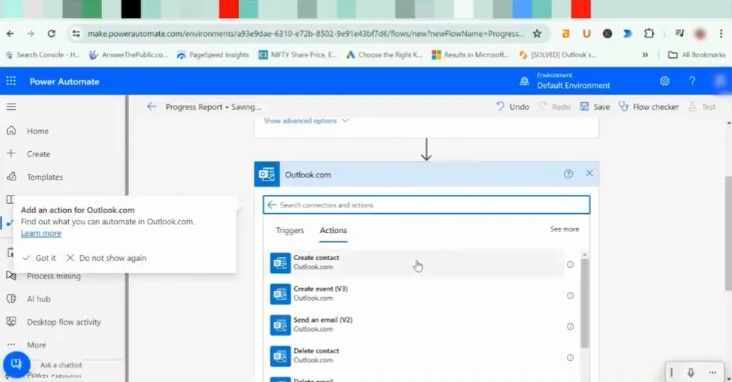
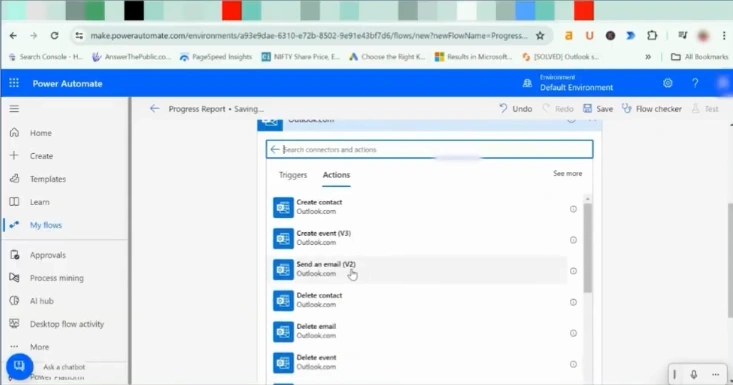
Step 18: Scroll and click on Send an email.
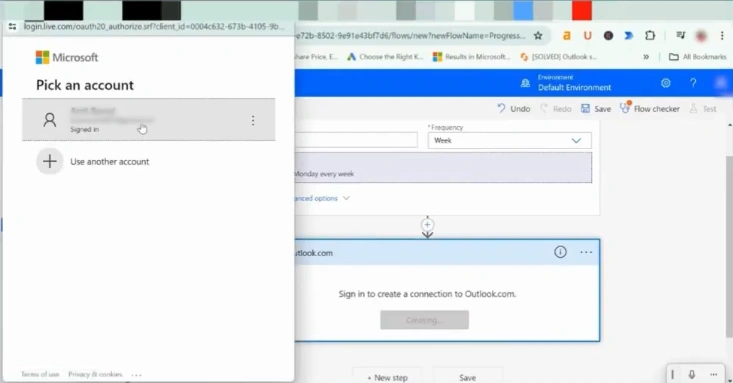
Step 19: Click on Sign in and pick your account.
Step 20: Enter the recipient’s email address, subject, and body.

Step 21: Click on Show advanced options.
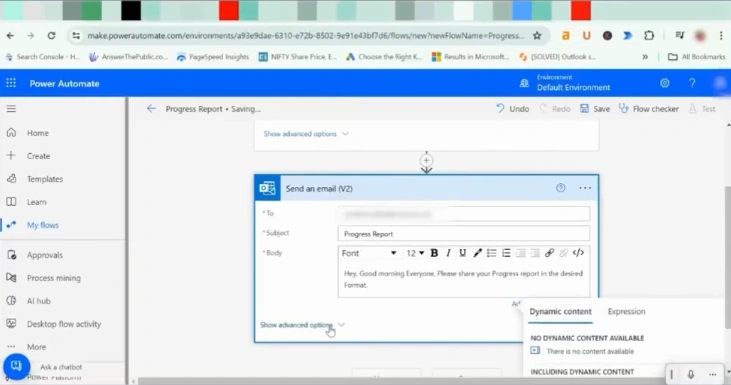
Step 22: Add the details you prefer and click on the Save button.

Step 23: Click on Test in the top-right corner.
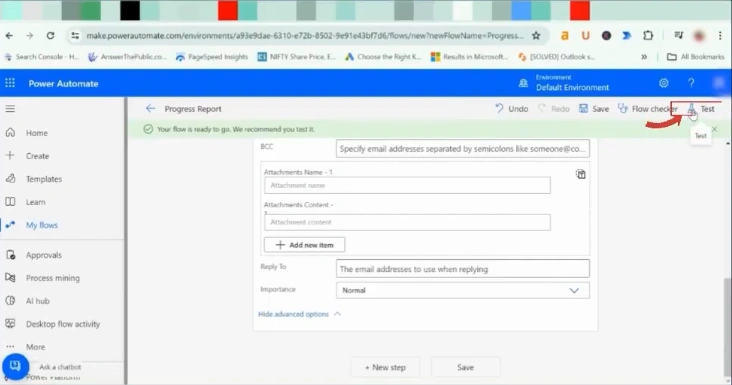
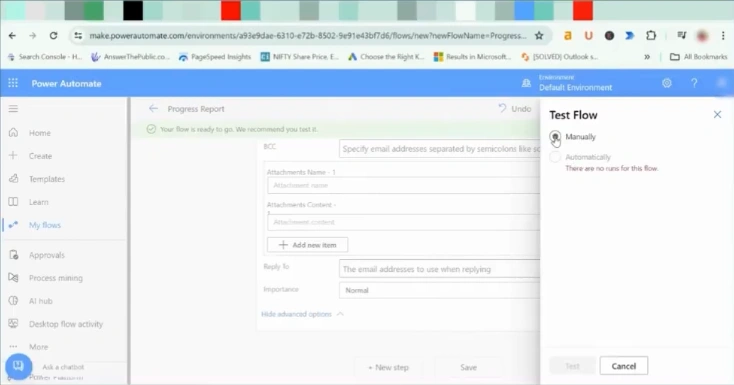
Step 24: Select Manually or Automatically and click on the Test button.
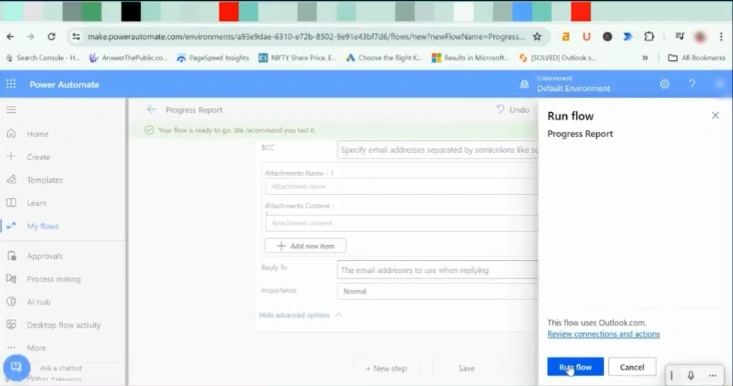
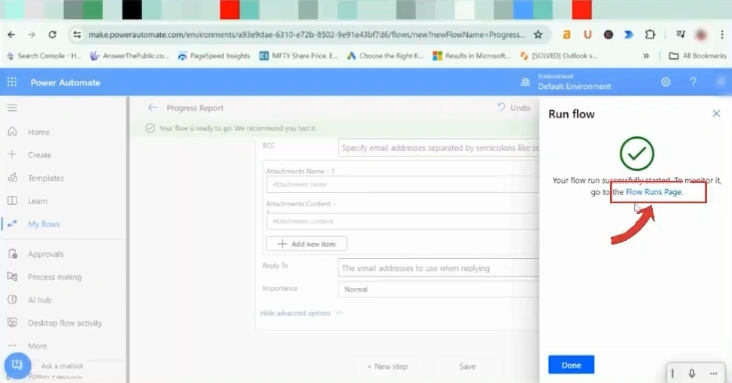
Step 25: Click on Run flow.
Step 26: Click on the Flow Runs Page to check the flow.
Also Read:- How to Mail Merge Emails in Outlook
In a Nutshell
Here, we end the complete process of setting up recurring emails in Outlook. Hope it was useful for you. Maybe now it would be easier for you to send emails to your team. You can save more time and effort, and you don’t need to worry about any forgotten emails.
 Verified Expert