How to Add Bluehost Email to Outlook?
- 0
- 452

Like any other workday, you log into your Bluehost email, switching between tabs and logging in and out, which can be quite frustrating. You often think, wouldn’t it be easier if all your emails came straight to your Outlook Mail? Since Outlook is where you manage almost everything, it makes sense to integrate your Bluehost email with it. By following a few simple steps, your Bluehost inbox will appear right inside Outlook, making your daily email tasks much easier. We have outlined the complete process for adding a Bluehost email to Outlook, but before proceeding, you should review some common issues that might occur during setup.
Common Problems When Adding Bluehost Email to Outlook
Here are a few common problems that you might face when trying to add a Bluehost email to Outlook:
-
SSL or encryption conflicts
-
Incorrect username or password
-
Outdated Outlook version
-
IMAP/POP conflicts
-
Firewall or antivirus blocking the connection
Steps to Add Bluehost Email to Outlook
Adding your Bluehost email to your Outlook inbox is quite simple. Check out the right steps to correctly add a Bluehost email to Outlook:
Step 1: Log in to your Bluehost account.
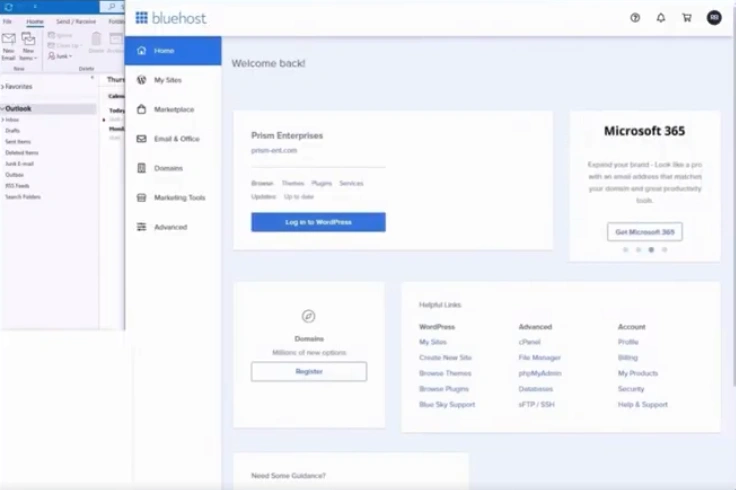
Step 2: Go to the “Helpful Links” section.
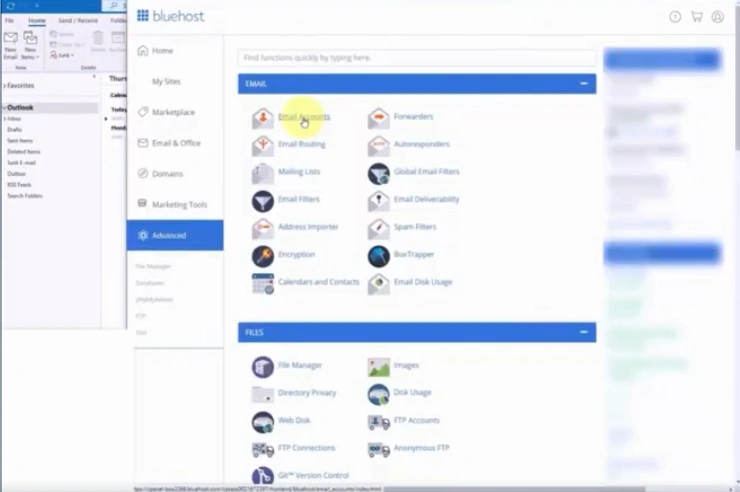
Step 3: Under the Advanced column, click on cPanel.

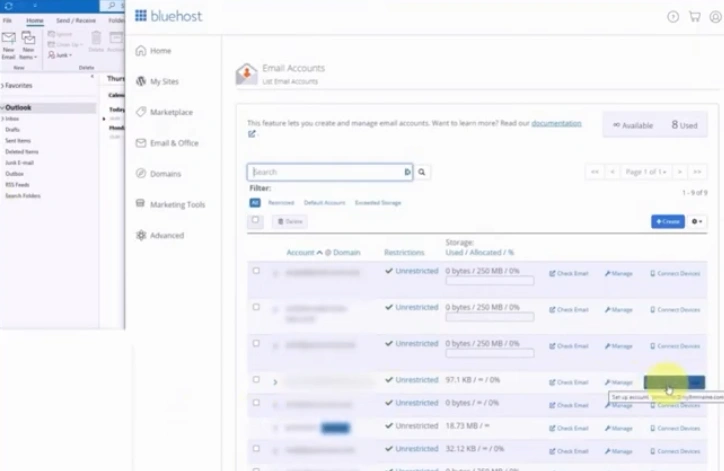
Step 4: On the next page, click on Email Accounts under the Email section.
Step 5: Find the email ID you want to set up on Outlook.
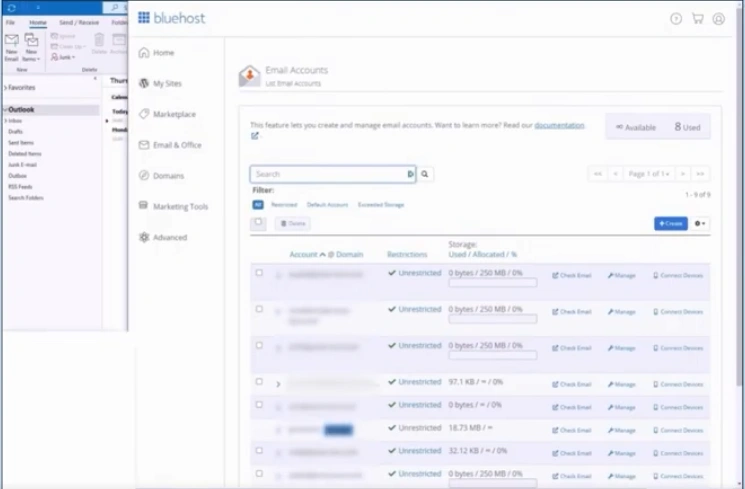
Step 6: Click on the Connect Devices button next to the email.
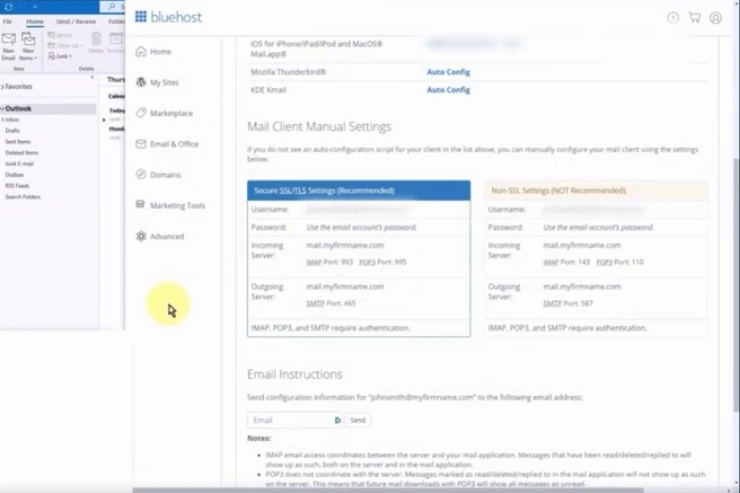
Step 7: On the “Set Up Mail Client” page, scroll down to the “Mail Client Manual Settings” section.
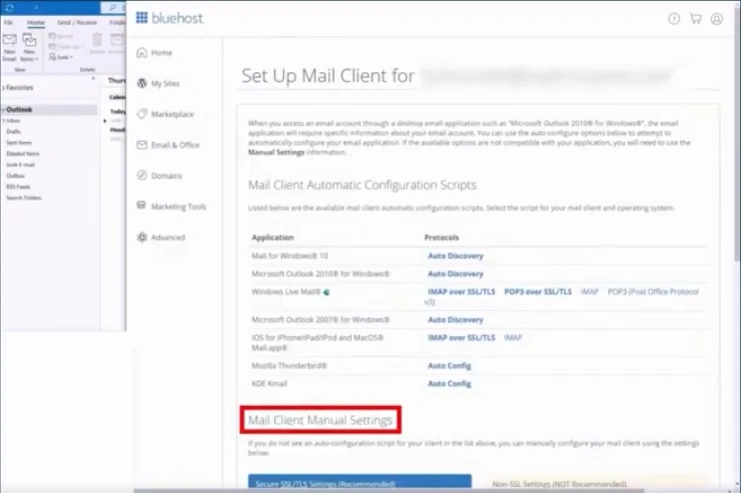
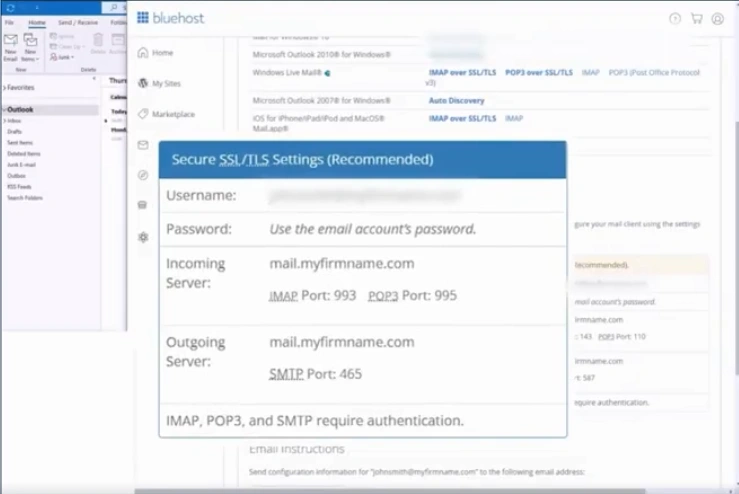
Step 8: Note the SSL/TLS settings.
Step 9: Open your Outlook.
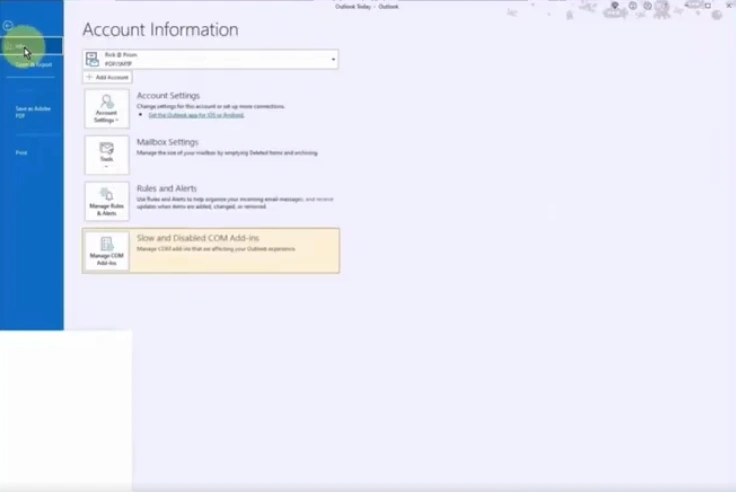
Step 10: Click on the File menu.

Step 11: In the Info tab, click on the Add Account button.
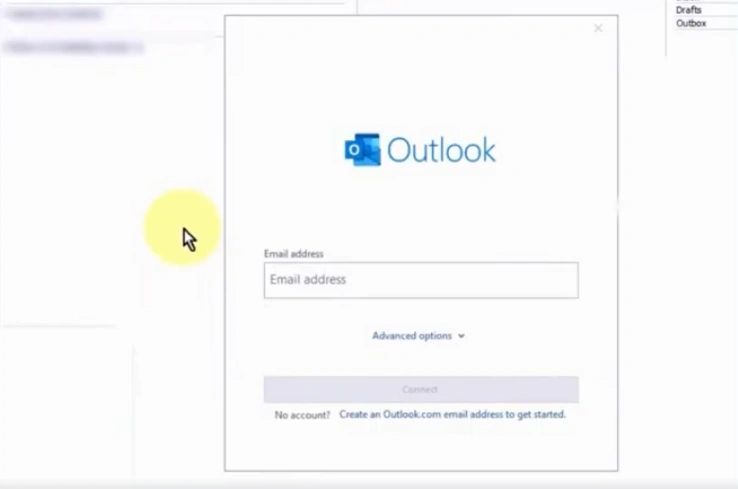
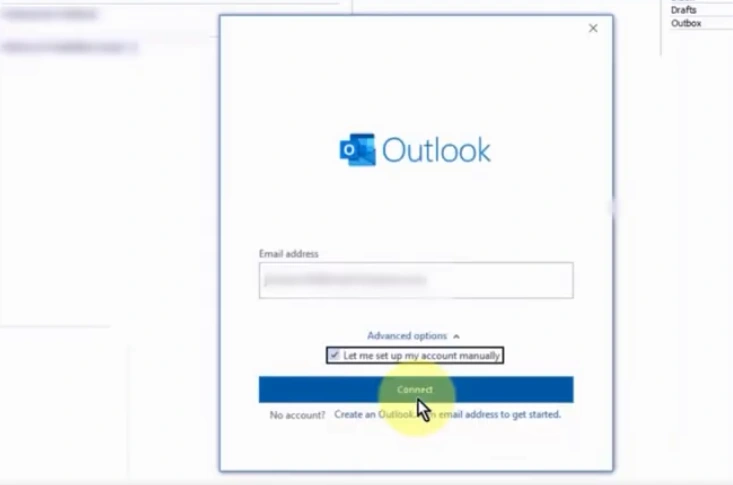
Step 12: Enter the Bluehost email address you want to add.
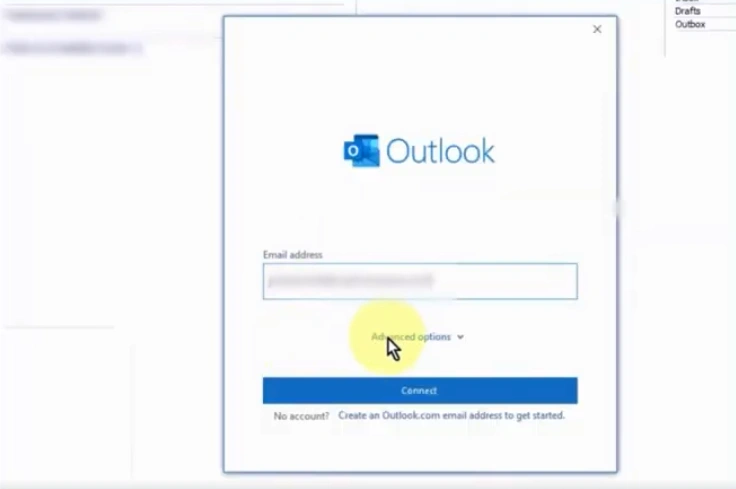
Step 13: Click on Advanced options.
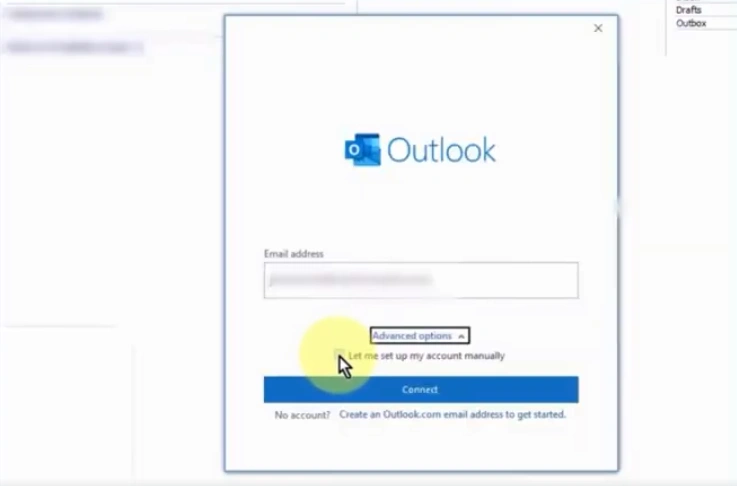
Step 14: Check the “Let me set up my account manually” box.
Step 15: Click on Connect.
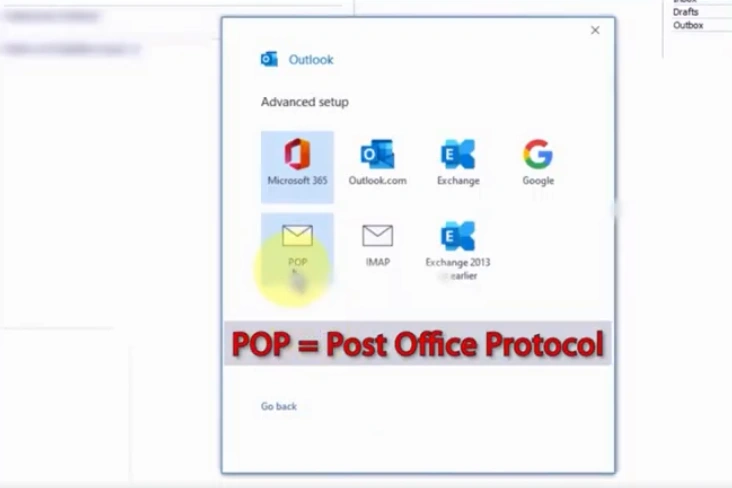
Step 16: Select POP or IMAP.
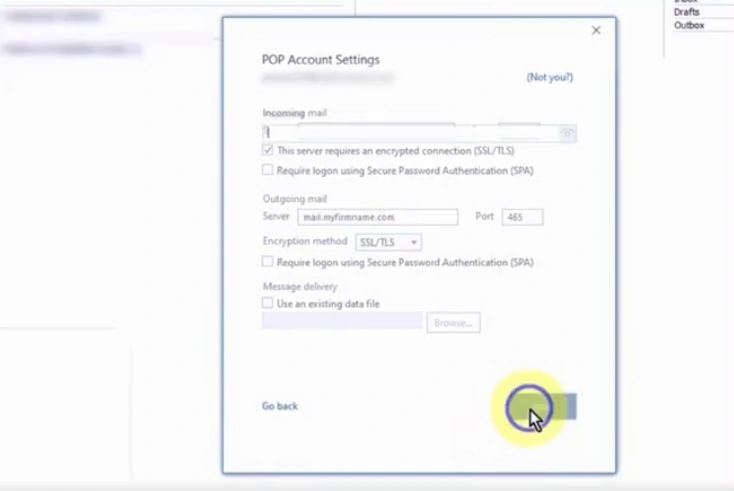
Step 17: In the POP Account Settings window, go to your Incoming Mail Server field.
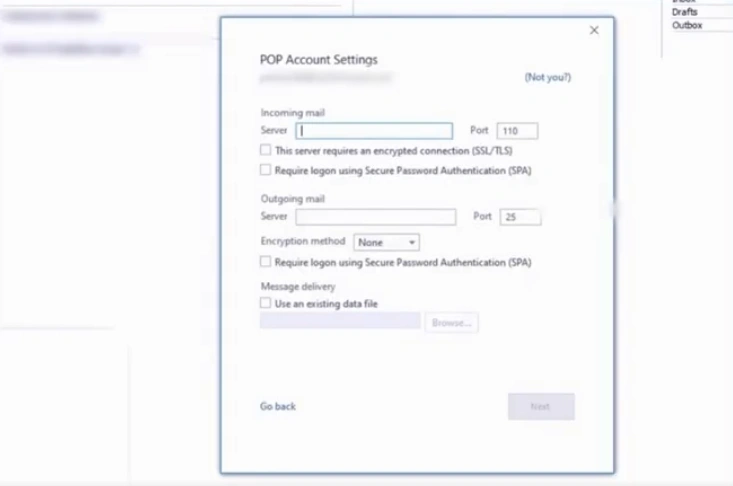
Step 18: Enter “mail.(your domain name)” in the Incoming Mail Server field.
Step 19: Enter “995” in the Port.
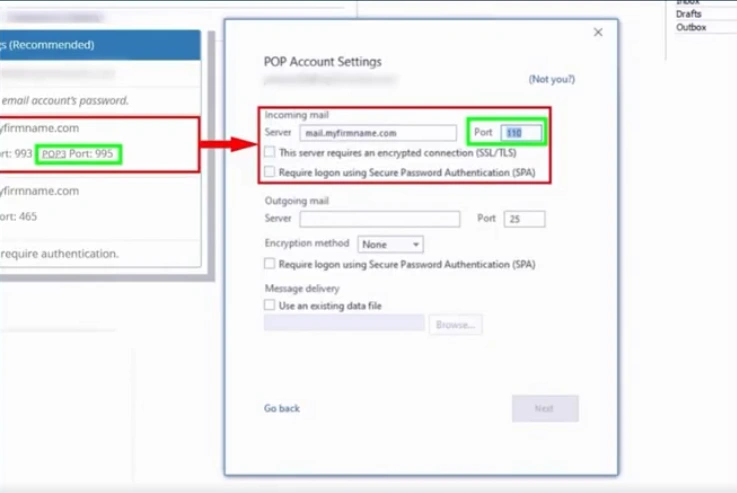
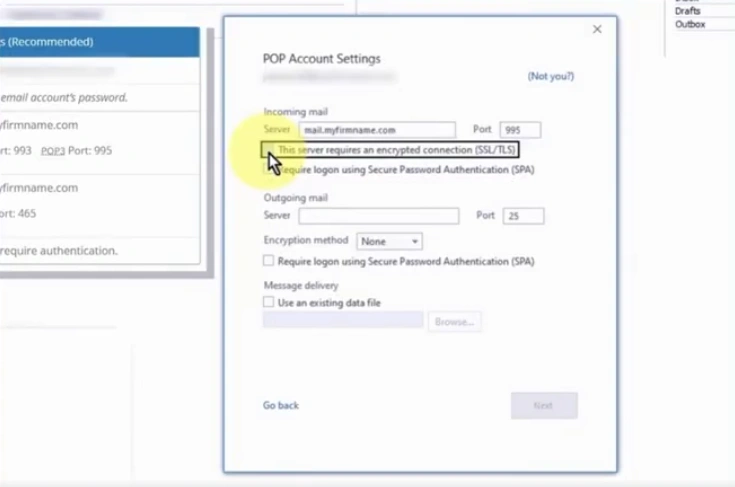
Step 20: Check the SSL/TLS box.
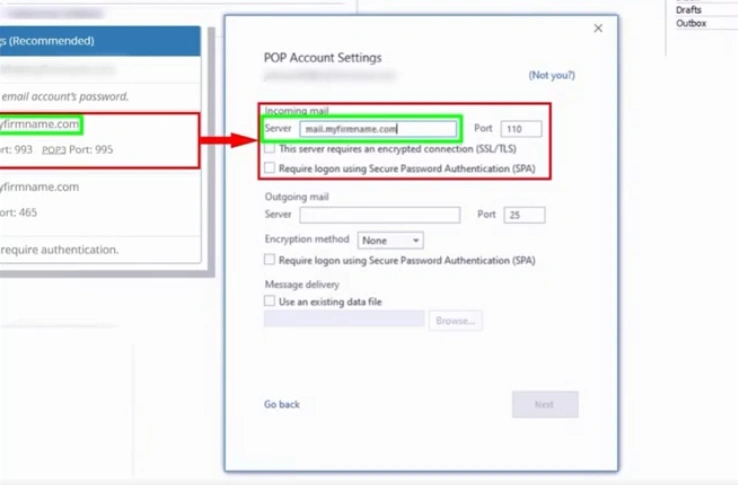
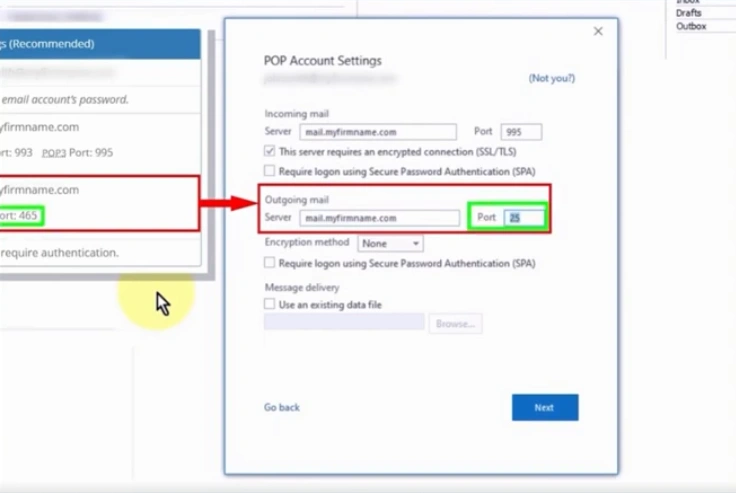
Step 21: Go to the Outgoing Mail Server field and enter “mail.(your domain name)”.

Step 22: Enter “465” in the Port.
Step 23: In the Encryption method, select “SSL/TLS” from the dropdown.
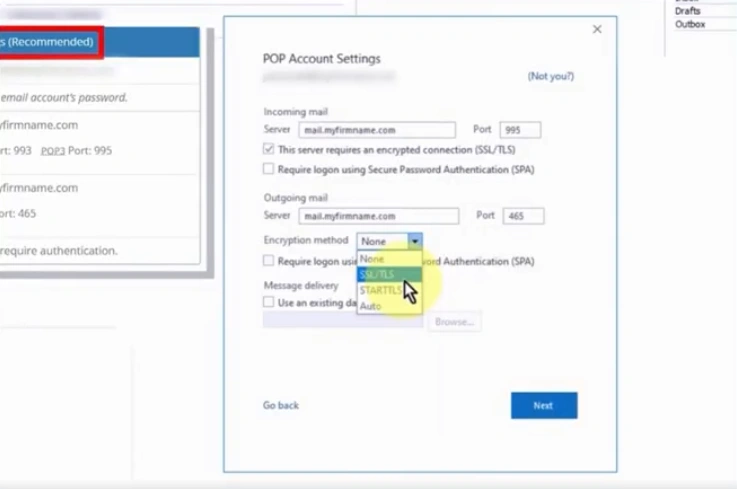
Step 24: Click on Next.
Step 25: In the password window, enter the password you set when creating the email address.
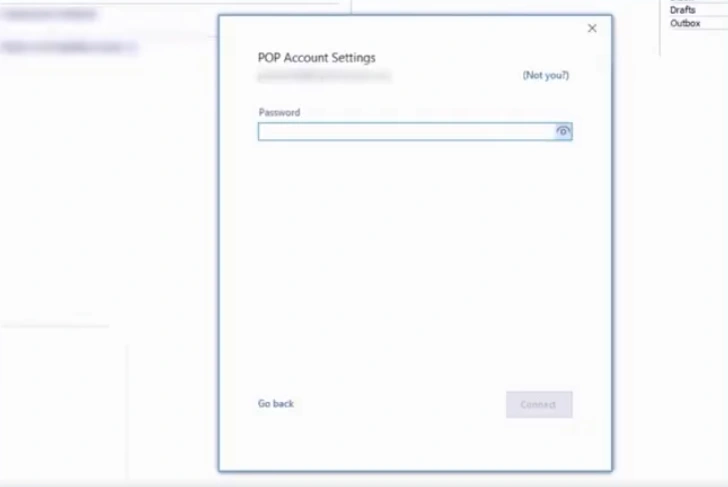
Step 26: Click on Connect.
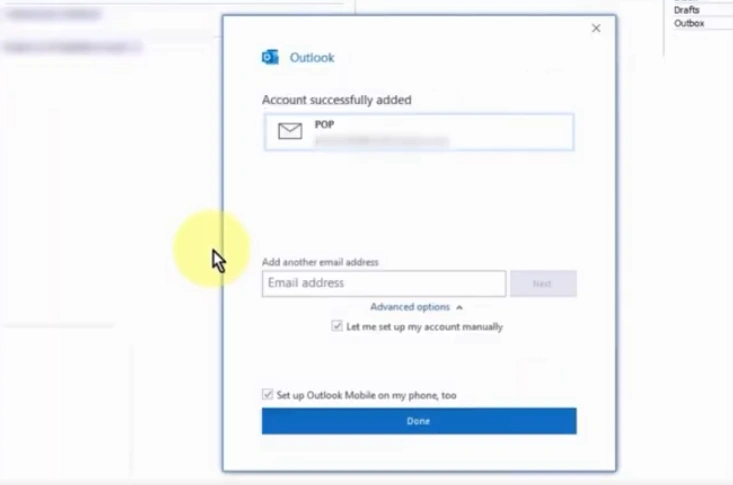
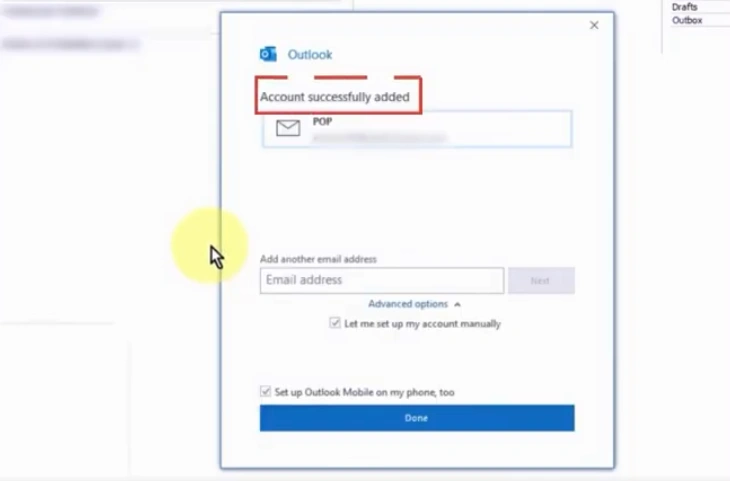
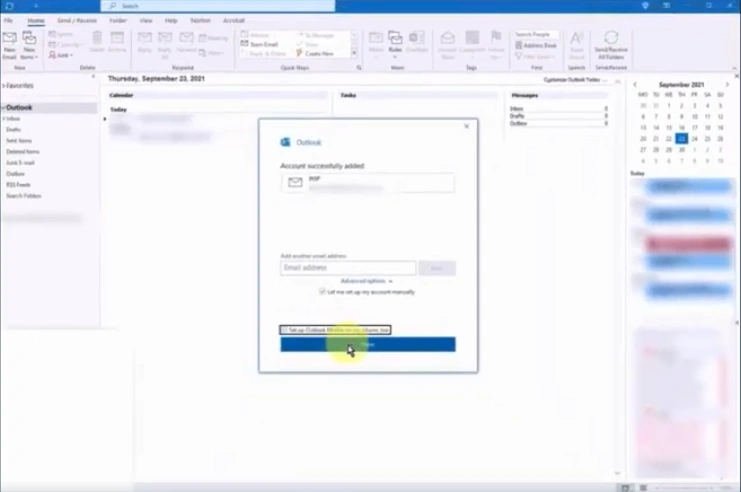
Step 27: You will receive an “account successfully added” message.
Step 28: Check or uncheck the “Set up Outlook mobile on my phone, too” box.
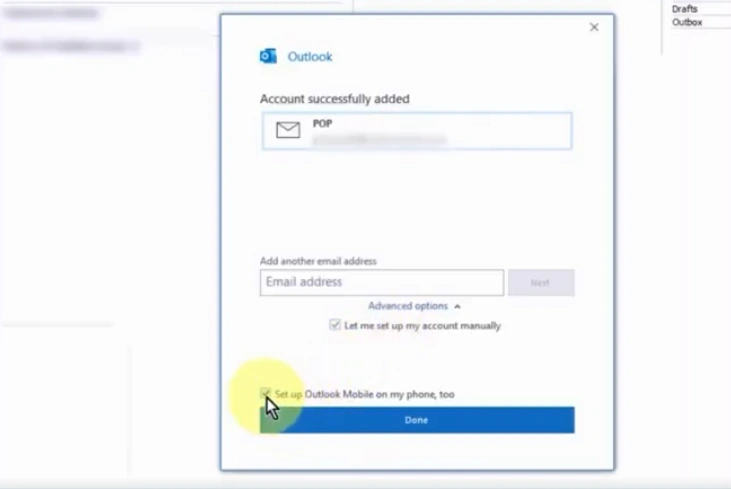
Step 29: Click on Done.
Also Read:- How to Add Footer to Outlook Email?
Summing Up
Adding your Bluehost email to Outlook is simple and helps you manage your daily communication more easily in one place. Follow each step carefully to receive all your messages together in Outlook. If any issue arises, try resolving it using the troubleshooting tips mentioned above.
 Verified Expert