How to Add Zoho Email to Outlook?
- 0
- 502

Does your Zoho Mail account contain most of your important emails, especially from clients? Do you also use Outlook for other email tasks? Managing two inboxes at once can often feel confusing and time-consuming. You might even think, “How nice it would be to have all the messages in one place.”
Adding Zoho email to Outlook can make this possible. But how can you make it happen? You need to know the right steps to perform this integration. We will discuss the complete process of integrating Zoho email with Outlook, but first, let’s look at some potential issues that may occur.
Common Issues When Adding Zoho Email to Outlook
These are some of the most common problems that can occur when adding Zoho email to Outlook:
-
Sync delays or missing emails
-
Two-factor authentication
-
Outdated version of Outlook
-
Blocked access
-
SSL/TLS configuration errors
Steps to Add Zoho Email to Outlook
Integrating Zoho email with Outlook can save you from switching between multiple email platforms. These are all the steps to add Zoho email to Outlook:
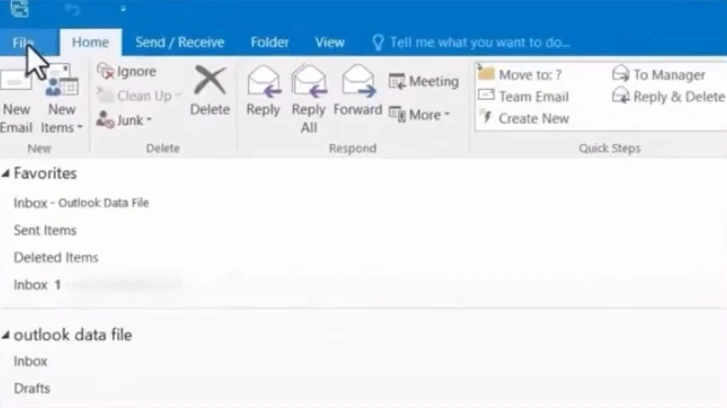
Step 1: First, open the Outlook app on your system.
Step 2: Click on File.
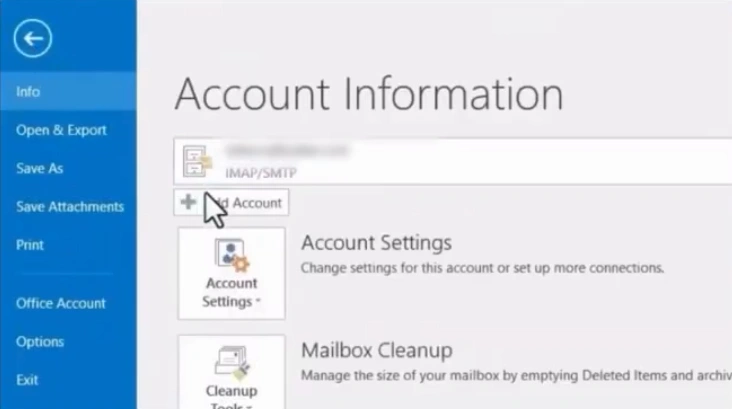
Step 3: Click on Add Account.
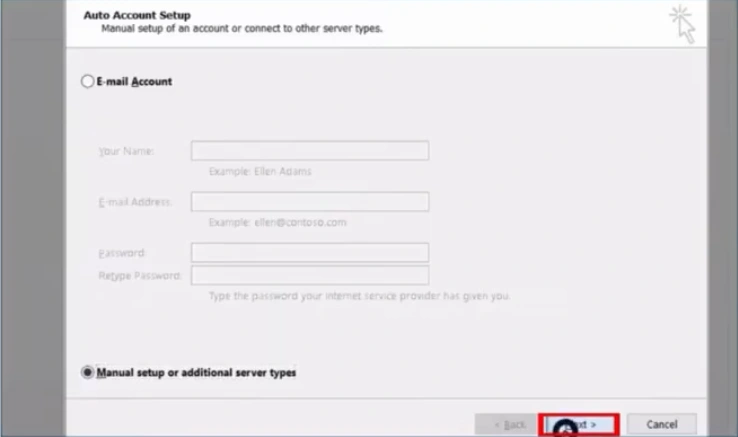
Step 4: Select the “Manual setup or additional server types” option.
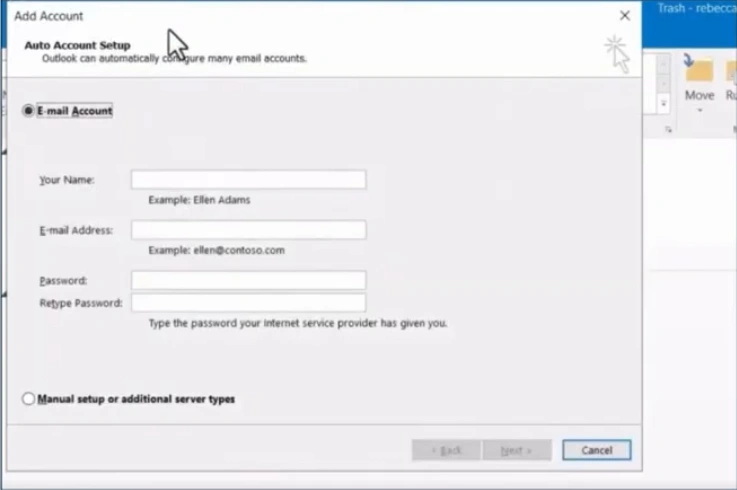
Step 5: Click on Next.
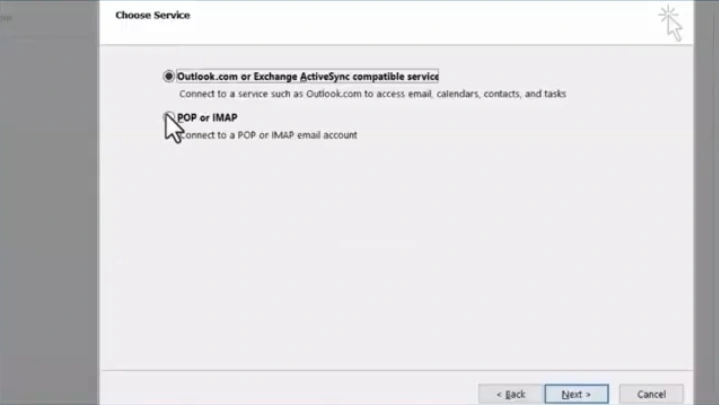
Step 6: On the Choose Service page, you have to select the POP or IMAP option and then click on Next.
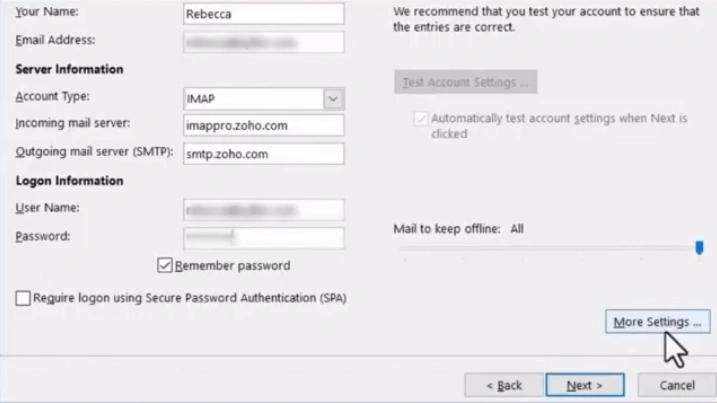
Step 7: In the POP and IMAP Account Settings window, enter your User Information.
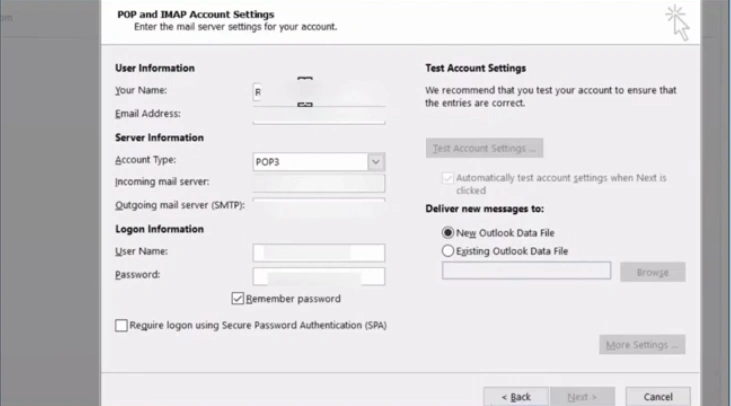
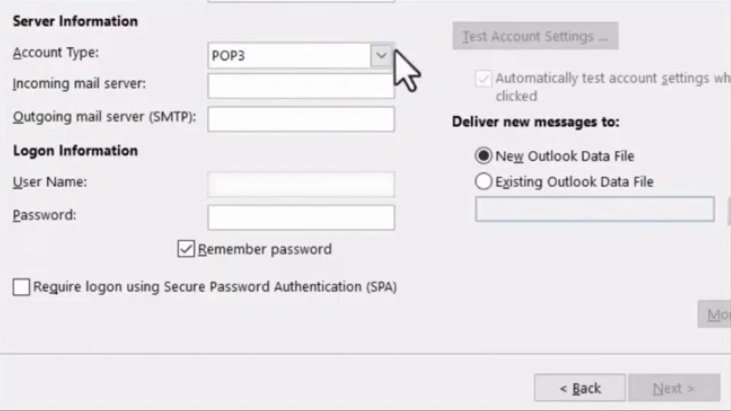
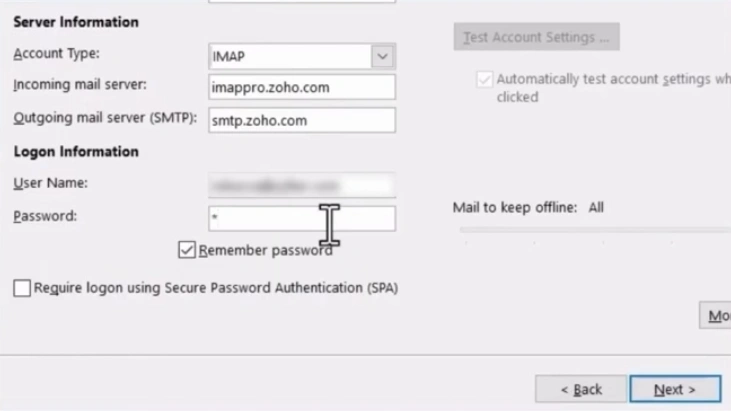
Step 8: In the Server Information section, choose IMAP in Account Type.
Step 9: In the Incoming mail server field, enter “imappro.zoho.com” for organization accounts and “imap.zoho.com” for personal accounts.

Step 10: In the Outgoing mail server field, enter smtp.zoho.com.

Step 11: In the Logon Information section, enter your email password and ensure the checkbox for Remember password is selected.
Step 12: Click on More Settings.
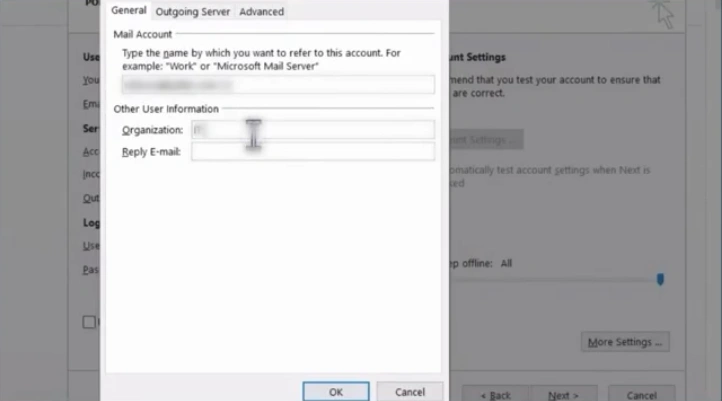
Step 13: In the General tab, enter the Organization name and Reply E-mail.
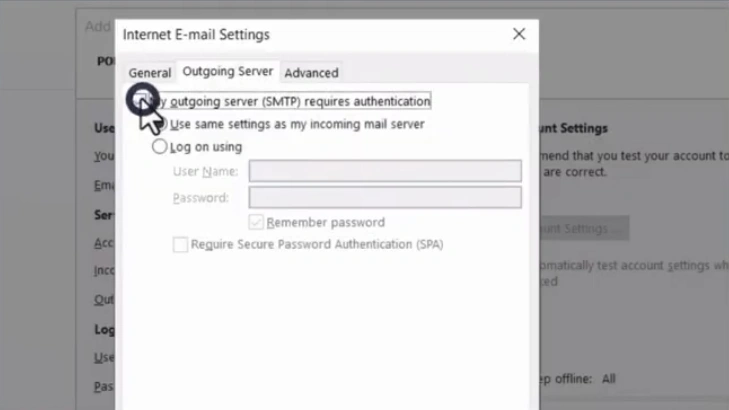
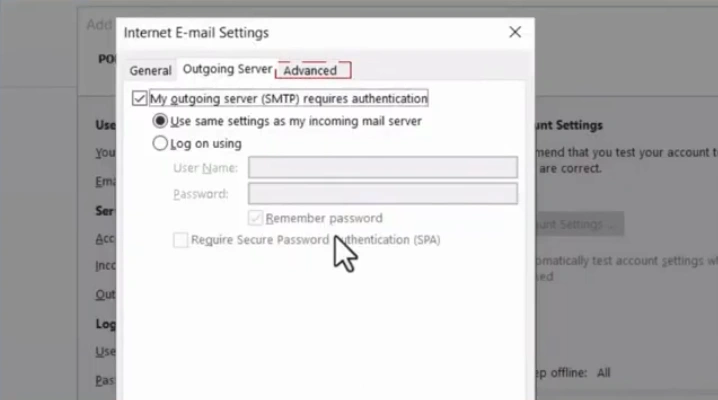
Step 14: Open the Outgoing Server tab.
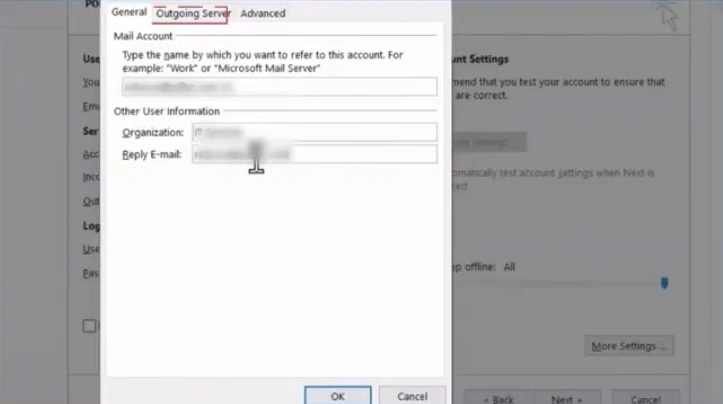
Step 15: Check the “My outgoing server (SMTP) requires authentication” box.
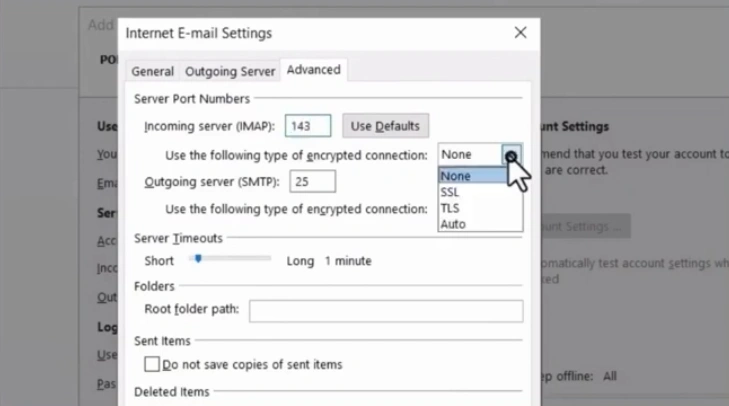
Step 16: Open the Advanced tab.
Step 17: In the Server Port Numbers section, enter “993” in the incoming server field and select SSL from the dropdown.
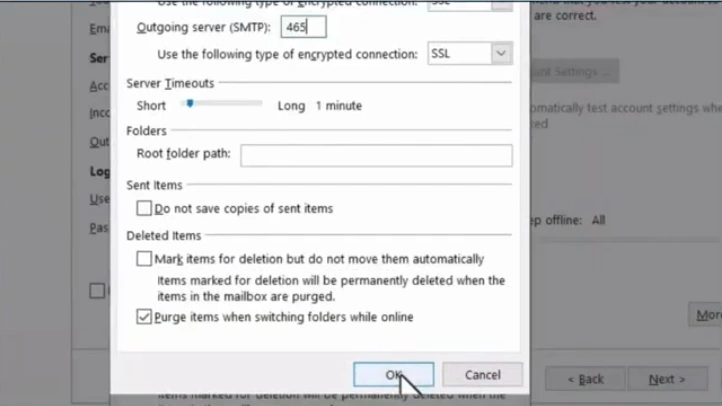
Step 18: In the outgoing server field, enter “465” and select SSL from the dropdown.

Step 19: Click on OK.
Step 20: In the Add Account window, click on Next.
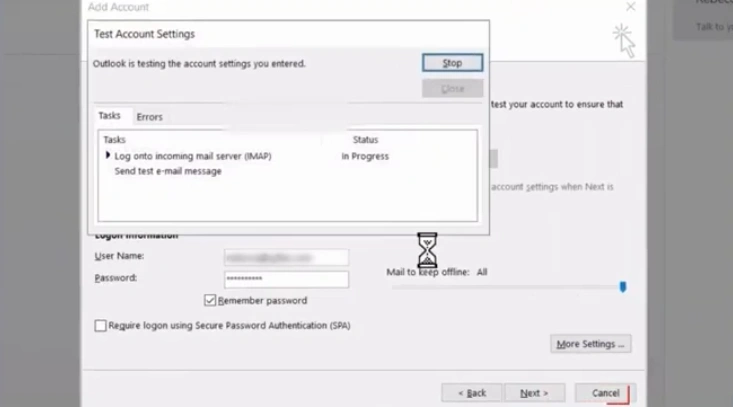
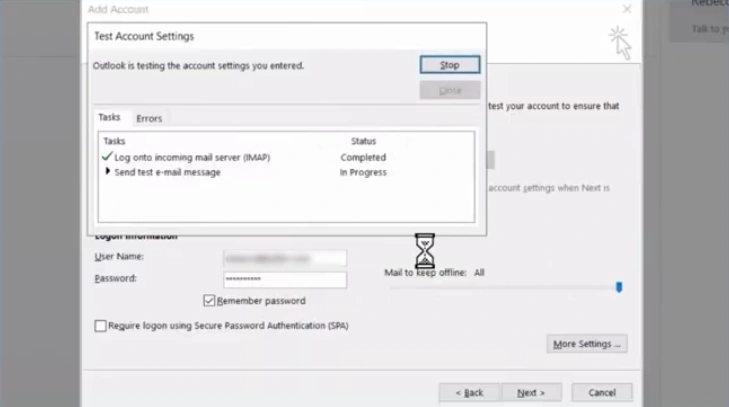
Step 21: Wait for Outlook to test the account settings.
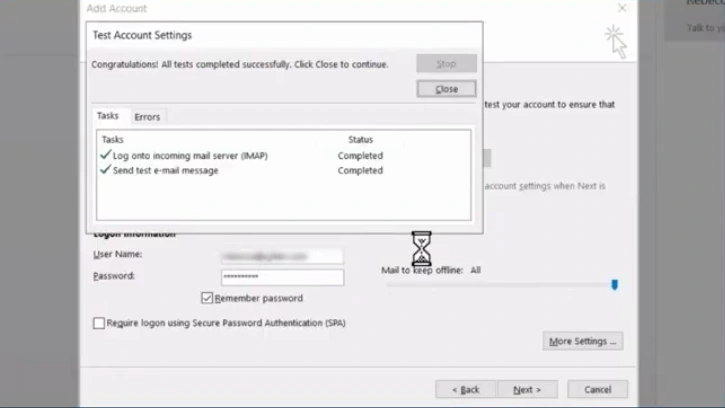
Step 22: Once the tasks show a green checkmark, click “Close.”
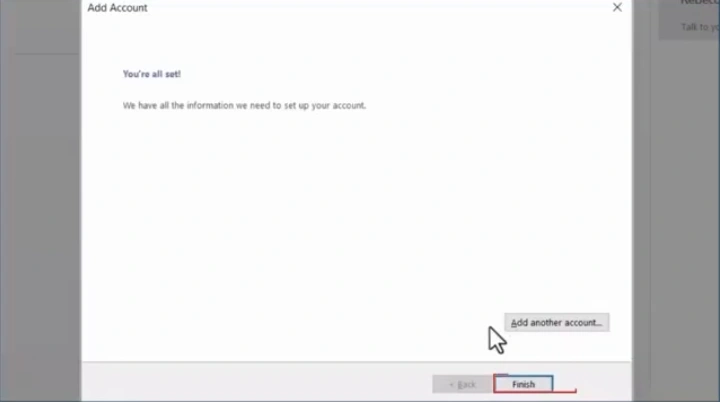
Step 23: After the window indicates that you are all set, click Finish.
Also Read:- How to Add Footer to Outlook Email?
Final Words
Here, we conclude this step-by-step guide on adding Zoho email to Outlook. We hope you’ve learned something useful today.
Perform the Zoho email to Outlook setup carefully to get all your messages in one place. This way, you can enjoy smoother communication and stay connected with your team/clients without managing multiple inboxes at once.
 Verified Expert