How to Resolve iCloud Customer's Issues on iPhone/iPad?
- 0
- 985

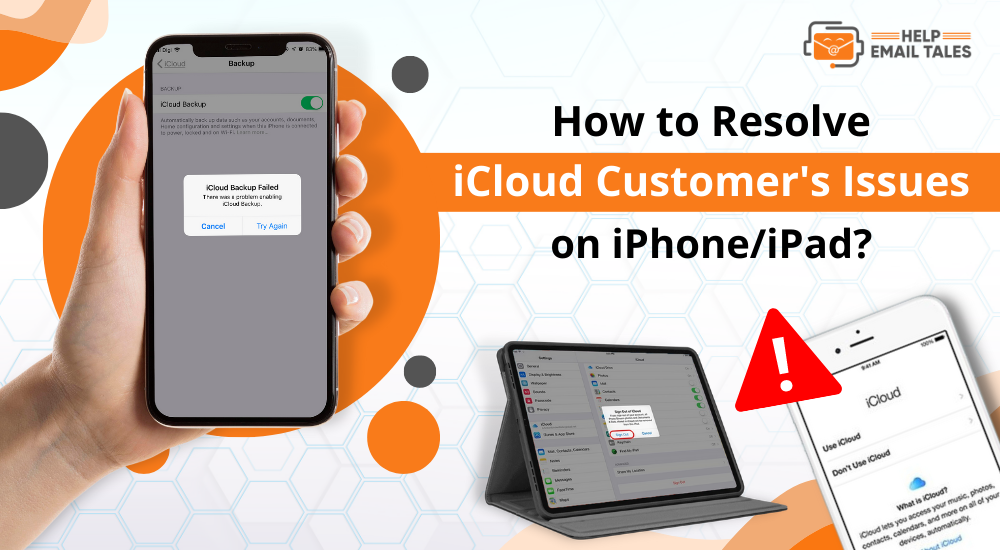
iCloud is a popular cloud-based service offered by Apple that allows users to store and access their data across all Apple devices. However, iCloud users may encounter various issues while using the service on their iPhone or iPad device, which can be frustrating. Some common problems include difficulty logging in, lost or deleted emails, email recovery, IMAP and POP-related issues, professional email issues, and more. In this blog post, we'll provide complete and detailed steps to resolve these issues and help iCloud customers ensure that their experience with the service on their iOS devices is smooth and seamless.
Issue 1: Can't Log in to the Account
If you're having trouble logging in to your iCloud account on your iPad or iPhone device, try the following easy steps to fix the issue:
- Check the internet connection: Ensure that your device is connected to the internet and that the connection is stable. Try connecting to a different Wi-Fi network or cellular data to see if it fixes the issue.
- Check Apple System Status: Check the Apple System Status page to see if there are any issues with iCloud services. If there are, you may need to wait until the issue is resolved.
- Check your Apple ID: Ensure you are entering your account's correct Apple ID and password. If unsure, you can use the "Forgot Apple ID or password" option to reset it.
- Restart your device: Sometimes, restarting your device can fix login issues. Click the Sleep/Wake button until the "slide to power off" option appears. Slide the power icon to the right to turn off your device, and tap and hold the Sleep/Wake button again until the Apple logo appears.
- Sign out and sign in again: If the above steps don't work, try signing out of your account and signing back in. Go to Settings, then iCloud, and hit Sign Out. Enter your Apple ID password if asked, and sign back in.
Issue 2: Lost/Deleted Emails Recovery
If you have lost or deleted emails from your iCloud account on your iOS device, you may be able to recover them by following these basic steps:
Step 1: Check your Mail Trash Folder
Open the Mail app on your device and go to the Mailboxes view. Scroll to the bottom of the list and look for the Trash folder. If you find the lost/deleted email, select it, then tap Move to and choose a different mailbox to move the email back to the inbox.
Step 2: Check the iCloud.com Website
If the lost/deleted email is not in your Mail Trash folder, try to recover it by logging in to your account on the iCloud.com website. Once logged in, tap the Mail icon and look for the Trash folder on the left side of the screen. If you find the email, tap on it, select the "Move to" option, and choose a different mailbox to move it back to the inbox.
Step 3: Check the Archive Folder
If the email you are searching for is not in the Trash folder, it might be in the Archive folder. Go to the Mailboxes view in the Mail app and look for the Archive folder. If you find the lost/deleted email, click on it and select "Move to," and choose a different mailbox to move it back to your inbox.
Step 4: Check the Recently Deleted Folder
If you still cannot find the lost/deleted email, it might be in the Recently Deleted folder. In the Mail app, go to the Mailboxes view and look for Recently Deleted. If you find the email in this folder, tap on it and select "Move to," and then choose a different mailbox to move it back to the inbox.
Issue 3: IMAP & POP-Related Issues
If you are facing issues with iCloud IMAP and POP on your iOS device, you can follow the steps below to fix the problem:
- Check your internet connection: Confirm that your device is connected to active and stable internet, as iCloud services require good internet to function.
- Verify the settings: Check to ensure your account settings are configured correctly. Go to Settings > iCloud and verify that you are signed in with the correct account.
- Check the email account settings: Verify that your settings are correct. Go to Settings > Passwords & Accounts > (your account) and confirm that the incoming and outgoing server settings are correct.
- Reset network settings: Resetting your settings can sometimes solve issues with connectivity. Go to Settings > General > Reset > Reset Network Settings. Keep in mind that this will remove all your saved networks and passwords.
- Disable and re-enable iCloud: Try disabling and re-enabling iCloud on your device. Go to Settings > iCloud and toggle the switch off, wait a few seconds, and toggle it back on.
- Remove and re-add your account: Remove your account from your device and re-add it. Go to Settings > Passwords & Accounts > (your account) > Delete Account. After that, add the account again by clicking Add Account and following the basic steps.
Issue 4: Professional Email Issues
If you are experiencing professional email issues with iCloud on your iOS device, there are a few steps to try and fix the problem:
Step 1: Verify Your Account Settings
Ensure that you have configured your iCloud account correctly. Open Settings on your device and go to Passwords & Accounts. Look for your account and select it to open the account settings. Verify that your incoming and outgoing mail servers are set correctly. If unsure, check the settings on Apple's support website.
Step 2: Restart Your Device
Try restarting your device by pressing the power button until you see the "slide to power off" option. Slide the power button to the right to turn off your device, then tap it again to turn it back on. This may help refresh your device and clear any issues causing the professional email issue.
Step 3: Update Your iOS Software
Make sure your device is running the latest software. Go to Settings on your device, then navigate to General and select Software Update. If an update is available, download and install it. This may fix bugs or glitches causing the professional email issue.

Issue 5: Unable to Receive Email
If you are experiencing issues with iCloud not receiving emails on your iOS device, there are several steps to try and resolve the issue:
- Check your internet connection: Ensure your device is connected to stable internet. To confirm, you can open apple.com in Safari on your device.
- Ensure that mail is enabled in iCloud: Click on Settings > [Your Name] > iCloud, and turn on Mail.
- Check iCloud email fetch and notification settings: Open Settings > Mail > Accounts > Fetch New Data, and ensure that Fetch is turned on. You can also choose to have notifications turned on for new mail.
- Turn on cellular data for mail: If cellular data is turned off, go to Settings > Cellular/Mobile Data > Cellular/Mobile Data Options, and turn on the toggle for Mail.
- Check iCloud server status: Visit Apple's System Status website to check for any ongoing issues with iCloud servers that could be causing the issue.
- Try resetting network settings: Go to Settings > General > Reset > Reset Network Settings. This will reset all network settings, such as Bluetooth and Wi-Fi, so ensure you have the necessary passwords to reconnect to networks.
- Free up iCloud storage: If your storage is full, you may not be able to receive new emails. You can free up storage by deleting unwanted files or upgrading to a higher storage plan.
- Uninstall the Mail app and install it again: Click the app icon until it wiggles, then press the X key to uninstall. Open the App Store, search for the Mail app, and install it again.
Issue 6: Reset Your Account
If you're facing an issue where your iOS device asks you to "Reset Your Account" for iCloud, it can be a frustrating experience. However, there are some steps to try and fix the issue:
Step 1: Verify Your Account Details
Ensure you have the correct Apple ID and password associated with your account. Go to Settings > [Your Name] > iCloud and check if you're registered with the correct account. If you're signed in with the wrong account, sign out and sign in with the correct one.
Step 2: Update Your Device
Ensure your device is updated to the latest version of iOS. To do this, go to Settings > General > Software Update. If an update is available, download and install it.
Step 3: Restart Your Device
Try restarting your device by holding the power button and sliding the "Slide to power off" slider. Wait a few seconds, then turn your back on by tapping the Power button.
Step 4: Reset Your Account
If the issue still persists, you can try resetting your account. Go to Settings > [Your Name] > iCloud > iCloud Backup and turn it off. Next, go back to the main settings and hit Sign Out. Input your Apple ID to sign out. After signing out, restart your device and sign back. Once signed back in, go to Settings > [Your Name] > iCloud > iCloud Backup and turn it on again.
Issue 7: Email Account Hacked
If you suspect your iCloud email account has been hacked, it's important to take immediate action to secure it and prevent further unauthorized access. Here are the steps to follow on your iOS device:
- Change your iCloud password: Open the Settings app on your device and tap on your name at the top. Now, select Password & Security and tap Change Password. Follow the steps to create a new, strong password. Avoid using passwords that are easy to guess or that you have used before.
- Sign out of all devices: Once you have changed your password, sign out of your account on all devices that are signed in, including your iPhone and iPad. To do this on your device, go to Settings > [Your Name] > iCloud and toggle off all the apps that use iCloud. Next, scroll to the bottom of the screen and hit Sign Out. Follow the steps to sign out of your account.
- Check for any suspicious activity: After signing out of your account, check for any unusual activity in your account, such as unrecognized login attempts, sent or deleted messages, or changes to your account settings. If you notice anything suspicious, contact Apple Support immediately.
- Enable two-factor authentication: 2FA is an extra layer of security that requires you to enter a code sent to your device and your password. To enable 2FA, go to Settings > [Your Name] > Password & Security > Two-Factor Authentication and follow the steps to set it up.
- Update your security questions: If you suspect your security questions have been compromised, update them immediately. Go to Settings > [Your Name] > Password & Security > Change Security Questions and follow the steps to choose new questions and answers.
- Run a malware scan: If you have downloaded any suspicious apps or clicked on any suspicious links, your device may be infected with malware. Run a malware scan using an antivirus app to detect and remove any malware on your device.
- Change the passwords of other accounts: If you use the same password for multiple accounts, change those accounts' passwords to prevent further unauthorized access.
Issue 8: Set Forwarding to Email
If you're having trouble setting up email forwarding on your iOS device, here are the steps you can follow to fix the issue:
- Verify your email account: Make sure that your account is properly verified and that you can send and receive emails from it.
- Check email forwarding settings: Go to the email settings on your device and check the forwarding settings. Make sure that forwarding is enabled and that the correct email address is set up for forwarding.
- Verify forwarding email address: If you're having trouble with forwarding to a specific email address, ensure it is correct and active.
- Disable forwarding and enable it again: If forwarding is enabled but not working, disable forwarding and enable it again. This may reset the forwarding settings and fix any issues.
- Check email filters: Some email filters may prevent emails from being forwarded. Check your email filters to ensure they are not blocking any emails.
- Check for email storage limitations: If your email storage is full, it may prevent emails from being forwarded. Delete unnecessary emails or increase your email storage limit to fix this issue.
- Update your device: Make sure that your device is updated to the latest software version. This may fix any software-related issues that prevent email forwarding.
Issue 9: Multiple Issues in Emails
If you are experiencing multiple issues with your emails on your iOS device, such as being unable to send or receive emails or encountering error messages, below are the steps to try and fix the issue.
- Restart your device: Try restarting your device to refresh your email settings and connections. To do this, click the power button until you see the slider to turn off your device. Slide to turn it off, and tap the power button again to turn it back on.
- Update your device and email app: Make sure your device and email app is running on the latest version. To update your device, open Settings > General > Software Update. To update your email app, go to the App Store, and check for any available updates.
- Check your email settings: Ensure your settings are correct, especially your incoming and outgoing server settings. You can do this by going to Settings > Mail > Accounts, selecting your email account, and then checking the server settings.
- Remove and re-add your account: If the above steps do not work, try removing and re-adding your account on your device. To do this, go to Settings > Passwords & Accounts, select your email account, and select Delete Account. Then, add your account back by clicking Add Account and following the steps.
By following these steps, you can fix any issues you are experiencing with your emails on your iOS device.
Frequently Asked Questions (FAQs)
Answer: To
ensure iCloud syncing on all devices, make sure you're signed in with the same
Apple ID and have turned on Contacts, Calendars, and Reminders in iCloud
settings. Also, verify that your device's date and time settings are accurate
for your current location.
Answer: In
order to reset iCloud settings on your iPhone device, open the Settings tab, tap your name, and then
click on iCloud. From there, you can
select which apps you want to use iCloud.
Answer: To
fix the issue of an iPad not connecting to iCloud, make sure your device has a
stable internet connection and cellular data is turned on in the settings. Open
Settings > Cellular or Mobile Data, and check if the setting is turned on. If
not, enable it to access your Apple ID and iCloud when not connected to Wi-Fi.


