How to Fix the ‘iCloud Mail Not Receiving Emails’ Issue?
- 0
- 658
iCloud Email provides a seamless emailing experience for iOS and Mac device users. A device with the internet allows you to send email from any part of the world. Also, it provides top-notch security to your emails by protecting them by two-factor authentication. In addition, iCloud email is best for both personal and professional use.
This email service is easy to use and offers a remarkable user experience due to its smart features, such as rich links, default email addresses, custom email domains, email organization with folders, and more. However, the product can show some common errors for various reasons, and iCloud not receiving emails is one of them. Keep reading this specific content until the end to learn about the top 5 solutions to resolve the issue quickly.
Solution 1: Turn off and on Your iCloud Mail Account
Sometimes, the reasons for iCloud not receiving emails could be minor. Hence, follow the steps to restart your iCloud account and see if it works.
iOS
-
For the first step, tap on the Settings (Gear) icon on the home screen.
-
On the Settings window, tap on your name option.
-
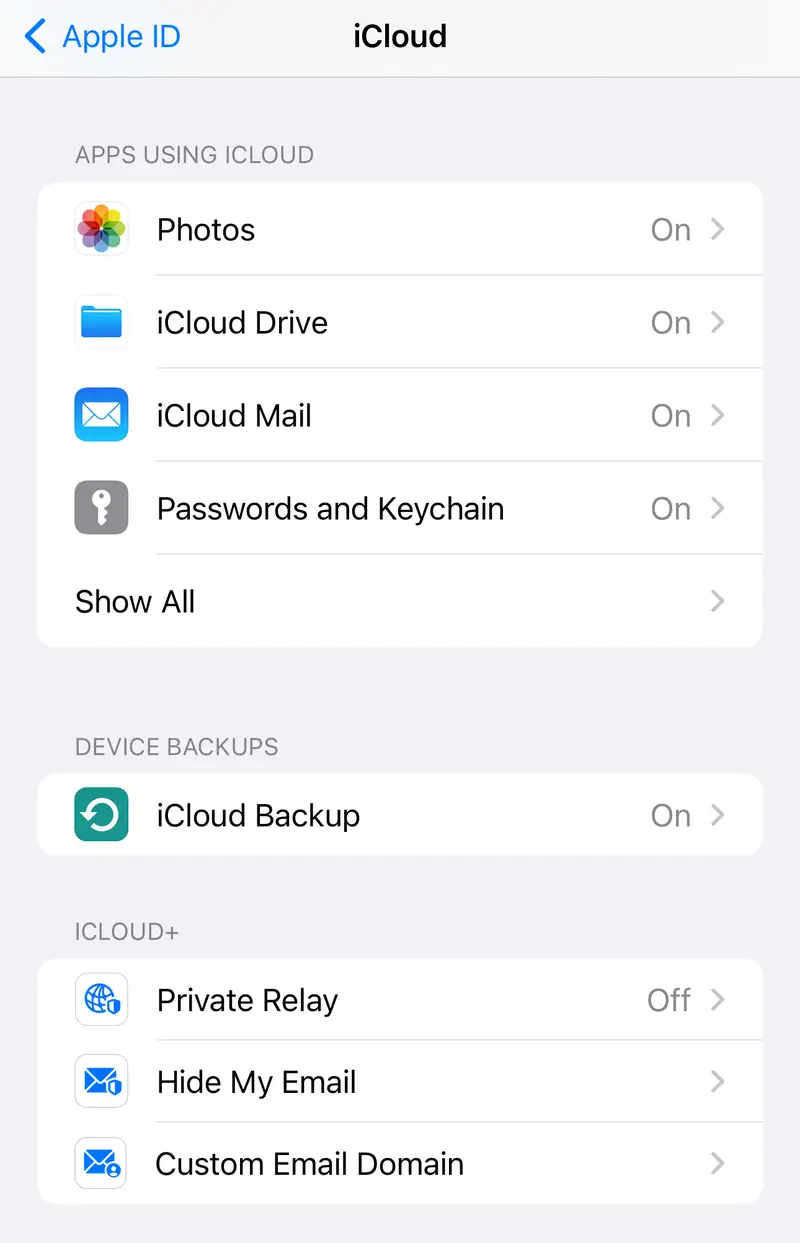
Next, select the options iCloud > iCloud Mail.
-
After that, turn off the option of Use on this iPhone.
-
Furthermore, restart your iPhone/iPad device.
-
After restarting your device, repeat the steps 1, 2, and 3.
-
Next, turn off the Use on this iPhone option.
macOS
-
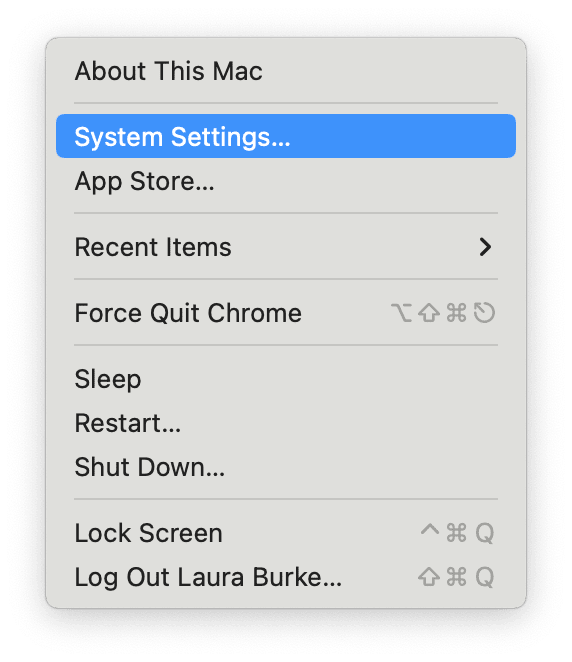
From the Apple menu option, select System Settings.
-
Select the option of your Apple ID tile.
-
Then, navigate to the options iCloud > iCloud Mail.
-
Now, select the option to switch off the Sync this Mac and select the Done button.
-
Moreover, restart your Mac system.
-
Then, repeat the steps 1, 2, and 3, and then turn off the Sync This Mac option.
-
Finally, check if the iCloud not receiving emails issue is resolved or not.
Solution 2: Clear the Cache From Your Mac Device
If you are having the iCloud not receiving emails problem on your Mac device, then these are the steps you need to follow.
-
Before you begin the process, ensure you are using Finder on your Mac.
-
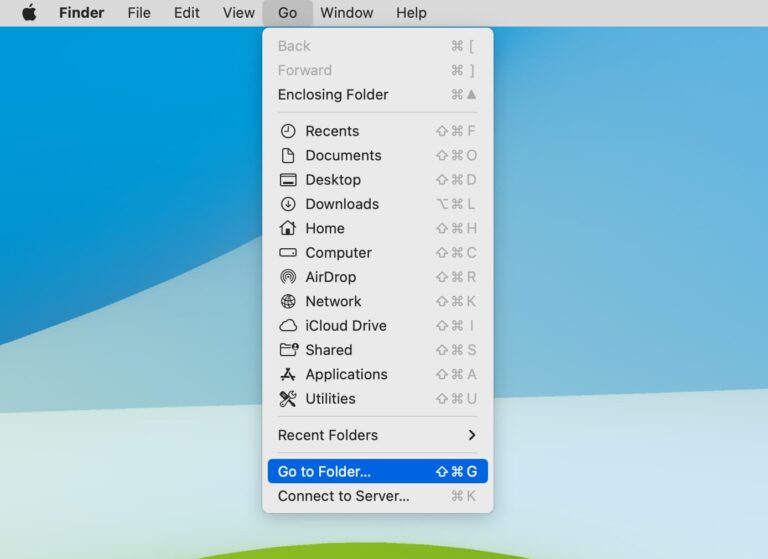
Then choose the option Go > Go to Folder from the top side menu bar.
-
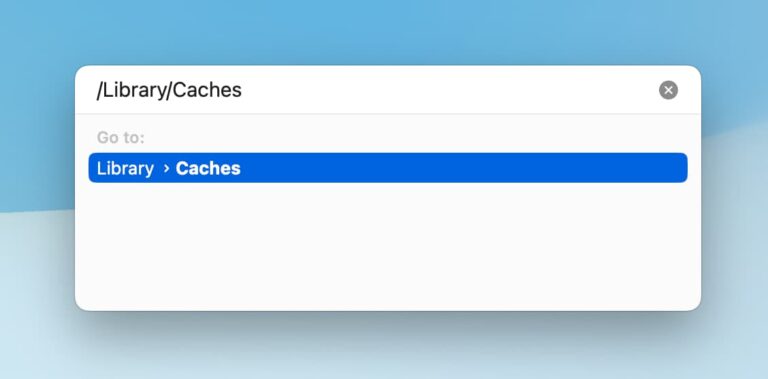
Then you have to type /Library/Caches and then select the Return key.
-
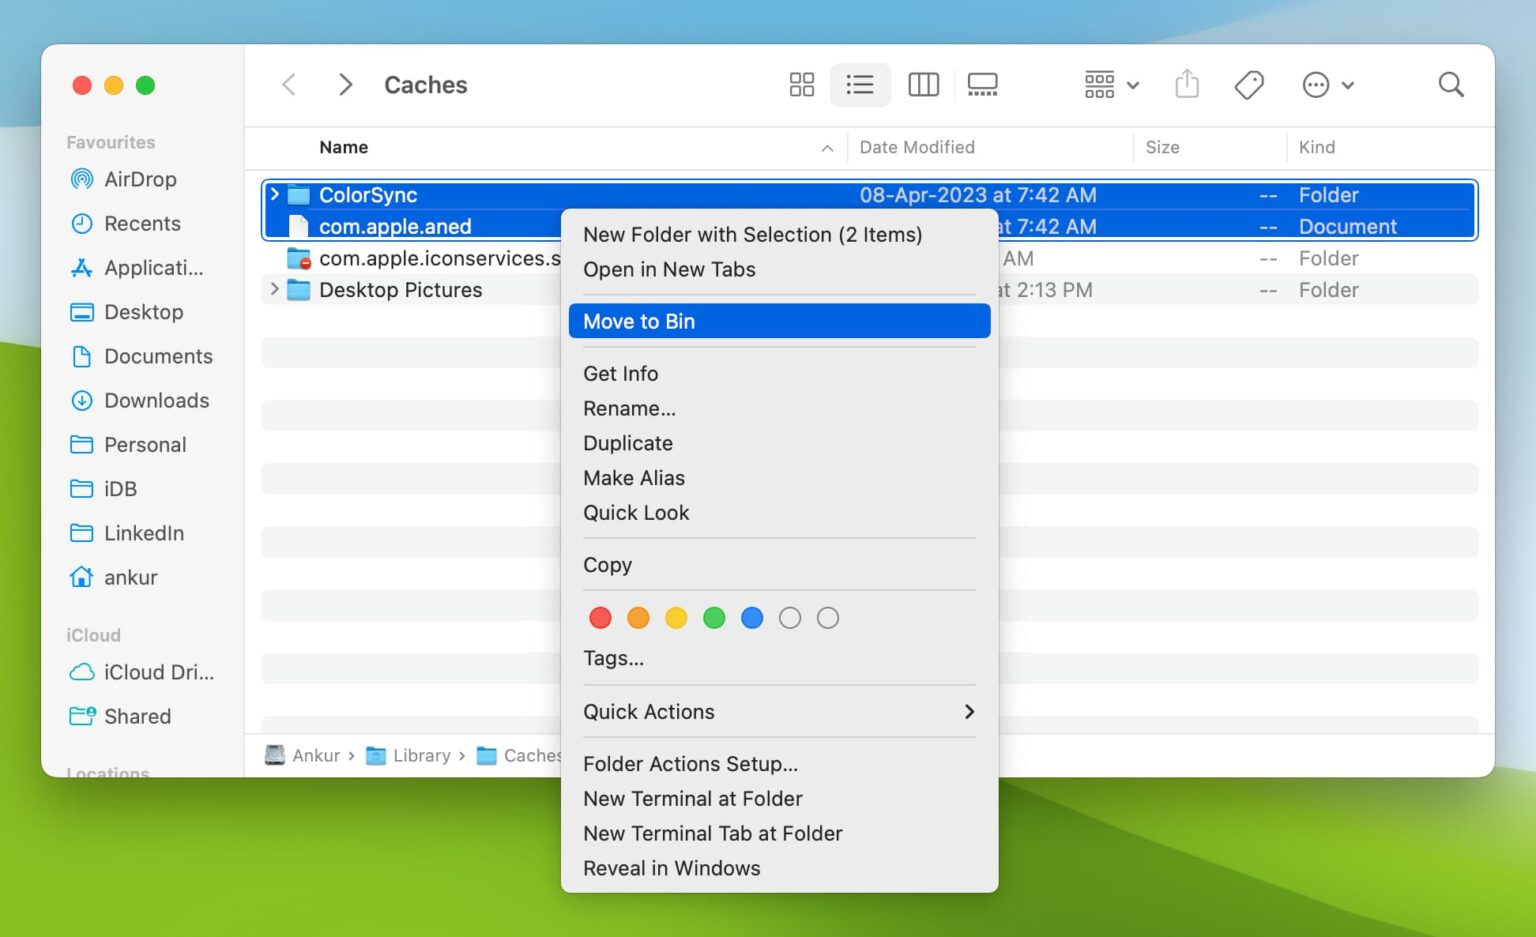
Now, go to the folder in which you want to clear the cache, then select the option Move to Trash.
-
Next, go to the Trash folder to employ it.
-
At the last step, reset your macOS device to apply the change.

Must Read: How to Recover Deleted iCloud Email
Solution 3: Delete the Cache From the Browsers on Your Device
You can face the iCloud mail not receiving emails issue if there is too much cache on your browser. Follow the steps below to clear all the cache from the browser.
Safari
-
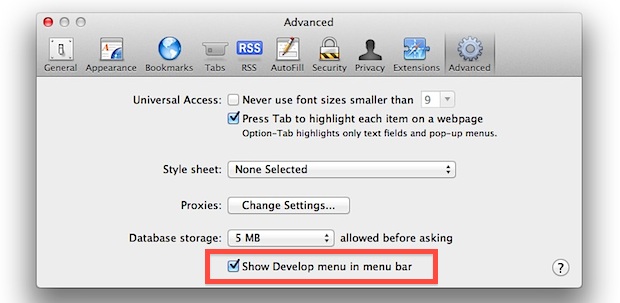
Initially, move the Safari Settings on your system and then select the Advanced option.
-
Next, click on the box of the ‘Show Develop menu in menu bar.’
-
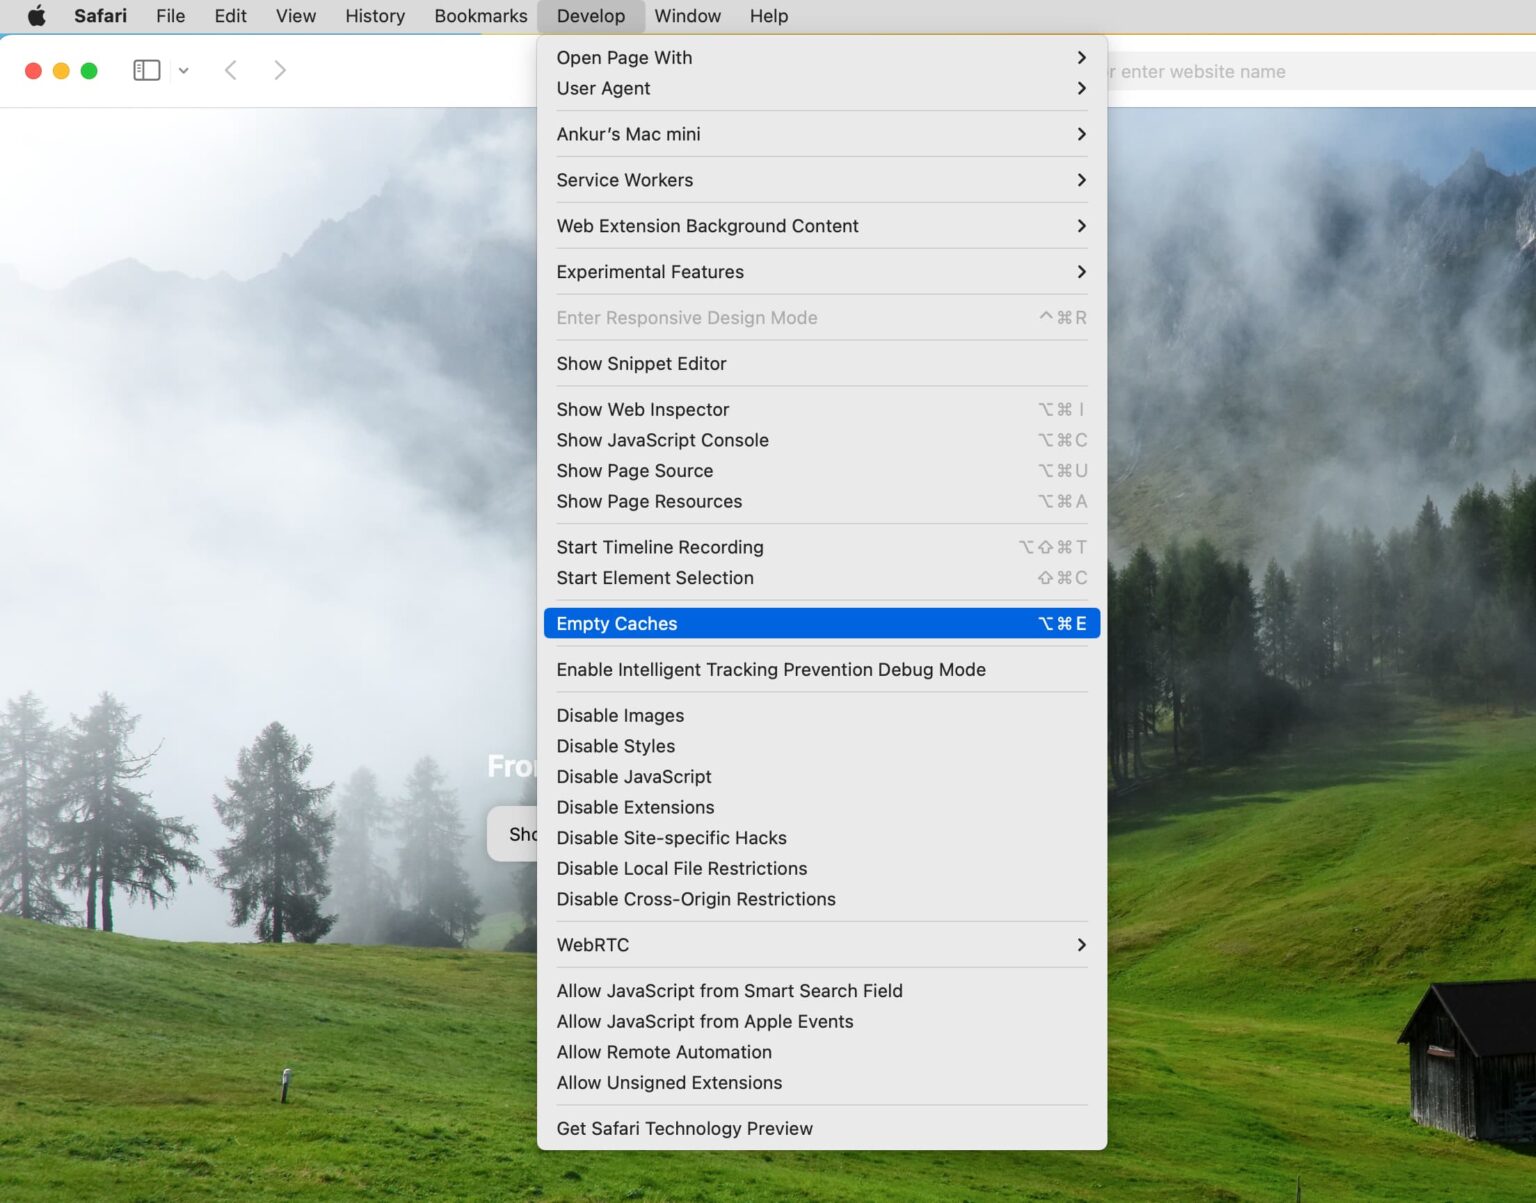
Then, from the top menu bar, click on the Develop option.
-
Now, from the open list of options, select Empty Caches.
Chrome
-
Launch the Google Chrome on your device and then press the Command + Y keys. It will show your browser's history.
-
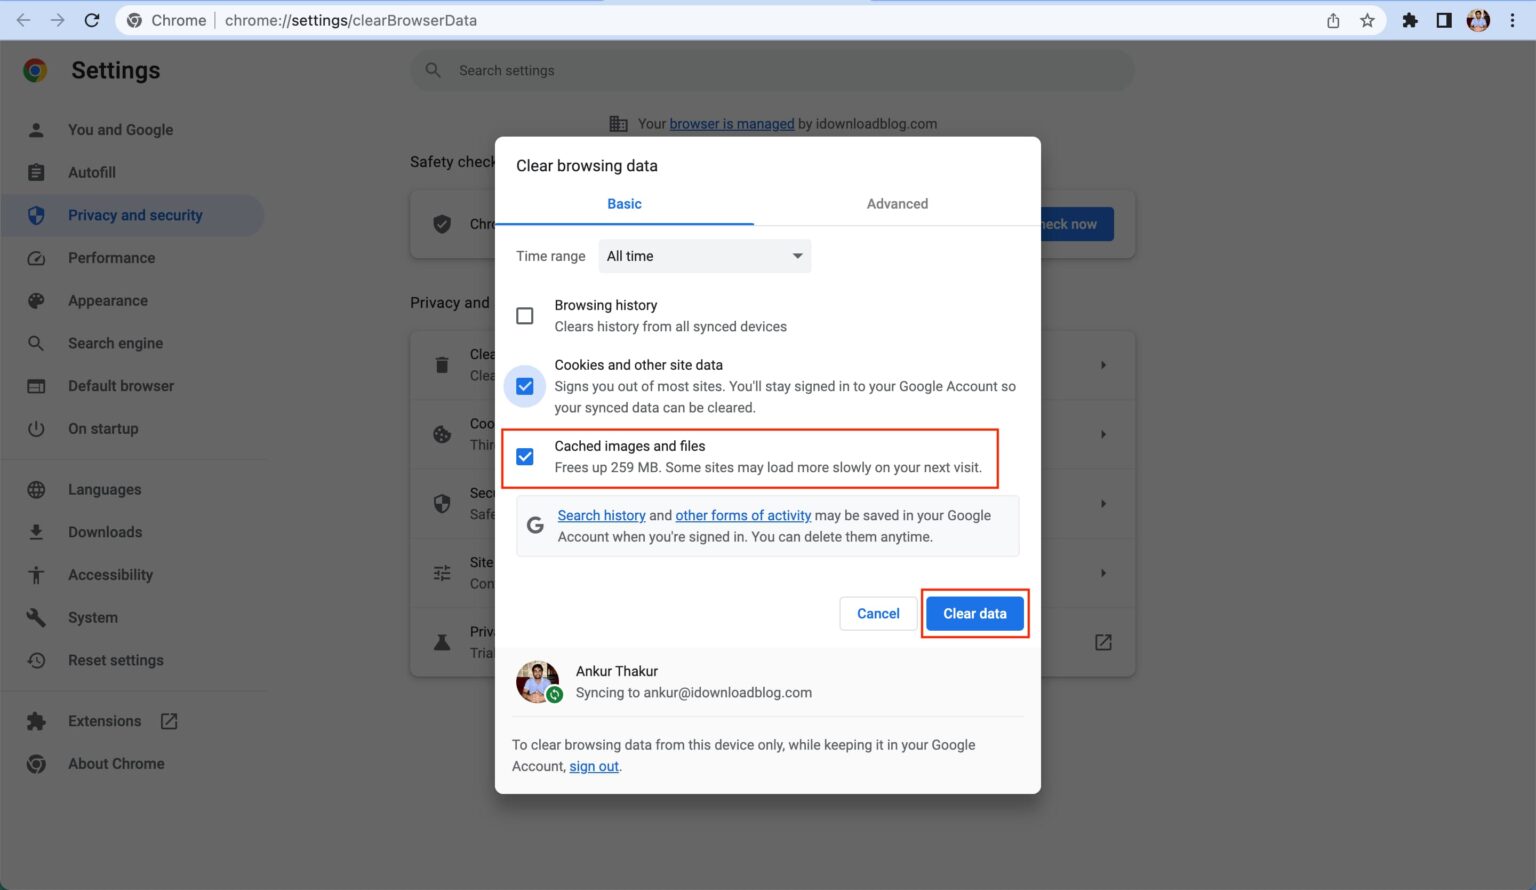
After that, choose the option of Clear browsing data and make sure to select the Cached images and files option.
-
In the next step, choose the Clear Data button.
Solution 4: Inspect the Wired/Wireless Connection Status on Your Device
Sometimes, the iCloud email can show some issues due to problems with the device's connection. These are the steps that will help you check the connection status on your device.
-
Initially, click on the Apple icon on the Mac desktop and then choose the System Preferences option.
-
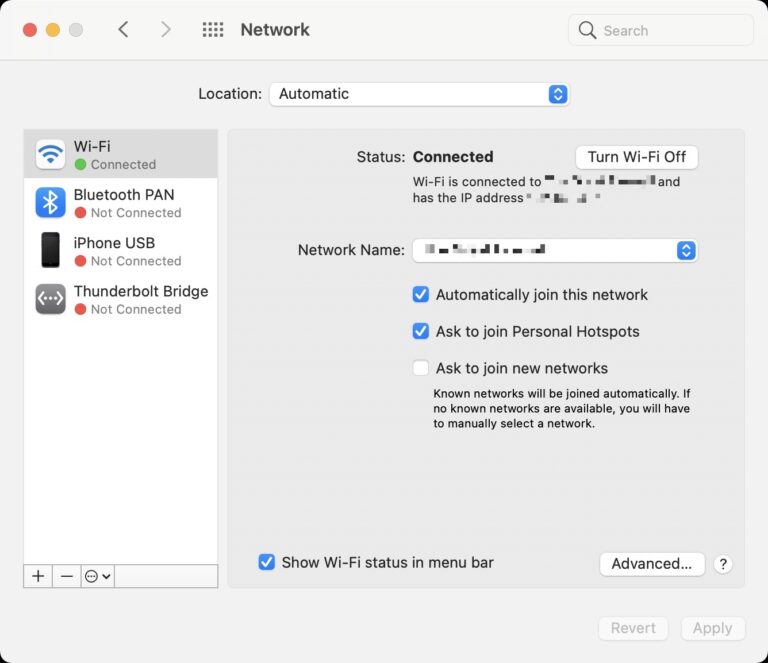
From the open list box, click on Network.
-
Now, check if you are seeing the green dot and connected option for a network. Things should work fine in this case.
-
If the network option appears to be yellow, then it indicates the network is active. However, your Mac device is not connected to the network. (In this case you need to disable any other network option from your device.)
-
If you see a red top for a network, then the connection process between the network and the Mac device is not complete. (In this case, you need to turn On the WiFi router.)
Solution 5: Ensure the iCloud Mail Setup Is Done Properly
If there is some issue with the iCloud Mail setup, then there is a high chance you will face the iCloud not receiving emails error. Thus, follow the below steps to inspect the mail setup.
iOS
-
Start by tapping on the Settings (Gear) icon on the iPhone/iPad home screen.
-
Afterward, choose Mail and then go to the Account option.
-
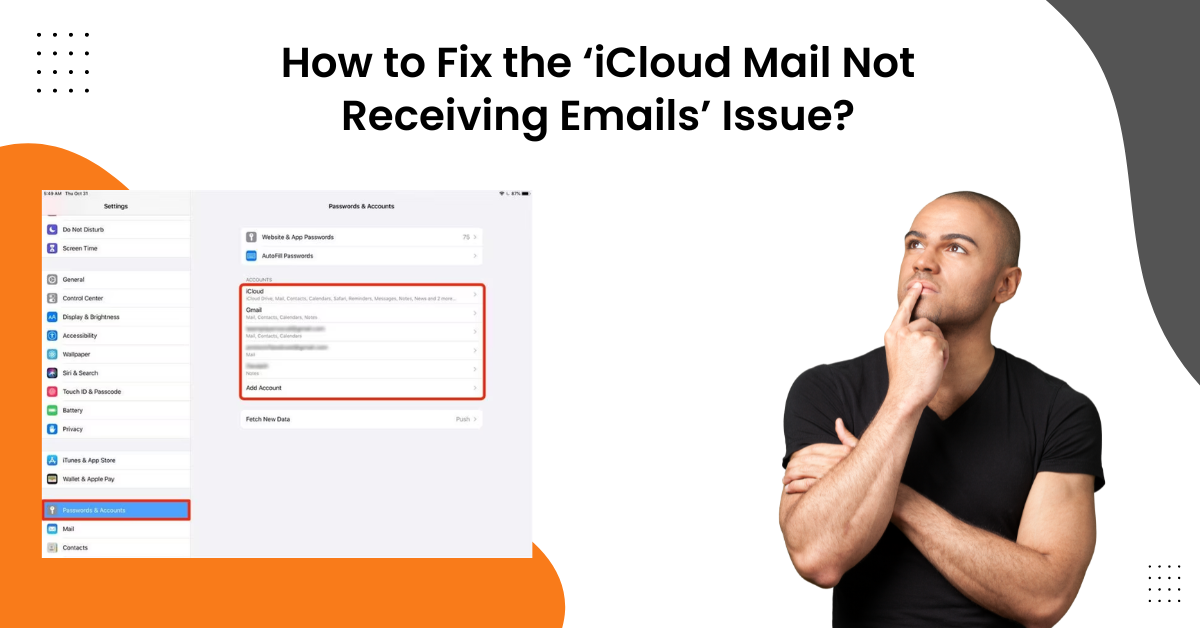
Now, under the accounts section, the iCloud option will appear. (If the iCloud option does not appear on the screen, then go to Settings, tap on [your name] option, and select iCloud > iCloud Mail.
-
Finally, select the option Use on this iPhone option.
Mac
-
From the System Settings window, click on your Apple ID option.
-
And then, click on the iCloud option and check if it shows the On next to the iCloud Mail.
-
If the On option does not appear, then move to the next screen to turn it on.
Finally, check if your device still shows the iCloud email not receiving emails error.
Frequently Asked Questions (FAQs)
Any minor or major errors on your device can lead to problems such as receiving emails. Some of the key factors of this issue could be
- Outdated software, iCloud mail software, or Mac/iOS device.
- Weak or unstable internet connection
- Incorrect email address or password.
- The sender is not entering the correct iCloud mail.
- Authentication issues on your iCloud mail.
- Having too much cache on your browser on a Mac/iOS device and others.
If you are unable to receive emails on your iCloud product then here are some quick solutions you can follow.
- Ensure the iCloud Mail setup is done properly.
- Inspect the wired/wireless connection status.
- Reset the iCloud Mail app on your iOS/Mac.
- Turn off and On your iCloud mail account.
- Ensure the iCloud Mail setup is done properly, etc.
The iCloud mail reinstallation process is simple. The following procedure will guide you to uninstall the product and install it again properly.
- First, open the Settings window on your iOS device.
- After that, tap on the iCloud option.
- Now, scroll down to the bottom and select the Delete Account or Sign Out option.
- Choose the appropriate option to confirm you want to remove the product.
- After that, go to the App Store and search for iCloud.
- From there, download the app.
- Once the app installation is complete, sign in to your account and start using it.

